Tương tác giữa PHP và jQuery - part 13 pdf
Bạn đang xem bản rút gọn của tài liệu. Xem và tải ngay bản đầy đủ của tài liệu tại đây (516.4 KB, 10 trang )
CHAPTER 4 ■ BUILD AN EVENTS CALENDAR
121
• index.php: This is the main file, which displays the month in calendar format with
event titles displayed in the box of the day on which they occur.
• view.php: If users clicks an event title, they’re taken to this page where the event’s
data is displayed in detail.
• admin.php: To create or modify new events, the form displayed on this page is
used.
• confirmdelete.php: To delete an event, the user must first confirm that choice by
submitting the confirmation form on this page.
The public folder will also have a subfolder called assets, which will contain additional files for the
site. Those files will be grouped by their usage, which in this section falls into four categories: common
files, CSS files, JavaScript files, and form-processing files.
Create four folders within assets called common, css, inc, and js. The common folder will store files that
will be used on all the publicly accessible pages (namely the header and footer of the app); the css folder
will store site style sheets; the inc folder will store files to process form-submitted input; and the js
folder will store site JavaScript files.
Nonpublic Application Files
The sys folder will be broken into three subfolders: class, which will store all class files for the
application (such as the Calendar class); config, which stores application configuration information
such as database credentials; and core, which holds the files that initialize the application.
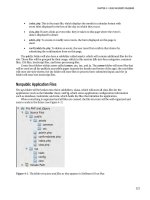
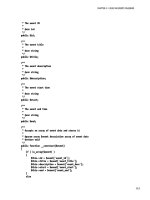
When everything is organized and all files are created, the file structure will be well organized and
easy to scale in the future (see Figure 4-1).
Figure 4-1. The folder structure and files as they appear in NetBeans 6.8 on Mac
CHAPTER 4 ■ BUILD AN EVENTS CALENDAR
122
PUBLIC AND NONPUBLIC FOLDERS—WHY BOTHER?
You may be asking yourself right about now, “Why put in the extra effort to create public and nonpublic
folders? What's the benefit?”
To answer that question, you need to know a little bit about how web servers work. A server is essentially
a computer that stores files and serves selected files to a network (such as the World Wide Web) using a
network identifier (an IP address or a URL mapped to an IP address). Hundreds of web sites or other
applications can be hosted on one server, each in their own folder.
The server grants access to outside users to these public folders, which means all the files on the folder
can be accessed from the network to which the server is connected. In the case of files that contain
sensitive information, this isn’t always desirable.
Fortunately, files in a public folder can still access files outside of the public folder, even though the users
on the network cannot. This allows you to hide your sensitive data from the rest of the world, but keep it
accessible to your application.
There are other ways to hide this information, but simply keeping sensitive data nonpublic is the most
straightforward, surefire method of doing so.
Modifying the Development Environment
Because you’re using public and nonpublic folders for this application, a quick modification to your
development environment is necessary: you need to point the server to your public folder, rather that
the folder containing both.
In this section, you’ll learn how to point your server to the public folder.
■ Note You can skip this section and keep the sys folder inside the public folder without losing any functionality
in the application (keep in mind that file paths will differ from those used throughout the exercises in this book).
You will, however, open the application to potential security risks. It’s highly recommended that you take a minute
to follow these steps.
Local Development
To change the document root (public folder) in a local installation, you need to modify the server’s
configuration file. This book assumes Apache is being used as your server in the XAMPP stack, so you
need to locate the httpd.conf file (located at /xamppfiles/etc/httpd.conf on Mac,
/opt/lampp/etc/httpd.conf on Linux, and \xampp\apache\conf\httpd.conf on Windows).
Inside httpd.conf, search for the DocumentRoot directive. This is where you set the path to your
public folder. The file should look something like this:
CHAPTER 4 ■ BUILD AN EVENTS CALENDAR
123
#
# DocumentRoot: The directory out of which you will serve your
# documents. By default, all requests are taken from this directory, but
# symbolic links and aliases may be used to point to other locations.
#
DocumentRoot "/Applications/XAMPP/xamppfiles/htdocs/public"
Additionally, search for a line in your httpd.conf file that references document root to set
permissions. It will look something like this:
<Directory "/Applications/XAMPP/xamppfiles/htdocs/public">
After locating and altering the paths above, restart Apache using the XAMPP control panel. Now, the
default folder accessed is the public folder of the application. To test this, create the file index.php and
add the following code snippet:
<?php echo "I'm the new document root!"; ?>
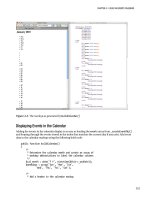
Navigate to document root of your development environment in a browser (localhost by default) to
make sure the reconfiguration worked (see Figure 4-2).
Figure 4-2. The public folder’s index file is displayed after reconfiguring Apache
CHAPTER 4 ■ BUILD AN EVENTS CALENDAR
124
Remote Development
Because remote development usually takes place on a hosting company’s server, the steps to point your
domain to the app’s public folder will vary from hosting provider to hosting provider, and therefore
won’t be covered in this book.
However, in many cases, the host will allow you to point a domain to a folder within your hosting
account. If this is the case, simply point the domain to the public folder, and everything should work
properly.
Some hosts do not allow access outside of document root. If this is the case with your hosting
provider, simply place the sys folder in the public folder and alter file paths accordingly.
Building the Calendar
With the folder structure ready and your development environment set up, it’s time to actually start
developing. We’ll cover each of the three event views (main view, single event view, and administrative
view) in steps, starting with the main calendar view.
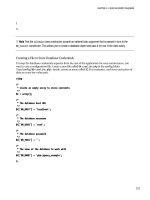
Creating the Database
As with the application planning process, the first step in developing the application is to create the
database. In your local development environment, pull up phpMyAdmin (http://localhost/phpmyadmin
in XAMPP), and open the SQL tab (you can also execute these commands in a PHP script if not using
phpMyAdmin). Create the database, a table to store event data called events, and a few dummy entries
using the following SQL:
CREATE DATABASE IF NOT EXISTS `php-jquery_example`
DEFAULT CHARACTER SET utf8
COLLATE utf8_unicode_ci;
CREATE TABLE IF NOT EXISTS `php-jquery_example`.`events` (
`event_id` INT(11) NOT NULL AUTO_INCREMENT,
`event_title` VARCHAR(80) DEFAULT NULL,
`event_desc` TEXT,
`event_start` TIMESTAMP NOT NULL DEFAULT '0000-00-00 00:00:00',
`event_end` TIMESTAMP NOT NULL DEFAULT '0000-00-00 00:00:00',
PRIMARY KEY (`event_id`),
INDEX (`event_start`)
) ENGINE=MyISAM CHARACTER SET utf8 COLLATE utf8_unicode_ci;
INSERT INTO `php-jquery_example`.`events`
(`event_title`, `event_desc`, `event_start`, `event_end`) VALUES
('New Year's Day', 'Happy New Year!',
'2010-01-01 00:00:00', '2010-01-01 23:59:59'),
('Last Day of January', 'Last day of the month! Yay!',
'2010-01-31 00:00:00', '2010-01-31 23:59:59');
CHAPTER 4 ■ BUILD AN EVENTS CALENDAR
125
■ Note All the preceding commands are specific to MySQL. Since this book is focused on jQuery and PHP, I won’t
go into detail about MySQL here. For more information on MySQL, check out Beginning PHP and MySQL by Jason
Gilmore (Apress).
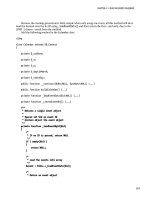
After you execute the preceding commands, a new database called php-jquery_example will appear
in the left-hand column. Click the database name to display the tables, and then click the events table to
view the entries you created (see Figure 4-3).
Figure 4-3. The database, table, and entries after they’re created
Connecting to the Database with a Class
Because you’ll be creating multiple classes in this application that need database access, it makes sense
to create an object that will open and store that database object. This object will be called DB_Connect,
and it will reside in the class folder with the name class.db_connect.inc.php
(/sys/class/class.db_connect.inc.php).
CHAPTER 4 ■ BUILD AN EVENTS CALENDAR
126
This class will have one property and one method, both of which are protected. The property will be
called $db and will store a database object. The method will be a constructor; this will accept an optional
database object to store in $db, or it will create a new PDO object if no database object is passed.
Insert the following code into class.db_connect.inc.php:
<?php
/**
* Database actions (DB access, validation, etc.)
*
* PHP version 5
*
* LICENSE: This source file is subject to the MIT License, available
* at
*
* @author Jason Lengstorf <>
* @copyright 2009 Ennui Design
* @license
*/
class DB_Connect {
/**
* Stores a database object
*
* @var object A database object
*/
protected $db;
/**
* Checks for a DB object or creates one if one isn't found
*
* @param object $dbo A database object
*/
protected function __construct($dbo=NULL)
{
if ( is_object($db) )
{
$this->db = $db;
}
else
{
// Constants are defined in /sys/config/db-cred.inc.php
$dsn = "mysql:host=" . DB_HOST . ";dbname=" . DB_NAME;
try
{
$this->db = new PDO($dsn, DB_USER, DB_PASS);
}
catch ( Exception $e )
{
// If the DB connection fails, output the error
die ( $e->getMessage() );
CHAPTER 4 ■ BUILD AN EVENTS CALENDAR
127
}
}
}
}
?>
■ Note The preceding function uses constants that are not defined just yet. You’ll create the files to define these
constants in the next section.
Creating the Class Wrapper
To build the application itself, start by creating the file class.calendar.inc.php in the class folder that
resides within the non-public sys folder (/sys/class/class.calendar.inc.php). This class will extend the
DB_Connect class in order to have access to the database object. Open the file in your editor of choice and
create the Calendar class using the following code:
<?php
/**
* Builds and manipulates an events calendar
*
* PHP version 5
*
* LICENSE: This source file is subject to the MIT License, available
* at
*
* @author Jason Lengstorf <>
* @copyright 2009 Ennui Design
* @license
*/
class Calendar extends DB_Connect
{
// Methods and properties go here
}
?>
With the class created, you can start adding the properties and methods to the class.
Adding Class Properties
The Calendar class doesn’t need any public properties, and you won’t be extending it in the examples
contained within this book, so all class properties will be private.
CHAPTER 4 ■ BUILD AN EVENTS CALENDAR
128
As defined in the section on planning, create the properties for the Calendar class:
<?php
class Calendar extends DB_Connect
{
/**
* The date from which the calendar should be built
*
* Stored in YYYY-MM-DD HH:MM:SS format
*
* @var string the date to use for the calendar
*/
private $_useDate;
/**
* The month for which the calendar is being built
*
* @var int the month being used
*/
private $_m;
/**
* The year from which the month's start day is selected
*
* @var int the year being used
*/
private $_y;
/**
* The number of days in the month being used
*
* @var int the number of days in the month
*/
private $_daysInMonth;
/**
* The index of the day of the week the month starts on (0-6)
*
* @var int the day of the week the month starts on
*/
private $_startDay;
// Methods go here
}
?>
CHAPTER 4 ■ BUILD AN EVENTS CALENDAR
129
■ Note For the sake of brevity, DocBlocks will be left out of repeated code snippets.
According to the original planning, the class properties are as follows:
• $_useDate: The date to use when building the calendar in YYYY-MM-DD HH:MM:SS
format
• $_m: The month to use when building the calendar
• $_y: The year to use when building the calendar
• $_daysInMonth: How many days are in the current month
• $_startDay: Index from 0–6 representing on what day of the week the month starts
Building the Constructor
Next, you can build the class constructor. Start out by declaring it:
<?php
class Calendar extends DB_Connect
{
private $_useDate;
private $_m;
private $_y;
private $_daysInMonth;
private $_startDay;
/**
* Creates a database object and stores relevant data
*
* Upon instantiation, this class accepts a database object
* that, if not null, is stored in the object's private $_db
* property. If null, a new PDO object is created and stored
* instead.
*
* Additional info is gathered and stored in this method,
* including the month from which the calendar is to be built,
* how many days are in said month, what day the month starts
* on, and what day it is currently.
*
CHAPTER 4 ■ BUILD AN EVENTS CALENDAR
130
* @param object $dbo a database object
* @param string $useDate the date to use to build the calendar
* @return void
*/
public function __construct($dbo=NULL, $useDate=NULL)
{
}
}
?>
The constructor will accept two optional parameters: the first is a database object, and the second is
the date around which the calendar display should be built.
Checking the Database Connection
To function properly, the class needs a database connection. The constructor will call the parent
constructor from DB_Connect to check for an existing database object and use that when available, or it
will create a new object if none is supplied.
Set up the call to make this check using the code shown in bold:
<?php
class Calendar extends DB_Connect
{
private $_useDate;
private $_m;
private $_y;
private $_daysInMonth;
private $_startDay;
public function __construct($dbo=NULL, $useDate=NULL)
{
/*
* Call the parent constructor to check for
* a database object
*/
parent::__construct($dbo);
}