Joomla cho người mới bắt đầu part 14 ppt
Bạn đang xem bản rút gọn của tài liệu. Xem và tải ngay bản đầy đủ của tài liệu tại đây (2.11 MB, 10 trang )
Chapter 6
[ 137 ]
7. Let's use the text editor tools to change the basic formang of the text. Select
the subheading Abstract Chaos. Click on the Format drop-down box and select
the pre-dened Heading 3 format as shown in the following screenshot:
In the previous screenshot, the Heading 3 format is applied to an arcle subheading. As the
main arcle tles in Joomla! usually have a Heading 2 format, the Heading 3 format is suited
for the next level (the subheadings within an arcle).
Want more formang control?
The font style of the heading is now set to the Heading 3 format. What
this actually looks like depends on the CSS stylesheet of the template
you're using. In the default Joomla! template we're using, the Heading
3 style is pre-formaed as a blue Arial font. When you install a dierent
template, your headings and all other CSS-dened layout can look
completely dierent. And if you really want to get creave and create
a mouthwatering arcle layout, you'll want to change the template CSS
styles yourself and adapt them to your needs. Don't worry, we'll get to
the ins and outs of templates and styling in Chapter 11.
8. Select the other subheadings and apply the Heading 3 style to those too.
9. Click on Save. To preview the arcle, click on the Preview buon in the toolbar
(that's not the Preview link in the top of the screen!). It looks like this:
Download at Wow! eBook
WWW.WOWEBOOK.COM
Creang Killer Content: Adding and Eding Arcles
[ 138 ]
10. Clicking on this buon displays a pop-up screen:
This preview screen gives you a rough impression of what the arcle will look like.
However, like the site preview link this buon doesn't take you to the frontend. The
quick preview comes in handy when you want to check an arcle that isn't visible
on the frontend (because it isn't published yet or because there is no menu link
poinng to it).
What just happened?
You've created a new arcle in the Ugly Painngs Facts category and formaed some text
using the word processor like interface of the text editor. While preparing your text, you can
set it to be invisible (unpublished); later on, you'll publish the nished text in one click.
Download at Wow! eBook
WWW.WOWEBOOK.COM
Chapter 6
[ 139 ]
Have a go hero – change the formatting
Feel free to play around and explore the dierent text formang opons. Check out how
to apply indenng, bulleted lists, and so on. You may want to select the rst paragraph and
apply bold styling to really make it stand out as the leading paragraph. Applying styles to the
selected text works like you're used to in word processing soware.
Make sure to check out the HTML buon (just below the Paragraph drop-down menu).
Clicking on it opens up a pop-up screen showing the HTML code of the arcle text:
Download at Wow! eBook
WWW.WOWEBOOK.COM
Creang Killer Content: Adding and Eding Arcles
[ 140 ]
This can be parcularly useful if you know your way around HTML; somemes you might
want to directly edit the HTML code or check it for unwanted tags. You can close the HTML
editor window by clicking on Update (to apply changes) or Cancel.
Extending the text editor
Joomla! ships with the text editor you've just used. It's actually an extension
called Tiny MCE. If you would like to have some advanced text eding controls,
you can set Tiny MCE to its "Extended" view. Just navigate to Extensions | Plugin
Manager and click on Editor - TinyMCE 2.0 to edit the sengs.
In the Plugin Parameters secon, select Funconality: Extended. This will add
some useful buons to the editor screen, such as a "Paste from Word" buon
that lets you copy text from a Word document while automacally stripping all
Word formang that's not needed on a web page. The extended text editor
toolbar looks similar to the following screenshot:
If you sll nd Tiny MCE's capabilies too limited, you can easily replace it by
another (free) text editor. A very popular one is Joomla! Content Editor (JCE).
You'll read more about replacing the default text editor in Chapter 10.
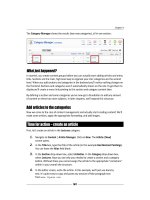
Adding images to articles
You've just created an all-text page on painngs that's not really what makes your visually
oriented art loving visitors ck. Let's show them what it's all about and add some images!
Time for action – upload images
Imagine you've been sent some image les by mail and you've copied them to your hard
drive. To add them to an arcle, you'll rst use Joomla!'s Media Manager to upload the
image les to the web server.
1. Navigate to Site | Media Manager. The Media Manager will open the images
folder. However, arcle images are by default stored in a subfolder called stories.
Navigate to this folder by clicking on the stories folder icon.
2. In the Files secon, type the name of the new subfolder. In this example, we've
entered painngs. Click on the Create Folder buon.
Download at Wow! eBook
WWW.WOWEBOOK.COM
Chapter 6
[ 141 ]
3. Click on the icon of the new painngs folder.
4. You'll be shown an empty folder. Add a new image by clicking on the Browse buon
below the Files secon.
5. In the Upload File pop-up screen, select an image from your computer's hard drive,
click on Open, and then click on Start Upload.
6. Repeat Steps 4 and 5 unl you've got about ve pictures. The Files secon of the
Media Manager now shows thumbnails of the uploaded pictures:
What just happened?
You've uploaded a set of pictures ready to be inserted into any arcle. By default, Joomla!
will look for images that you can insert into arcles in the /images/stories directory.
That's why you have to create subfolders in stories if you want to keep dierent groups of
images organized (for example, Painngs, Sta, and Meengs). This way, you won't end up
with all image les piled up in one big default image folder.
Download at Wow! eBook
WWW.WOWEBOOK.COM
Creang Killer Content: Adding and Eding Arcles
[ 142 ]
If you'd like to use another folder as the default base directory, navigate to Site | Global
Conguraon | System. In the Media Sengs secon, change the Path to Image Folder.
For example, entering /images as the default path will make Joomla! look in this folder
when you insert arcle images.
When uploading image les, you'll have noced that Joomla!'s Media Manager
doesn't allow you to upload more than one le at a me. It has some more
limitaons; although you can add and delete les, you can't move them from
one folder to another. Because of this, many Joomla! users prefer to use an FTP
program to upload les and manage the media folders on the web server. There
are also many extensions available that enhance Joomla!'s image management
capabilies (such as the Joomla! Flash Uploader extension). The Joomla! Content
Editor (see Chapter 10) is a powerful replacement for the default text editor,
which also makes uploading and inserng images much easier.
Time for action – inserting and aligning images
Now, let's insert the images you've just uploaded into the arcle text:
1. Navigate to Content | Arcle Manager and open the arcle, Just What is Ugly Art?,
to edit it (by clicking on the arcle tle).
2. Let's place an image in each of the arcle paragraphs. Place the cursor at the
beginning of the rst paragraph below the introducon text, just aer the
rst subheading.
3. Click on the Image buon at the boom of the text editor screen:
4. A pop-up screen opens displaying the contents of the images root directory. In
the top le-hand corner of the pop-up screen, select the appropriate subdirectory:
painngs (another way to select this directory is by clicking on the painngs
folder icon).
Download at Wow! eBook
WWW.WOWEBOOK.COM
Chapter 6
[ 143 ]
5. Select the image you want to insert:
6. In the Image URL box, Joomla! automacally adds the appropriate URL. The other
details you can add or set yourself are as follows:
In the Image Descripon box type a descripon. This text isn't
displayed, but it informs search engines what the picture is about.
It will also show up when the visitor uses a non-visual web browser.
In the Title box enter a tle. This is shown only when the web vis-
itor hovers the mouse pointer on the image. Select the Capon
checkbox if you want to have Joomla! display the tle text as a
capon just below the image.
In the Align drop-down box you can choose how the image will
be aligned: to the le, to the right, or centered. In the upcoming
screenshot, you can see the eects of right and le alignment
of pictures.
7. Place the cursor in another paragraph and repeat Steps 4 to 6. Do this unl every
paragraph of the arcle body text contains a picture.
Download at Wow! eBook
WWW.WOWEBOOK.COM
Creang Killer Content: Adding and Eding Arcles
[ 144 ]
8. Click on Apply and then click on Preview to get a rst impression of the output.
In the pop-up screen, scroll down to see all of the images that have been inser-
ted. In the following example, some are aligned right relave to the text, some
are aligned le:
What just happened?
Adding pictures to arcles is a prey straighorward process. You upload the desired image
les and use the Image buon to tell Joomla! where you want them displayed.
Have a go hero – adjust the image settings
Aer you've inserted an image, you may want to adjust the display sengs. To create some
guer space between the images and the surrounding text, click on the Insert/edit image
icon (a picture of a tree) in the text editor toolbar.
Download at Wow! eBook
WWW.WOWEBOOK.COM
Chapter 6
[ 145 ]
Now you can set a value for Vercal space or Horizontal space (in pixels). This will create
some whitespace around the image, making it stand apart from the arcle text. Click on
Update to apply the changes (yes, you're right; they'd beer label this buon Apply).
The Insert/edit image buon in the editor isn't really suited for inserng
images. Aer clicking on this buon, you can't browse to the image le,
but have to know its exact locaon (URL). That's why there's a separate
Image buon below the text editor screen that's beer equipped for
inserng images.
Changing the way the article displays
The arcle editor screen gives you much more power than just formang text and adding
pictures. You can also control how the arcle should be displayed: as one individual arcle,
split into two parts, or even split in as many parts (subpages), as you like. Let's nd out how
we can enhance arcles with these opons.
One lump or two? Split the article in an intro text and main text
So far, we haven't added any instrucons in our arcle to change the way it displays. Let's
have a look at the frontend to see how it's displayed by default. To see how our new arcle
looks at the frontend, on the frontend Main Menu, click on the Ugly Painngs link.
Download at Wow! eBook
WWW.WOWEBOOK.COM
Creang Killer Content: Adding and Eding Arcles
[ 146 ]
Remember, you created a link to the Ugly Painngs secon in Chapter 5. This menu link
(of the Secon Blog Layout type) displays an overview of anything you add to the given
secon or category. As you've now put some content in this secon, on clicking the Ugly
Painngs menu link you should now see the page shown in the following screenshot:
Oops! Here's the good news, the arcle is visible and it looks just like you've formaed
it. However, there's some bad news too. The full ve paragraph arcle shows up on the
Ugly Painngs secon overview page. This is not how we want our arcle to display, if we
were to add more arcles to this same secon, they would all be fully displayed on a huge
overview page. To get Joomla! to show just a short teaser text here, we'll now split the
arcle, separang the intro text and the full arcle body text.
Download at Wow! eBook
WWW.WOWEBOOK.COM