Hướng dẫn tạo themes cho wordpress part 13 docx
Bạn đang xem bản rút gọn của tài liệu. Xem và tải ngay bản đầy đủ của tài liệu tại đây (1.28 MB, 10 trang )
Chapter 7
125
For the sake of remaining simple, this page template will only display a simple string. Directly
after the piece of markup that you added earlier, insert the following code:
<!DOCTYPE HTML PUBLIC "-//W3C//DTD HTML 4.01//EN"
" /><html>
<head>
<title>
Hello World!
</title>
</head>
<body>
<h1 style="text-align:center;">Hello World!</h1>
</body>
</html>
This simple piece of markup denes a standard HTML document with appropriate head and
body elements. Inside of the body is a single heading element that reads Hello World!. Save
your le at this point to make sure that WordPress will be able to detect it for the next few steps.
Pat yourself on the back! You've just created your rst custom page template. Although it may
be simple, the new page template will serve well for demonstration purposes. Now you just
need to see it in action, by creating a new page.
Open the WordPress administrative area, and navigate to the Add New Page interface. Once
there, add a title of some sort (it doesn't matter what, but you need to have a title). Next,
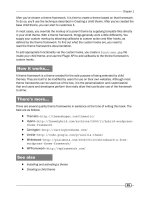
locate the Attributes meta box. It looks like the following:
Custom Page Templates
126
As you can see, this meta box allows you to change the page template for the page that you
are editing. Select the page template Hello World from the drop-down menu underneath the
Template heading.
If you can't nd the Attributes meta box, then it may be hidden from the
screen. At the top right, click on the Screen Options link and make sure
that the checkbox next to Attributes is selected.
After selecting the appropriate page template from the drop-down menu, publish your page by
clicking on the Publish button in the Publish meta box. After a few brief moments, your page
should refresh, and you'll be greeted with a View Page link at the top of the screen. Click on
this link and your browser will navigate to and display your new page, showing off your custom
page template. Your page should look like the example shown in the following screenshot:
How it works
You created a simple page template that displays the text Hello World!, and immediately after
creating your new le, WordPress made it available as an option in the Template drop-down
menu in the Attributes meta box. How did WordPress know about your new page template
and how did it know to display it for your newly created page?
It all starts with the comment header that you added at the very beginning of this recipe. That
header looked like the following:
<?php
/*
Template Name: Hello World
*/
?>
Chapter 7
127
When it comes down to it, this header is the only thing separating your custom page
template from any other WordPress template le. When you visit the Edit Page interface
in the WordPress administrative area, the Attributes meta box dynamically populates the
Template drop-down menu by following a multistep process.
First, a list of all les contained in the currently-active theme's directory is generated and
returned from the
get_current_theme function. Next, WordPress iterates over each le,
reading its contents and attempting to nd the Template Name: header. If such a header is
found in a le, then the le is stored as an available page template that can be chosen from
the drop-down menu on the Edit Page interface.
Once a page has been saved, the selected page template is stored as a meta item for the
post, with a key of _wp_page_template. When WordPress displays a page, it checks to see
if a custom page template was selected. If so, then WordPress attempts to fetch and display
the specied template le. If that le cannot be loaded for some reason, WordPress reverts to
the default display hierarchy.
Creating an archives page template
After learning how to create a simple page template in the recipe Creating a simple page
template, you're probably brimming with ideas for custom page templates that you can provide
for your theme. However, if you're going to take the time to create any page templates at all, you
should make sure that you provide your users with a useful Archives template.
The Archives template can contain many things, but its main purpose is to help your users
navigate around your blog in a way that makes sense to them. As such, it should almost always
include a post archive by month, and a list of the categories on your blog. In this recipe, we'll be
providing just that.
Getting ready
To properly use the techniques in this recipe, you'll need to be working with a theme that you
previously acquired or developed. If you haven't started developing a custom theme yet, I
recommend using the Thematic theme. It can be freely downloaded from the WordPress.org
Theme Repository at
/>Custom Page Templates
128
How to do it
First, follow the steps in the recipe Creating a simple page template until you reach the point
at which you start adding custom content. While following that recipe, modify the lename
from hello-world-page-template.php to archives-page-template.php and
change the value of the Template Name: header from Hello World to Archives.
Now, you're ready to start adding the appropriate content. After the page template comment
header, add the following markup to your page template, and then save the le:
<?php get_header(); ?>
<div id="container">
<div id="content">
<h2>Archives by Month</h2>
<ul>
<?php
wp_get_archives(array(
'type'=>'monthly',
'show_post_count'=>true
));
?>
</ul>
<h2>Archives by Category</h2>
<ul>
<?php
wp_list_categories(array(
'title_li'=>'',
'show_count'=>true
));
?>
</ul>
</div>
</div>
<?php get_sidebar(); ?>
<?php get_footer(); ?>
At this point, your Archives page template is ready for use. Go and create a new page in the
WordPress administrative area and make sure that it uses the Archives page template. If you
need more information on how to do this, see the recipe Creating a simple page template.
Visit your newly-created page. You should see output similar to the example shown in the
following screenshot:
Chapter 7
129
Here you can clearly see the month and category archives produced via your custom Archives
page template.
How it works
To learn more about the ways in which WordPress stores and displays custom page templates,
see the How it works section in the recipe Creating a simple page template.
Here, you're using two new functions that are particularly valuable in an Archives page template.
The functions are wp_get_archives and wp_list_categories. Both of these functions are
great because they:
Automatically produce a list of sorted links
Provide a means for visitors to browse content in a way that makes sense to them
Shield you, as a theme developer, from future WordPress API changes
Custom Page Templates
130
There's more
Both of the new functions that you are using, wp_get_archives and wp_list_categories,
take a variety of parameters that can be used to modify their output. Let's look at some of these
parameters in detail.
Listing archive links
wp_get_archives supports a wide variety of parameters that greatly change the way that
the output is produced. The most important parameter is denitely type, as this completely
modies the output by providing a different level of granularity for the archive.
The values available to be used for type are:
monthly
yearly
daily
weekly
postbypost
alpha
Each of the time-based values for type produces a list that contains an item for each of
those timeframes that contains a post. For example, you can see the output for a weekly
list as follows:
Chapter 7
131
On the other hand, postbypost and alpha produce a list of each post on the blog, sorted
alphabetically. You can see a partial list in the following screenshot:
For a full list of parameters supported by wp_get_archive, visit the WordPress Codex page for
the function, at />Listing Categories
One of the best ways to browse a site's archive and really nd what you want is to follow the
categories that interest you. The wp_list_categories function makes it easy for you, as
a theme developer, to provide this capability. The wide array of parameters that wp_list_
categories
allows you to modify the output from the function in many different ways.
Custom Page Templates
132
Some of the most used parameters for wp_list_categories are number, show_count,
and child_of. The number parameter limits the number of items output in the category
list. The show_count parameter is a Boolean value that determines whether the number of
posts in a particular category should be output as a part of the list items produced for that
category. Finally, the child_of parameter indicates which categories should be retrieved and
displayed based on their parent category. If you wanted to display four child categories of the
category with ID 3 and show the number of posts in each category, you'd use something like
the following code:
<ul>
<?php
wp_list_categories(array(
'title_li'=>'',
'show_count'=>true,
'number'=>4,
'child_of'=>3
));
?>
</ul>
This code would display output very similar to the example shown in the following screenshot:
Chapter 7
133
For a full list of parameters supported by wp_list_categories, visit the WordPress
Codex page for the function at
wp_get_archives
.
See also
Creating a simple page template
Creating a taxonomy navigation template
Similar to the Archives page template created in Creating an archives page template, a
Taxonomy Navigation page template can be very useful to your site visitors. With the introduction
of custom post taxonomies in WordPress 2.8, WordPress users have more options than ever
when it comes to classifying their content. A car enthusiast's site may have posts classied by
Make, Model, or Transmission Type. Wouldn't it be useful to be able to navigate by those things
in addition to the standard post tags and categories?
Custom taxonomies are amazingly powerful and quite easy to put in place.
We'll use a small snippet of code for testing purposes later, but if you
want more information on how to use them, see Justin Tadlock's excellent
post about custom taxonomies at />archives/2009/05/06/custom-taxonomies-in-wordpress-28.
In this recipe, you'll learn how to create a page template that allows visitors to browse by any
taxonomy that the system has in place. The best part is that you don't need to know ahead of
time what taxonomies are available.
Getting ready
To properly use the techniques in this recipe, you'll need to be working with a theme that you
previously acquired or developed. If you haven't started developing a custom theme yet, I
recommend using the Thematic theme. It can be freely downloaded from the WordPress.org
Theme Repository at />In addition to properly testing the custom taxonomy navigation for this recipe, we need to add
a new taxonomy. Open up your theme's functions.php le and insert the following:
<?php
add_action( 'init', 'wptc_taxonomies' );
function wptc_taxonomies() {
register_taxonomy(
'genres',
'post',
Custom Page Templates
134
array(
'hierarchical'=>false,
'label'=>'Genres',
'query_var'=>true,
'rewrite' => true
)
);
}
This little snippet adds a new taxonomy for Genres, something that might be right at home
on a book or movie review site. Go to the WordPress administrative interface and navigate to
the Add New Post interface, and then make sure that the new Genres meta box appears. It
should look like the following:
Now go ahead and add some genres to a post and publish it, to ensure that there is data to
pull for your custom taxonomy.
How to do it
First, follow the steps in the recipe Creating a simple page template until you reach the point
at which you start adding custom content. While following that recipe, modify the lename
from hello-world-page-template.php to taxonomies-page-template.php, and
change the value of the Template Name: header from Hello World to Taxonomies.
Now you're ready to start adding the appropriate content. After the page template comment
header, add the following markup to your page template, and then save the le:
<?php get_header(); ?>
<div id="container">
<div id="content">
<?php
$taxonomies = get_object_taxonomies('post');
foreach($taxonomies as $tax) {
$obj = get_taxonomy($tax);
?>
<h2><?php echo esc_html($obj->label); ?></h2>
<?php