Hướng dẫn tạo themes cho wordpress part 10 pot
Bạn đang xem bản rút gọn của tài liệu. Xem và tải ngay bản đầy đủ của tài liệu tại đây (1.14 MB, 10 trang )
6
Sidebars
In this chapter, we will cover:
Using the Text widget for custom sidebar content
Including a dynamic sidebar in your theme
Including multiple dynamic sidebars in your theme
Setting the default widgets for a sidebar in your theme
Positioning multiple sidebars in your theme by using CSS
Styling the appearance of sidebars in your theme by using CSS
Displaying different widgets on different pages by using the Widget Logic plugin and
conditional tags
Showing asides in the sidebar by using the Miniposts plugin
Adding an interactive Facebook-style wall to a sidebar by using jQuery
Introduction
Most WordPress themes follow a fairly standard structure: there is a header with some type of
navigation, a main content area where post contents are read, and one or more sidebars that
display auxiliary information about the post being displayed or about the blog as a whole.
WordPress has quite a bit of functionality built in that supports the sidebar paradigm.
Dynamic sidebars and widgets are included in many of the most popular themes. The power
for end users to change the content displayed in the theme's sidebar without involving a
programmer is one of the best developments in the history of the WordPress platform.
In addition to widgets provided by WordPress core and various plugins, sidebars can be
created to display various data, including posts, comments, or links. Anything that isn't a
main piece of content, but that you want to show to your site's visitors, is a great item to
put in a sidebar.
Sidebars
96
Using the Text widget for custom sidebar
content
Sometimes you need to include code from a Facebook badge, or promote your latest book if
you happen to be a book author. Whatever it may be, if a block of HTML or text is provided,
you can probably use it in the versatile Text widget.
Getting ready
For this recipe, you'll need to have a basic theme installed, preferably a default theme or
one that has a Widgets panel underneath the Appearance section of your WordPress admin
control screen. If you don't, a recipe for adding one is given in just a few pages. Oh, and make
sure that the theme that you download or create has a place set aside for your sidebar on the
left or right side of your design. You could also place it at the top or bottom of the design—I'm
not judging. Lost? Download the companion code for this book at Packt Publishing's website
to follow along.
How to do it
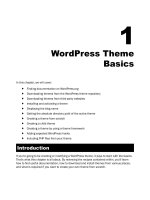
Log into your Wordpress admin area, and then click on the Appearance tab on the left
side of the screen. Select Widgets from the menu that appears. You will now see a whole
lot of available widgets. Drag the Text widget to your Sidebar panel, as shown in the
next screenshot:
Chapter 6
97
For the Title of the widget, enter Shameless Plug. Type the following code into the big text
area as shown in the following screenshot:
The Wordpress Themes Cookbook is now available for preorder!
<a href =" /><img src =
/>uploads/2010/03/wordpress-themes-book.png alt="wordpress cookbook
cover"/><br />
Preorder now or learn more >></a>
Place a checkmark in the Automatically add paragraphs checkbox, and then click on the
Save button, as shown in the next screenshot:
View your blog to admire the snazzy new sidebar widget. You can see a screenshot of what it
should look like, in the following screenshot:
Sidebars
98
Including a dynamic sidebar in your theme
If you are creating your own custom theme for a more recent version of WordPress, or are
updating an old theme, then you will need a dynamic sidebar to take advantage of WordPress'
visual widget administration features.
Getting ready
For this recipe, you'll need to have a basic theme installed, or be in the process of building
your own theme. Oh, and make sure that the theme that you downloaded or created has a
place set aside for your sidebar on the left or right side of your design. You could also place it
at the top or bottom of the design—you decide. Lost? Download the companion code for this
book at Packt Publishing's website to follow along.
How to do it
First, download and open up the index.php le of your theme. Paste the code,
<?php get_sidebar(); ?>, just above the footer code, near or at the end of your
index.php le, so it should now look like:
<?php get_sidebar(); ?>
<?php get_footer(); ?>
Save your changes to the index.php le.
Next, we need to create a sidebar.php le, and as a bonus, we will add a search box at
the same time. Create a new le in your favorite PHP or HTML editor. Save the le as
sidebar.php. You need the same basic information at the top of this le as you do for
all other WordPress theme les, so paste the following code into your sidebar.php le:
<?php
/**
* @package WordPress
* @subpackage MyAwesome_Theme
*/ ?> <! begin sidebar >
<! begin sidebar >
<div id="menu">
<ul>
<?php /* Widgetized sidebar, if you have the plugin installed. */
if ( !function_exists('dynamic_sidebar') || !dynamic_sidebar() ) :
?>
<li id="search">
<label for="s"><?php _e('Search:'); ?></label>
Chapter 6
99
<form id="searchform" method="get" action="<?php bloginfo('home');
?>">
<div>
<input type="text" name="s" id="s" size="15" /><br />
<input type="submit" value="<?php esc_attr_e('Search'); ?>" />
</div></form></li>
<?php endif; ?></ul></div>
<! end sidebar >
Save the changes. Next, look in your theme folder for a le called functions.php. If it exists,
the code for the sidebar function should look like this:
<?php
/**
* @package WordPress
* @subpackage My_Awesome_Theme
*/
if ( function_exists('register_sidebar') )
register_sidebar(array(
'before_widget' => '<li id="%1$s" class="widget %2$s">',
'after_widget' => '</li>',
'before_title' => '',
'after_title' => '',
));?>
If you don't have a functions.php le, paste the previous code into an empty le and name
it functions.php. Save the les, and then upload them to your theme folder.
How it works
The get_sidebar function is a special template tag that, just like get_header and
get_footer, calls a specic template le in the current theme. When the main theme
le, such as index.php, loads in a browser, all of the functions within it are called. The
functions.php le is checked as a part of the process. The code that we placed in the
functions.php le noties the theme and WordPress that if it nds a sidebar.php le
with the correct sidebar code, to go ahead and load it. WordPress then looks in the current
theme folder for a le named sidebar.php, and if it is found, includes the content specied
within sidebar.php in place of the get_sidebar() template tag.
Unlike a regular PHP include, you will not have access to local variables
inside your sidebar when including it by using get_sidebar, because
of a scope difference.
Sidebars
100
There's more
Because of the standard header, content, sidebar, and footer format, WordPress supplies
theme authors with a standard function to quickly and easily include a separate sidebar
template into your main design. You can also search for themes with sidebars similar to
what you want, for inspiration.
Finding inspiring sidebars for your theme design
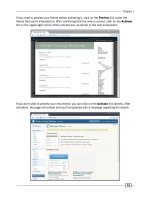
We are using the Thematic theme as our inspiration in this chapter, and as you can see in
the following screenshot, it contains a lot of default sidebars. It can be freely downloaded
from the WordPress.org theme repository at />thematic/
if you want all of the sidebars and none of the sweat equity, If you are determined
to add your own sidebars, check out the next recipe for more details.
Including multiple dynamic sidebars in your
theme
Although many themes are two-column, with only a single sidebar and corresponding
sidebar.php le, there are a number of instances where you'll want two, three, or even four
sidebars surrounding your main content. Visit sites such as
for inspiration on how to use multiple sidebars with your theme.
Chapter 6
101
In older versions of WordPress, having multiple sidebars meant resorting to using PHP's
include function, or in-lining the sidebar's contents into your main template les. Luckily,
with newer versions of WordPress, you can specify the name of the sidebar to include, by
using the get_sidebar function.
Getting ready
We are using a basic template based on the Classic WordPress theme. You should already
have a sidebar.php le, and your theme layout should support at least one sidebar.
How to do it
We're going to give our current sidebar, which was created in the rst recipe of this chapter, a
name, and then create additional sidebars in which to store WordPress widgets.
Create a le for each sidebar, naming them by appending a descriptor to the string
sidebar For this example, let's go ahead and plan to have two sidebars:
sidebar-one.php and sidebar-two.php. Start by renaming your current
sidebar.php le to sidebar-one.php. Copy that le, and name the new le
sidebar-two.php.
Open up the index.php le of your current theme, and then insert the following code above
the get_footer tag:
<?php get_sidebar( 'one' ); ?>
<?php get_sidebar( 'two' ); ?>
Save the index.php le, and then open up your functions.php le. If you don't have one,
refer to the last recipe. You will see the code:
if ( function_exists('register_sidebar') )
register_sidebar(array(
'before_widget' => '<li id="%1$s" class="widget %2$s">',
'after_widget' => '</li>',
'before_title' => '',
'after_title' => '',
));?>
Replace it with:
if ( function_exists('register_sidebars') )
register_sidebars(2);
?>
Sidebars
102
Don't worry about the extra widget or style code; we will work on that in another recipe. Save
the le and then open your sidebar-one.php le:
<! begin sidebar >
<div id="menu"><ul>
<?php /* Widgetized sidebar, if you have the plugin installed. */
if ( !function_exists('dynamic_sidebar') || !dynamic_sidebar(1) )
: ?>
<li id="search">
<label for="s"><?php _e('Search:'); ?></label>
<form id="searchform" method="get" action="<?php bloginfo('home');
?>">
<div><input type="text" name="s" id="s" size="15" /><br />
<input type="submit" value="<?php esc_attr_e('Search'); ?>" />
</div></form></li>
<?php endif; ?>
</ul></div>
<! end sidebar >
Save the sidebar-one.php le and open up the sidebar-two.php le. Paste the
following code into the le, replacing the existing content:
<! begin sidebar >
<div id="menu">
<ul>
<?php /* Widgetized sidebar, if you have the plugin installed. */
if ( function_exists('dynamic_sidebar') && dynamic_sidebar(2) ) :
else : ?>
<?php endif; ?>
</ul></div>
<! end sidebar >
Save the sidebar-two.php le. Back up your current theme folder, and then upload the
les index.php, functions.php, sidebar-one.php, and sidebar-two.php into your
current theme folder on your server. Delete the old sidebar.php le from the server.
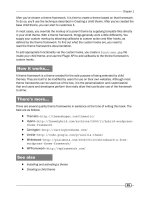
You should now have two sidebars showing up when you select Appearance | Widgets in your
control panel, as shown in the next screenshot:
Chapter 6
103
Now, if you view your site, you should see two sidebars. By default, they will usually appear
on the right and the bottom without any extra CSS styles applied, as shown in the following
screenshot. We will adjust the layout of our theme by using CSS styles in a later recipe.
How it works
WordPress will automatically look for a le named sidebar-one.php in the theme folder
when it encounters <? get_sidebar('one');?> in the index.php le. WordPress will
check the functions.php le for a register_sidebars function, and use it to determine
how many sidebars should be available. WordPress will then examine sidebar-one.php and
include the content of sidebar-one.php if it exists. If you use the name of a sidebar that
does not exist, the theme's code will either throw an error message or the WordPress back-end
code will detect the sidebar hook and substitute an automatically-generated sidebar.
Notice that we've gone ahead and used dynamic sidebars, as most WordPress 2.8 and 2.9
themes will have them.
There's more
You can set defaults for sidebar names, and affect the appearance of widgets in a particular
sidebar, by using parameters when you register your sidebar.
Sidebars
104
Sidebar parameters
When calling register_sidebar, there are a number of different parameters that you can
pass in the following form:
<?php
dynamic_sidebar(
array( 'parameter_name' => 'parameter_value' )
);
?>
The important parameters are as follows:
Name—allows you to change the name of the sidebar that is displayed in the admin
interface on the widgets management page. In themes with multiple sidebars, the
use of the name parameter can really help your theme's end users.
ID—the ID assigned to the sidebar, mostly for styling use. You can generally leave this
parameter with its default setting.
before_widget—the HTML to display before printing the contents of a widget. You can
use two placeholders here:
%1$s will be replaced by the widget's ID.
%2$s will be replaced by the widget's class name.
after_widget—the HTML to display after printing the contents of a widget.
before_title—the HTML to display before the title of the widget.
after_title—the HTML to display after the title of the widget.
Although the defaults are fairly well thought out, they assume a certain structure to your
sidebar and your theme. It is good to examine the register_sidebar function for yourself,
and decide if the defaults are okay. If not, change them to make it easier for you to style by
adding different class tags or removing list item tags.
Default content
If your user has not added any widgets to their sidebars, your theme may look extraordinarily
blank. For this reason, it is a good idea to include default content that will be displayed if the
sidebar does not have any active widgets. If you noticed in the last example, we went ahead
and placed search box code in sidebar-one.php.