Hướng dẫn học Microsoft SQL Server 2008 part 87 docx
Bạn đang xem bản rút gọn của tài liệu. Xem và tải ngay bản đầy đủ của tài liệu tại đây (1.04 MB, 10 trang )
Nielsen c36.tex V4 - 07/21/2009 2:11pm Page 822
Part V Data Connectivity
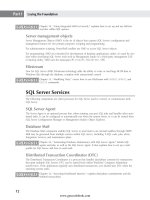
FIGURE 36-1
The Agent Security dialog
FIGURE 36-2
The Snapshot Agent Security dialog
822
www.getcoolebook.com
Nielsen c36.tex V4 - 07/21/2009 2:11pm Page 823
Replicating Data 36
Creating a push subscription to a transactional/snapshot
publication
The previous two sections discussed the two ways of replicating data, a push and a pull. This section
focuses on how to create push subscriptions to transactional and snapshot publications:
1. Connect to your publisher in SQL Server Management Studio and expand the Replication
folder and the Local Publications folder.
2. Locate your publication, right-click on it, and select New Subscriptions. Click Next to exit the
splash screen.
3. In the Publication dialog, ensure that the publication you wish to create a subscription to is
highlighted. If it is not already selected, do so now; you may have to expand other databases
to find it. Once your publication i s highlighted, click Next.
4. In the distribution Agent Location dialog, accept the default, which is Run all agents on the
Distributor, MySQLServerName (push subscriptions), where MySQLServerName isthenameof
your publisher.
5. Click Next to advance to the Subscribers dialog. All subscribers currently enabled will appear
in this dialog. If your subscriber does not appear, then click the Add Subscriber button. Note
that this button is a drop-down button that enables you to create SQL Server and Non-SQL
Server Subscribers. You can create subscriptions to SQL Servers, as well as Oracle and DB2
subscribers using this wizard. With the replication stored procedures it is possible to replicate
to any ODBC level 2 compliant and above data source.
For more information on how to replicate to Oracle and DB2 subscribers, please refer to
this link:
/>6. After clicking the Add Subscriber button, you are prompted to connect to your Subscriber.
This dialog looks very similar to the Connect to SQL Server dialogs you are familiar with from
connecting to SQL Server. Once you have added the subscriber, you will be able to select the
subscription database. Select it in the drop-down box, and then click Next.
7. The Distribution Agent Security dialog will appear. This is similar to the Snapshot Agent
Security dialog. Enter the account under which you wish the distribution agent to run. You
can also specify the accounts you wish to use to connect to the distributor and subscriber
here.
8. Click OK when you have completed the setup of these accounts.
9. Click Next to advance to the Synchronization Schedule dialog. From here, you can set a
schedule. The default is Run Continuously, which means that the agent will always be running
in the case of transactional replication (this setting has no effect on snapshot publications).
If you wish to run your distribution agent on a schedule, click the drop-down button and
define a schedule or have the agent run on demand. If you select the option to run the
agent on demand, then you have to run the agent either through Replication Monitor, by
running the job for the distribution agent, or by expanding the publication, locating the sub-
scriber, right-clicking on it, and selecting View Synchronization Status and then clicking the
Start button.
10. Click Next to advance to the Initialize Subscriptions dialog. The options are to initialize, which
means the snapshot will be applied at the subscriber, or not to initialize, which means that
823
www.getcoolebook.com
Nielsen c36.tex V4 - 07/21/2009 2:11pm Page 824
Part V Data Connectivity
you need to put all the required objects in place. This includes all tables, the data, stored
procedures, functions, and views, as well as replication stored procedures.
a. To create the replication stored procedures, use the command
sp_scriptpublication
customprocs ‘PublicationName’
in your publication database. The stored procedures
will appear in the results pane. C opy them into the query window and run them in your
subscription database. Under most circumstances the best choice is to select the initialize
option.
b. If you do select the initialize option, two selections are available in the drop-down list: At
First Synchronization and Immediately. At first synchronization means the snapshot will
be generated when the distribution agent runs. Immediately means the snapshot will be
generated and applied on the subscriber when you complete the dialog.
11. Click Next to advance to the Wizard options. Here you can specify whether you want the
snapshot created immediately, scripted, or both.
12. Click Finish to complete the dialog and create your subscription.
Creating a pull subscription to a transactional/snapshot
publication
Creating a pull subscription is very similar to creating a push subscription. The following steps show
you how:
1. Connect to your subscriber using SQL Server Management Studio, expand the Replication
folder, and then right-click the Local Subscriptions folder.
2. Select New Subscriptions, and click Next at the splash screen. In the drop-down box, select
your publisher, and then expand your publication database and select your publication.
3. Click Next. In the Distribution Agent location dialog, select ‘‘Run each agent at its Subscriber
(pull subscriptions)’’ and click Next.
4. Click the check box next to your subscriber, and select your subscription database on the right
side of the screen. Click Next to advance to the Distribution Agent Security dialog.
5. Select the security context you wish the binary to run under, and choose the account you want
to use to connect to the subscriber. This account should be in the dbo_owner role on the
subscriber.
6. Click Next. In the Synchronization Schedule dialog, choose how frequently you want the
subscriber to connect. The options are to run continuously, run on demand, or run on a
schedule.
7. Click Next to continue to the Initialize Subscriptions dialog. The options are to initialize your
subscription immediately, at first synchronization, or not to initialize your subscription at all
(by not selecting the initialize check box). Follow the notes in Creating a Push Subscription for
more details on this option.
8. Click Next to advance to the Wizard options. Here you can specify whether you want the
snapshot created immediately, scripted, or both.
9. Click Finish to complete the dialog and create your subscription.
824
www.getcoolebook.com
Nielsen c36.tex V4 - 07/21/2009 2:11pm Page 825
Replicating Data 36
Creating a peer-to-peer topology
To create a peer-to-peer topology you must be running the Enterprise Edition of SQL Server. Create a
transactional replication publication, and once you have completed the publication creation, right-click
on the publication in the Local Publications folder. In the Subscription Options tab, ensure that Allow
Peer-to-Peer Subscriptions is set to true. Click OK.
Once this is done, follow these steps to set up a peer-to-peer topology:
1. Return to the publication, right-click on the publication again, and this time select Configure
Peer-to-Peer Topology. Click Next at the splash screen.
2. In the Publication dialog that appears, select your publication database and publication. These
should be highlighted.
3. Click Next to launch the Configure Topology dialog. Right-click and select Add a New Peer
Node.
4. Enter your subscriber name, select the appropriate authentication type, and click Next. You
will then be prompted for a database and Peer Originator ID. Choose 2 for the Originator ID;
the publisher will have an Originator ID of 1.
5. Right-click the database icon in the center of the Configure Topology dialog, and select
Connect to All Displayed Nodes. Click Next. This launches the Log Agent Security dialog.
6. Select a security context under which the Log Reader Agent will run, and click Next. This
launches the Distributor Security dialog.
7. Select an account under which the Distribution Agent should run and how the Distribution
Agent should connect to the Subscriber. You need to repeat this for each node in the topology.
Click Next. This launches the New Peer Initialization dialog. You will need to restore the
publication database on each of the peers or place the tables and related replication metadata
in place.
8. Click Next and then Finish to complete the peer-to-peer topology configuration.
Creating a merge publication
Creating merge publications is very similar to creating transactional or snapshot publications. Follow
these steps to create a merge publication:
1. Connect to your publisher in SQL Server Management Studio, expand the Replication folder,
and right-click on the Local Publications folder. Select New Publication and click Next.
2. Select the database you wish to merge replicate, and click Next in the Publication Database
dialog.
3. For Publication Type, select Merge publication and click Next.
4. For Subscriber types, select the type of SQL Server to which you are replicating. It is possible
to select multiple subscriber types; for example, you can replicate to SQL 2005 and SQL 2008
publishers.
5. Click Next to Advance to the Articles dialog. From here, you can choose what you wish
to replicate — for example, tables, views, stored procedures, or functions. If you e xpand a
table, you will notice that you have the option to select or deselect columns that you wish to
825
www.getcoolebook.com
Nielsen c36.tex V4 - 07/21/2009 2:11pm Page 826
Part V Data Connectivity
replicate. The Article Properties button enables you to control how tables will be replicated
(for example, you can choose to replicate user indexes). Click Next. The Article Issues dialog
will then warn you that a unique identifier (GUID) column will be added to all tables you are
indexing.
6. Click Next to advance to the Filter Rows dialog. Merge replication is designed to only
replicate a subset of the data to the subscriber. Part of the reason for this is because merge
replication is frequently used over low bandwidth lines, such as over a phone line or the
Internet. By filtering rows you can minimize the amount of data that is sent to your sub-
scriber. You can also use join filters. Basically, join filters extend a filter you place on a table
to all the other tables that have foreign key relationships on the filtered column. Consider
the
SalesTerritory table in the AdventureWorks2008 database. It is joined to the
SalesOrderHeader table by TerritoryID,andtheSalesOrderHeaderTable is
joined to the
SalesOrderDetail table by the SalesOrderID column. If you filter on the
TerritoryID, subscribers would only get the related data for a particular TerritoryID.
To use join filters, click the Add button in the Filter Table Rows dialog and select Automati-
cally Generate Filters, or click the Add Filter button and select the tables and rows you want
to filter on. You then have the option to click the Add Button again and select Add Join to
Extend the Selected Filter. You can also filter on Host_Name() and USER_NAME(), both of
which can be overridden by the Merge Agent (HostName and PublisherLogin, respectively).
7. Once you have created your filters, click Next to launch the Snapshot Agent dialog; in most
cases you will want to accept the default. Click Next to launch the Snapshot Security Agent
dialog and set the appropriate accounts for your Snapshot Agent.
8. Click Next to advance to the Snapshot Options dialog, where you can either generate your
publication or script it out. Click Next to name your publication and then click Finish. When
your publication has been created, click Close.
Creating merge replication subscriptions is almost identical to creating subscriptions to transactional and
snapshot publications. There are two differences.
The first is that there is a Subscription Type dialog. This controls conflicts. Conflicts arise when
an attempt is made to update a row that has been deleted on the subscriber between syncs, or the
same primary key value is assigned on the publisher and subscriber between syncs. The Subscription
Type dialog controls how conflicts are resolved. For example, you can assign a value of 75% to your
subscriber. This means that the subscriber change will remain on the publisher unless another subscriber
with a higher priority syncs that row at a later point in time. In this case, the subscriber with a higher
priority will replace the value that came from the lower priority subscriber.
The other subscription type is Client, which means that the first value to the publisher will win any
conflicts.
The other difference is that you will be able to add a value for hostname that supplies a value to
your filter.
Web synchronization
One other feature of merge replication is web synchronization. Merge r eplication is frequently used to
replicate to servers in branch offices over WANs or the Internet. To reduce the exposure of SQL Servers
to viruses, worms, Trojan horses, and hackers, Microsoft created web synchronization, whereby the sub-
scriber connects to a web server over port 80 or port 443 and an ISAPI filter redirects traffic to a SQL
826
www.getcoolebook.com
Nielsen c36.tex V4 - 07/21/2009 2:11pm Page 827
Replicating Data 36
Server. While most firewall administrators are reluctant to open port 1433 (the TCP/IP port that
SQL Server listens on), they have no problem leaving port 80 or 443 open.
To configure web synchronization, execute the following steps:
1. Connect to your publisher using SQL Server Management Studio, and expand the Replication
and Local Publications folders.
2. Right-click your publication and select Configure Web Synchronization. Click Next.
3. Specify whether your subscribers are running SQL Server or SQL CE and select Next.
4. Enter the name of the web server and choose to either create a new virtual directory or
use an existing one. You will receive a prompt to accept the copying of an ISAPI extension
that will process your web synchronization. Click Yes, and then Next to launch a dialog for
Authentication Access. I recommend that you use Basic Authentication.
5. For the domain, enter the name of the domain as it appears on the certificate; for the realm,
enter the name of your fully qualified domain name as it appears on your certificate. After
clicking Next, the Directory Access dialog appears.
6. Select an account or a group here that will be used to connect to your snapshot share. This
group should have read rights to access the snapshot share.
7. Click Next to advance to the Snapshot Share Access dialog. Enter the name of the snapshot
share as a
UNC: \\MyServerName\ShareName. The share must pre-exist.
8. Click Next. If you have not already configured a publication to use this share as its snapshot
folder, you will get a prompt telling you that the share is empty. Ensure that this is the share
you want to use and click Next to continue to the Complete the Wizard dialog.
9. Confirm your choices and click Finish.
After the Web Configuration Wizard completes, you will get a success or failure report. T he latter report
enables you to determine which component failed and to rerun the wizard to correct those portions.
Summary
Replication is a complex and powerful feature of SQL Server, and fully describing it could easily take a
book by itself. Using the wizards and dialogs that Microsoft has written into Management Studio greatly
simplifies the process of configuring and deploying replication.
Key points from this chapter include the following:
■ Replication can be a good fit for your data distribution needs.
■ Replication uses a publisher — distributor — subscriber metaphor.
■ Transactional replication is one-way replication by default and the fastest and most popular
replication method.
■ Peer-to-peer replication is bi-directional transactional replication, and an Enterprise
Edition–only feature.
■ Merge replication is a best fit for bi-directional replication, especially when the publisher and
subscribers are occasionally or frequently offline.
The next chapter continues the data connectivity theme with Microsoft’s BI solution for moving data:
Integration Services.
827
www.getcoolebook.com
Nielsen c36.tex V4 - 07/21/2009 2:11pm Page 828
www.getcoolebook.com
Nielsen c37.tex V4 - 07/21/2009 2:13pm Page 829
Performing ETL with
Integration Services
IN THIS CHAPTER
Integration Services variables
and expressions
Constructing control and data
flows
Package event handlers
Debugging
Full list of package elements
Configuring packages for
multiple environments
Package deployment
I
ntegration Services is most commonly described as an extract-transform-load
(ETL) tool. ETL tools are traditionally associated with preparing data for
warehousing, analysis, and reporting, but Integration Services represents a
step beyond the traditional role. It is really a robust programming environment
that happens to be good at data and database-related tasks.
Many prospective users have been intimidated by the Integration Services learning
curve, sticking to the Transact-SQL that they know instead of investigating a more
powerful ETL tool. This has made traditional SQL approaches one of the largest
competitors of Integration Services, but those who take the time to understand
this tool will find several advantages:
■ Simple, fast methods for moving large quantities of data, minimizing
database load, and batching data into destination tables to keep blocking
and transaction log sizes down
■ The capability to chain together many tasks, with complete control over
ordering and error and exception handling. Many tasks can be executed
in parallel.
■ Connections to read or write most any type of data without special
programming or linked server calls
■ Common data and database management tasks are implemented without
the need to write code; a .NET scripting environment is available for
more custom tasks, plus Integration Services is fully extensible with
custom assemblies.
■ Resulting packages are as manageable as the situation requires, with
several deployment, configuration, auditing, restart, and logging options.
While careful coding in SQL or other languages can approach the same core func-
tionality as Integration Services, most projects require significant effort and end
829
www.getcoolebook.com
Nielsen c37.tex V4 - 07/21/2009 2:13pm Page 830
Part V Data Connectivity
up with minimal exception handling — often something like ‘‘stop and send me an e-mail if there is a
problem.’’ One colleague recently received 8,000 e-mails over a two-day period from such a data loading
system.
Integration Services enables you to avoid many of the tedious details and spend more time building
robust applications. It also excels at identifying problems and performing recovery operations within
the application itself. Many of the Integration Services features, such as error row redirection, complex
precedence constraints, data conversion, and fuzzy lookup, are well suited to recovering from data
problems, rather than ignoring or failing on them. There is nothing better than building a system
integration application that one seldom even thinks about.
New in 2008
L
ook throughout this chapter for new features added in SQL Server 2008, including enhanced ADO.NET
connectivity, upgrade of the scripting environment to use Visual Studio Tools for Applications (VSTA),
enhanced lookup functionality, including cache creation and tuning, and the new Data Profiling task.
Additionally, the Integration Services runtime environment has been made more scalable through increased
parallelism.
Design Environment
One of the best ways to understand Integration Services is to understand its design environment. Begin
by opening a new Integration Services project within the Business Intelligence Development Studio. The
Integration Services template is located in the Business Intelligence folder. The window that appears
should look similar to what is shown in Figure 37-1.
Beyond the ever-present Solution Explorer and Properties panes, several panes and tabs are used in
building a package (use the View menu to display any missing panes):
■ Connection Managers pane: Connection managers are pointers to files, databases, and so on,
that are used to provide context for the execution of tasks placed on the design surface. For
example, an Execute SQL task requires a database connection.
■ Toolbox: The toolbox provides a list of tasks that can be dragged onto the design surface. The
list of available tasks varies according to the active tab in the main pane.
■ Control Flow tab: This is the primary design surface on which tasks are placed, configured,
and ordered by connecting tasks with precedence arrows.
■ Data Flow tab: One of the tasks that can be configured on the Control Flow tab is a Data
Flow task, used to move and transform data. The Data Flow tab is used to configure Data
Flow tasks; think of it as a Properties window on steroids.
■ Event Handlers tab: Events are exposed for the overall package and each task within it.
Tasks are placed here to execute for any event, such as
OnError or OnPreExecute.
830
www.getcoolebook.com
Nielsen c37.tex V4 - 07/21/2009 2:13pm Page 831
Performing ETL with Integration Services 37
■ Package Explorer tab: This tab lists all the package’s elements in a single tree view. This
can be helpful for discovering configured elements not always obvious in other views, such as
event handlers and scoped variables.
FIGURE 37-1
The Control Flow tab of Integration Services’ design environment
The package runs by executing Control Flow tasks, beginning with tasks that have no incoming prece-
dence constraints (arrows). As each task completes, the next task executes based on the precedence con-
straints until all tasks are complete. Refer to Figure 37-1 for an example of three tasks sequenced by two
such arrows. While the tasks in this example are ordered for serial execution, many combinations are
possible (see the section ‘‘Control Flow Precedence’’ later in this chapter).
For users of Data Transformation Services (DTS) in SQL 7.0 and SQL 2000, this approach to building a
package will be familiar, but why the Data Flow tab?
Each data flow is a single task on the Control Flow tab; drill down (e.g., via a double-click) to view a
single data flow’s configuration on the Data Flow tab (see Figure 37-2). Note that it does not contain
tasks but data sources, destinations, and transformations. The arrows between the boxes are not prece-
dence indicators but data inputs and outputs that determine how data flows from source to destination.
831
www.getcoolebook.com