WebSphere Studio Application Developer Version 5 Programming Guide part 21 pot
Bạn đang xem bản rút gọn của tài liệu. Xem và tải ngay bản đầy đủ của tài liệu tại đây (259 KB, 10 trang )
174 WebSphere Studio Application Developer Version 5 Programming Guide
To test the statement, select it in the Statements folder and
Execute
(context) or
select
SQL -> Execute
in the menu bar.
Enter 'C' as the value for the :type and '%o%' as the value for the :lastname
variables in the Host Variable Values window and click
Finish
to execute the
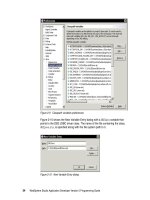
query. The matching rows from the database are shown in the DB Output view
(Figure 6-38).
Figure 6-38 SQL Query Builder: testing the SQL statement
Later on we will look at how you can use Application Developer to generate Web
pages and Java classes to quickly and easily build an application based on an
SQL statement that uses host variables.
We will use this SQL statement in “Accessing databases from a Web application”
on page 248.
Accessing databases from a Java application
We have already seen an example of how to access a relational database using
JDBC from a Java application. In Chapter 5, “Developing Java applications” on
page 93 we created a simple application (CustomerListing, Figure 5-10 on
page 102) that accesses a DB2 table to return a list of customers. We now take a
closer look at database access.
Access using the DriverManager
We use the driver manager class to manage the connection to the database.
First we have to establish a connection to the database as shown in Figure 6-39.
The first thing that has to be done is to load the JDBC driver. The
Class.forName() call does this. The driver name is dependent on which
database you are connecting to.
Note: You do not have to create an instance of the driver or register it. This is
done automatically for you by the DriverManager class.
Chapter 6. Developing database applications 175
Figure 6-39 Establish a connection to the database
After loading the driver, you have to establish a connection. The class that
handles this is called DriverManager.
The URL string that is passed in to the getConnection method is again
dependent on which database system you are using. In the example above,
we are connecting to a DB2 database called EJBBANK. In this example we are
not passing a user ID and password, but if that was required, they would be
the second and third parameters of the getConnection call.
DB2 JDBC drivers
DB2 supplies two JDBC drivers:
COM.ibm.db2.jdbc.app.DB2Driver—This is a JDBC type 2 driver that uses
a DB2 client installed on the machine where the application runs. You would
use this driver when accessing a local database or a remote database
through a local DB2 client. The database URL has the format:
jdbc:db2:databasename
COM.ibm.db2.jdbc.net.DB2Driver—This is a JDBC type 3 driver. It is a Java
driver that is designed to enable Java applets access to DB2 data sources.
Using this driver your application will talk to another machine where the DB2
client is installed. The database URL has the format:
jdbc:db2://hostname:port/databasename
The standard port of the DB2 JDBC Applet Server service is 6789. This DB2
service must be started in your machine.
To connect to a database you have to supply user ID and password:
con = DriverManager.getConnection("jdbc:db2://localhost:6789/EJBBANK",
"db2admin","db2admin");
In our examples we use the DB2 app driver because we are talking to a local
database. If you are trying to connect to another database system, you should
consult the documentation to determine what driver name and URL to use.
protected static Connection connect() {
Connection con = null;
try {
Class.forName("COM.ibm.db2.jdbc.app.DB2Driver");
con = DriverManager.getConnection("jdbc:db2:EJBBANK");
} catch(Exception e) { }
return con;
}
176 WebSphere Studio Application Developer Version 5 Programming Guide
The classes required when connecting to a DB2 database from Java are found in
.\sqllib\java\db2java.zip. You would make this available in Application
Developer by creating a classpath variable for it and adding that to the project
build path, as explained in “Running your programs” on page 103.
Executing SQL statements
You are now ready to perform operations on the database. How to execute a
simple select statement is shown in Figure 6-40.
Figure 6-40 Executing a simple select statement
You create a statement using the connection obtained from the DriverManager
and then you execute the query passing the select statement. The result set from
the query is returned in a ResultSet variable.
Next, you have to process the result set from the query. The ResultSet class
provides a number of get methods for various data types as shown in
Figure 6-41.
Figure 6-41 Processing the result set from the query
Finally, JDBC objects must be closed to release the resources (Figure 6-42). The
best place is a finally clause that is executed even in case of exceptions.
Figure 6-42 Releasing JDBC resources
stmt = con.createStatement();
ResultSet rs = stmt.executeQuery("SELECT * FROM ITSO.CUSTOMER");
while (rs.next()) {
String firstName = rs.getString("firstName");
String lastName = rs.getString("lastName");
String userID = rs.getString("userID");
System.out.println(firstName + " " + lastName + " " + userID);
}
} finally {
try {
if (rs != null) rs.close();
if (stmt != null) stmt.close();
if (con != null) con.close();
} catch (SQLException e) {}
}
Chapter 6. Developing database applications 177
Access using a data source
JDBC access using a data source is not well suited for stand-alone applications.
It is, however, the preferred way to access databases from Web applications
where multiple clients use the same servlet for database access.
Figure 6-43 shows the basic code sequence to get a connection through a data
source.
Figure 6-43 Getting a connection through a data source
The data source is retrieved using a the lookup method of the InitialContext.
The data source must be registered in the JNDI server. In our example we use a
JNDI name of jdbc/ejbbank, which points to the EJBBANK database.
Once a connection is obtained, the rest of the code is the same.
Retrieving the data source is expensive. Good coding practice for Web
applications is to retrieve the data source only once in the init method of a
servlet, and to get and release a connection in the doGet or doPost method for
each client request.
We explore database access in Web applications in Chapter 8, “Developing Web
applications with database access” on page 247.
J2EE client application
In “Building an application client module” on page 614 we implement a modified
version of the CustomerList program. The CustomerListDS program uses a data
source and runs as a J2EE client application accessing the EJBBANK database,
which is defined in a WebSphere server through a data source.
try {
javax.naming.InitialContext ctx = new javax.naming.InitialContext();
javax.sql.DataSource ds = (javax.sql.DataSource)
ctx.lookup("jdbc/ejbbank");
con = ds.getConnection();
} catch (javax.naming.NamingException e) {
System.err.println("Naming-Exception: " + e.getMessage());
} catch (java.sql.SQLException e) {
System.err.println("SQL-Exception: " + e.getMessage());
}
178 WebSphere Studio Application Developer Version 5 Programming Guide
Summary
We have introduced you to JDBC and data sources, and have seen how to create
and connect to databases using Application Developer.
In particular we covered the Data perspective and the generation of SQL
statements.
© Copyright IBM Corp. 2003. All rights reserved. 179
Chapter 7. Developing Web
applications
In this chapter we develop a Web application as part of an enterprise application.
We develop static and dynamic content in the form of an HTML page, a servlet,
and a JSP.
We use the Page Designer, CSS Designer, and wizards to create servlets and
JSPs. To experiment with the new J2EE 1.3 functions, we develop both a sample
filter and a listener.
Finally, we use the wizard to create a simple Web application from a JavaBean.
7
180 WebSphere Studio Application Developer Version 5 Programming Guide
Introduction
This chapter guides you through the Application Developer’s features designed to
assist you in the creation of Web applications.
We will start off by introducing you to the sample application that will be used
throughout this chapter, and in later chapters as well. We will then proceed to
create a new Web project to hold our example application. Once the project is in
place, we are able to add both static and dynamic content to it, and to use tools
and wizards, such as Page Designer, CSS Designer, and creating Web pages
from a JavaBean.
Even though this chapter does not assume that you are always in the Web
perspective of Application Developer, you may find it easier to perform the tasks
described here using the Web perspective.
Sample application: RedBank
In this section we describe the architecture for our sample banking application:
RedBank.
Note that the intent of this chapter is to introduce you to the Application
Developer’s tools that make the development of Web applications possible.
Together we will work only on a single HTML page, a single servlet, and a single
JSP page. The rest of the application has already been developed and is made
available to you so that you can explore it if you would like to.
The RedBank application was designed using the MVC architecture pattern,
which we will cover in more detail in Chapter 10, “Developing Struts applications”
on page 293.
Because the same example is used throughout the book, you will have the
opportunity to see how little it changes in the face of varying design constraints
and evolving techniques. This is in fact the most important characteristic of the
MVC pattern.
We are now going to introduce you to how the application implements each of the
MVC layers, so that you feel more comfortable with its design.
Model
The RedBank application’s business model (Figure 7-1) is described in “Banking
model” on page 111, and the code is imported into the ItsoProGuideJava project.
Chapter 7. Developing Web applications 181
Figure 7-1 Banking model revisited
Controller
The control layer was implemented using two different strategies: one
straightforward; and the other a little bit more complex, but more realistic. We did
so to keep the discussion in the book simple, but still have a nice example.
The application has a total of four servlets:
ListAccounts—get the list of accounts for one customer.
AccountDetails—display the account balance and the selection of
operations: list transactions, deposit, withdraw, and transfer.
InvalidateSession—invalidate the session data.
PerformTransaction—perform the selected operation by calling the
appropriate control action: ListTransactions, Deposit, Withdraw, or
Transfer.
Three of the servlets, including the ListAccounts servlet that you will implement,
fall into the first category. They work as sole controllers, without any external
collaboration. It is easier to implement and understand them this way.
The last of the four servlets, PerformTransaction, falls into the second category.
It acts as a front controller, simply receiving the HTTP request and passing it to
the appropriate control action object. These objects are responsible for carrying
out the control of the application. For a more thorough explanation of this
strategy, and the motivation behind it, please read Chapter 10, “Developing
Struts applications” on page 293.
Banking Bank Customer
Account
TransRecord
Note: Action objects, or commands, are part of the command design pattern.
For more information, refer to
Design Patterns: Elements of Reusable
Object-Oriented Softwar
e.
182 WebSphere Studio Application Developer Version 5 Programming Guide
View
The RedBank application’s view layer is comprised of an HTML file and four JSP
files. The application home page is the index.html file (Figure 7-2).
Figure 7-2 RedBank home page (index.html)
The home page allows you to type the customer ID to access the customer
services. There is no dynamic content in this page, so we use plain HTML. Note
that security issues (logon and password) are not covered in this book.
The second Web page (Figure 7-3) displays the customer’s accounts for
selection.
Figure 7-3 RedBank account listing (listAccounts.jsp)
The customer’s name and the available accounts are processed dynamically, as
they depend on the given customer ID, so we implemented this page as a JSP.
Chapter 7. Developing Web applications 183
After selecting an account, the user can view the logged transactions or perform
banking transactions, such as deposit, withdraw, and transfer (Figure 7-4).
Figure 7-4 RedBank account maintenance (accountDetails.jsp)
The maintenance screen also shows the current account number and balance,
both dynamic values. A simple JavaScript code controls whether the amount and
destination account fields are available or not, depending on the option selected.
If the user chooses to list the logged transactions, the Web page shown in
Figure 7-5 is displayed.
Figure 7-5 RedBank transaction log (listTransactions.jsp)
