ADOBE INDESIGN CS2 REVEALED- P15 docx
Bạn đang xem bản rút gọn của tài liệu. Xem và tải ngay bản đầy đủ của tài liệu tại đây (1.14 MB, 15 trang )
INDESIGN 5-28 Working with Color
6. Select the frame shown in Figure 42.
7. Click File on the menu bar, click Place, navi-
gate to the drive and folder where your Data
Files are stored, then double-click OAHU
graphic.ai.
OAHU graphic.ai is an Adobe Illustrator file.
The fill color of O, A, H, and U is PANTONE
663—the same PANTONE 663 fill that was
created in InDesign and applied to the bor-
der and the “TWIST & SHOUT” text. For this
reason, PANTONE 663 does not need to be
added to the Swatches palette.
TIP If, when you import the graphic, a dia-
log box appears warning you that the PAN-
TONE color in the graphic is defined
differently and asking you if you want to
replace it, click No.
(continued)
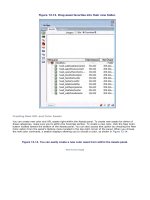
FIGURE 42
Selecting a frame for a graphic
Lesson 3 Work with Spot Colors INDESIGN 5-29
8. Click Object on the menu bar, point to
Fitting, then click Center Content.
9. Deselect all, then compare your document
with Figure 43.
10.Save your work, then close OAHU
Magazine Cover.
You imported a graphic that was created with a
spot color in another application, then noted that
the spot color was automatically added to the
Swatches palette. Next, you imported a graphic
that was filled with the same spot color that you
had already created in InDesign.
FIGURE 43
Viewing the document page
LESSON 4
What You’ll Do
INDESIGN 5-30 Working with Color
Creating Gradients
A gradient is a graduated blend of two or
more colors. By definition, every gradient
must have at least two colors, which are
commonly referred to as the starting and
ending colors of the gradient. You can
add colors to a gradient, colors that come
between the starting and ending colors. The
colors that you add are called color stops.
In InDesign, you create gradients by click-
ing New Gradient Swatch on the Swatches
menu. This opens the New Gradient Swatch
dialog box, as shown in Figure 44. In this
dialog box, you define all the elements of
the gradient. Like new colors, you can give
your gradient a descriptive name. You use
the gradient ramp to define the starting,
ending, and any intermediary colors for
your gradient. You choose whether your
gradient will be radial or linear using the
Type list arrow. You can think of a radial
gradient as a series of concentric circles.
With a radial gradient, the starting color
appears at the center of the gradient, then
radiates out to the ending color.
You can think of a linear gradient as a
series of straight lines that gradate from
one color to another (or through multi-
ple colors). Figure 45 shows a linear and
a radial gradient, each composed of three
colors.
Figure 46 shows the dialog box used to
create the linear gradient. The gradient
ramp represents the gradient, and the yel-
low color stop is selected. The sliders show
that the color stop was formatted with
100% yellow. Note that the Stop Color text
box reads CMYK.
You can create gradients using swatches
already in the Swatches palette as stop
colors. In Figure 47, the selected color stop
is a spot color named PANTONE 344 C.
Note that the Stop Color text box reads
Swatches. When you choose Swatches from
the Stop Color menu, all the named colors
in the Swatches palette are listed and avail-
able to be used in the gradient.
When you close the New Gradient Swatch
dialog box, the new gradient swatch
appears in the Swatches palette along with
all the other named color swatches.
In this lesson, you will create gradients
and explore options for applying them to
frames.
▼
WORK WITH
GRADIENTS
Lesson 4 Work with Gradients INDESIGN 5-31
FIGURE 44
New Gradient Swatch dialog box
FIGURE 45
A linear and a radial gradient
FIGURE 46
Viewing a linear gradient
FIGURE 47
Viewing a gradient with a named color
Radial gradient
Linear gradient
Type: defines a gradient
as linear or radial
Starting color
Color stop
(selected)
Location: Identifies location of
color stop on the gradient ramp
Ending
color
Color stop
(selected)
Spot color chosen for
the selected color stop
Swatch
name
Stop Color:
defines a stop
color as a named
or unnamed
process color or
a spot color
Selected stop
color is
defined as a
named color
Applying Gradients
You apply a gradient to an object the same
way you apply a color to an object. Simply
select the object, then click the gradient in
the Swatches palette. A gradient swatch
can be applied as a fill or as a stroke.
If you use a gradient to fill an object, you
can further control how the gradient fills
the object using the Gradient Tool. The
Gradient Tool allows you to change the
length and/or direction of a linear or radial
gradient. You can also use it to change the
angle of a linear gradient and the center
point of a radial gradient. To use the
Gradient Tool, you first select an object
with a gradient fill, then you drag the
Gradient Tool over the object. For both
linear and radial gradients, where you
begin dragging and where you stop drag-
ging determines the length of the gradi-
ent, from starting color to ending color.
For linear gradients, the angle that you
drag the Gradient Tool determines the
angle that the blend fills the object.
Figure 48 shows six rows of six squares,
which are InDesign frames filled with gra-
dients. Each frame is filled with a rainbow
gradient. The gradient appears differently
in each row as a result of dragging the gra-
dient tool. The black line associated with
each example represents the length and
direction that the Gradient Tool was
dragged to create each effect.
Modifying a Gradient Fill Using
the Gradient Palette
Like color swatches, gradients can be
modified. When you modify a gradient, all
instances of the gradient used in the docu-
ment will be automatically updated. Let’s
say you create a gradient and use it to fill
10 objects. Then you decide that, in only
one of those 10 objects, you want to mod-
ify the gradient by removing one color.
What do you do? If you modify the gradi-
ent swatch—remove a color stop—that’s
going to affect all usages of the gradient.
You could, of course, duplicate the gradi-
ent swatch, remove the unwanted color
stop, then apply the new gradient to the
single object. But there’s a better way. You
can use the Gradient palette, shown in
Figure 49.
When you select an object with a gradient
fill, the Gradient palette shows the gradi-
ent ramp that you used to create the gradi-
ent in the New Gradient Swatch dialog
box. You can manipulate the gradient
ramp in the Gradient palette. You can add,
move, and delete color stops. You can also
select color stops and modify their color
using the Color palette. And here’s the
great part: the modifications you make in
the Gradient palette only affect the gradi-
ent fill of the selected object(s).
INDESIGN 5-32 Working with Color
FIGURE 48
Using the Gradient Tool
FIGURE 49
Gradient palette
Gradient ramp
Lesson 4 Work with Gradients INDESIGN 5-33
Create a linear
gradient swatch
1. Open ID 5-2.indd, then save it as Making the
Gradient.
2. Click the Swatches palette list arrow, then
click New Gradient Swatch.
3. In the Swatch Name text box, type
Blue/Gold/Red Linear.
4. Click the left color stop on the gradient
ramp, click the Stop Color list arrow, then
click Swatches so that your dialog box
resembles Figure 50.
When you choose Swatches, the colors in
the Swatches palette are listed beneath the
Stop Color text box.
5. Click the swatch named Blue.
The left color stop on the gradient ramp
changes to blue.
6. Click the right color stop on the gradient
ramp, click the Stop Color list arrow, click
Swatches, then click the swatch named Red.
7. Click directly below the gradient ramp to add
a new color stop.
TIP Click anywhere to add the new color
stop. You’ll adjust the location using the
Location text box.
8. Type 50 in the Location text box, then
press [Tab].
The new color stop is located at the exact
middle of the gradient ramp.
(continued)
FIGURE 50
New Gradient Swatch dialog box
Starting color
stop selected
Swatches available
in the Swatches
palette
Stop Color
list arrow
INDESIGN 5-34 Working with Color
9. Click the Stop Color list arrow, click
Swatches, then click the swatch named Gold
so that your New Gradient Swatch dialog
box resembles Figure 51.
10.Click OK.
The new gradient swatch is added to the
Swatches palette.
You created a three-color linear gradient swatch
using three named colors.
Create a radial gradient
swatch
1. Click the Swatches palette list arrow, then
click New Gradient Swatch.
The New Gradient Swatch dialog box
opens with the settings from the last created
gradient.
2. In the Swatch Name text box, type
Cyan Radial.
3. Click the Type list arrow, then click Radial.
4. Click the center color stop, then drag it
straight down to remove it from the
gradient ramp.
5. Click the left color stop on the gradient
ramp, click the Stop Color list arrow, then
click CMYK.
6. Drag each slider to 0% so that your dialog
box resembles Figure 52.
7. Click the right color stop on the gradient
ramp, click the Stop Color list arrow, then
click CMYK.
(continued)
FIGURE 51
Creating a linear gradient swatch
FIGURE 52
Formatting the left color stop
New color stop
Starting color
stop selected
Lesson 4 Work with Gradients INDESIGN 5-35
8. Drag the Cyan slider to 100%, then drag the
Magenta, Yellow, and Black sliders to 0% so
that your dialog box resembles Figure 53.
9. Click OK.
The new gradient swatch is added to the
Swatches palette.
You created a two-color radial gradient swatch
using CMYK values.
Apply gradient swatches and
use the Gradient Tool
1. Click the Show Gradient Swatches button
on the Swatches palette.
2. Click the Selection Tool , click the
border of the top rectangular frame, verify
that the Fill button is activated in the
Toolbox, then click Blue/Gold/Red Linear
in the Swatches palette.
TIP Make sure you are in Normal View
Mode and that you are viewing frame edges.
3. Click the Gradient Tool , then, using
Figure 54 as a guide, place the pointer
anywhere on the top edge of the rectangular
frame, click and drag down, and release the
mouse button at the bottom edge of the
frame.
Your frame should resemble Figure 55.
TIP Pressing and holding [Shift] when
dragging the Gradient Tool constrains the
movement on a horizontal or vertical axis.
4. Drag the Gradient Tool from the bottom-
middle handle of the frame to the top-right
handle.
(continued)
FIGURE 53
Formatting the right color stop
FIGURE 54
Dragging the Gradient Tool straight down
FIGURE 55
Viewing the linear gradient applied vertically to the frame
Ending color
stop selected
Drag Gradient Tool
cursor straight down
INDESIGN 5-36 Working with Color
5. Drag the Gradient Tool from the left edge of
the document window to the right edge of
the document window.
6. Drag the Gradient Tool a short distance
from left to right in the center of the frame,
as shown in Figure 56.
7. Click the Selection Tool , click the edge
of the circular frame, then click Cyan Radial
in the Swatches palette.
8. Click the Gradient Tool , press and hold
[Shift], then drag the Gradient Tool from the
center point of the circle up to the bottom
edge of the center rectangle above the circle
so that your document resembles Figure 57.
You filled two objects with two different gradients,
and you used the Gradient Tool to manipulate how
the gradients filled the objects.
Use the Gradient Tool to
extend a gradient across
multiple objects and modify
a gradient
1. Click Window on the menu bar, then click
Gradient.
2. Deselect all, click the Selection Tool ,
then select the three rectangular frames
above the circle by pressing [Shift] and then
clicking their edges.
3. Click Blue/Gold/Red Linear in the Swatches
palette.
As shown in Figure 58, the gradient fills
each frame individually.
(continued)
FIGURE 56
Dragging the Gradient Tool from left to right
FIGURE 57
Viewing two gradients applied to two objects
FIGURE 58
A gradient fill applied individually to three objects
Start
End
Start
End
Start
End
Lesson 4 Work with Gradients INDESIGN 5-37
4. Verify that the three objects are still
selected, click the Gradient Tool ,
then drag it from the left edge of the
leftmost frame to the right edge of the
rightmost frame.
As shown in Figure 59, the gradient gradates
across all three selected objects.
5. Click the Selection Tool , then click the
rectangular frame at the top of the docu-
ment window.
6. Remove the center gold color stop from the
gradient ramp in the Gradient palette, then
click the Show All Swatches button at
the bottom of the Swatches palette.
As shown in Figure 60, only the gold color is
removed from the gradient fill in the selected
frame. The original gradient in the Swatches
palette (Blue/Gold/Red Linear) is not
affected.
7. Save your work, then close Making the
Gradient.
You selected three objects, applied a gradient to
each of them, then used the Gradient Tool to
extend the gradient across all three selected
objects. You then modified the gradient fill of a
selected object by removing a color stop from the
Gradient palette.
FIGURE 59
A gradient fill gradating across three objects
FIGURE 60
Modifying a gradient in the Gradient palette
Start
End
Gradient swatch in
Swatches palette not
affected
Gold color stop removed
from gradient ramp in
gradient palette
Gold color stop removed
from gradient fill in
selected frame
CHAPTER SUMMARY
CHAPTER SUMMARY
Chapter 5 was all about working with
color. You learned how to apply simple
fills and strokes to an object. You then
focused on the Swatches palette, learning
how to create new color swatches and tint
swatches. You investigated process colors,
how they are mixed, and how to create
them in the Swatches palette. You
learned what it means to work with an
unnamed color and how to save an
unnamed color in the Swatches palette.
You also explored various ways of apply-
ing color to an object and to text. From
your exploration of process colors, you
moved on to a study of spot colors—what
they are, how to create them in the
Swatches palette and rules for importing
graphics that contain spot colors. Finally,
you explored gradients—how to create
gradient swatches and apply them to
objects and how to use the Gradient Tool
to control the way a gradient fills an
object.
What You Have Learned
• About process colors
• About tints
• How to create a new color swatch
• How to work with the Swatches palette
• How to create a tint swatch
• How to work with unnamed colors
• How to create process color swatches
• How to use the color palette
• How to save an unnamed color in the
Swatches palette
• How to apply color to objects
• An understanding of the Paper swatch
• How to apply color to text
• How to create black shadow text
• How to modify and delete swatches
• An understanding of spot colors
• How to create spot colors
• Rules for importing graphics with spot colors
• How to create and apply a gradient
• How to create gradient swatches
• How to apply gradient swatches and use the
gradient tool
Key Terms
CMYK The four process inks in offset
printing: cyan, magenta, yellow, and
black.
Gradient A graduated blend between
two or more colors.
Linear gradient A series of straight
lines that gradate from one color to
another (or through multiple colors).
Process colors Colors you create by
mixing varying percentages of cyan,
magenta, yellow, and black (CMYK) inks.
Radial gradient A series of concen-
tric circles in which the starting color
appears at the center of the gradient, then
radiates out to the ending color.
Spot colors Non-process inks that are
manufactured by companies. Spot colors
are special pre-mixed inks that are
printed separately from process inks.
Swatches palette The palette that
contains pre-defined color swatches.
Unnamed colors Any colors you cre-
ate that aren’t saved to the Swatches
palette.
INDESIGN 5-38 Working with Color
6-1
PLACING AND
LINKING GRAPHICS
6
chapter
1. Use the Links palette.
2. Place vector graphics.
3. Place bitmap graphics.
4. Use libraries.
As a layout program, InDesign offers you a
number of options for importing graphics
from other applications and placing them
into your design. Chapter 6 focuses on
doing just that. First, you will explore the
Links palette, a great resource for manag-
ing the relationship between your
InDesign document and the imported files.
The Links palette allows you to find
imported graphics quickly and easily. It
tells you the status of the link to a graphic,
and if the graphic has been modified or if
it’s missing.
Lessons 2 and 3 focus on vector graphics
and bitmap graphics. You’ll learn the
difference between the two and what rules
apply when working with each. When
working with bitmap graphics, you’ll
explore InDesign’s powerful relationship
with Photoshop and how it allows you to
manipulate Photoshop graphics in
InDesign. You’ll remove a white back-
ground from an image, and you’ll load
alpha channels and clipping paths—all
without having to open Photoshop!
Finally, you’ll learn about libraries,
another great feature for managing your
work with imported graphics.
6-2
PLACING AND
LINKING GRAPHICS
chapter
6