Professional ASP.NET 1.0 Special Edition- P10 potx
Bạn đang xem bản rút gọn của tài liệu. Xem và tải ngay bản đầy đủ của tài liệu tại đây (1.27 MB, 40 trang )
& objSender.SelectedItem.Value & "'<br />"
End Sub
Notice how, in this case, we simply access the SelectedItem property of the list control, which returns a reference to
the first item in the list that is selected.
Extracting Multiple Selected Values from List Controls
Both of the lists in the previous example allow only a single selection to be made. This is always the case with a
RadioButtonList, but we can specify that a ListBox control will accept multiple selections by setting the
SelectionMode property to the value ListSelectionMode.Multiple. And of course, in a CheckBoxList we will
usually allow multiple item selection, as this is generally the sole reason for using this type of control.
We extract multiple selected values from a list control using exactly the same technique as we did with the
HtmlSelect
control in the previous section. We iterate through all the
ListItem elements in the Items collection exposed by the list
control, checking the
Selected property of each one and extracting the Text and Value properties for those that are
selected:
Sub MyCode(objSender As Object, objArgs As EventArgs)
Dim strResult As String
strResult = "The following items were selected:<br />"
Dim objItem As ListItem
For Each objItem in objSender.Items
If objItem.Selected Then
strResult += objItem.Text & " = " & objItem.Value & "<br />"
End If
Next
outMessage.InnerHtml = strResult
End Sub
Other ASP.NET Rich Controls
To finish off this chapter, we will look briefly at three other controls that are provided with ASP.NET. These are called rich
controls because they create the entire HTML required to implement a complex task in one simple operation. A typical
example of this is the
Calendar control, which can create a complete working calendar within a web page. All you do is
add the control to your page and set a few properties. The three controls we'll be covering here are:
Control Description
<ASP:AdRotator>
Displays an advertisement banner that changes on a predefined schedule.
<ASP:Calendar>
Displays a calendar showing single months and allows selection of a date.
<ASP:Xml>
Displays the content of an XML document or the result of an XSL or XSLT transformation.
Using the Rich Controls
The rich controls we are looking at in this section are very useful when you need to perform the specific tasks for which
they are designed. We don't have room to provide exhaustive coverage here, but by now you should be familiar with the
way that server controls work, and you should have no problem getting to grips with these. You can use the demonstration
application we provide (open the Other Controls section of the left-hand menu) to see the output that they generate, and
experiment with the various property settings.
The ASP:AdRotator Control
The
AdRotator control has been part of ASP almost since the beginning, and is a popular way to display advertisement
banners on a quasi-random pre-defined schedule. A new version is included as part of the default ASP.NET installation,
and it has a couple of extra features.
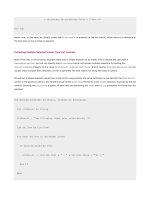
Probably the most useful is the ability to filter the list of banners that will be displayed dynamically, so that you can, for
example, display banners for products or organizations that are relevant to a specific page or user. The filtering is carried
out through the
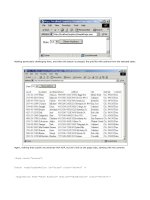
KeywordFilter property. You can see that we have set this property in the following screenshot from
our demonstration application:
The code we used to insert the control into the page for this example is:
<ASP:AdRotator id="MyControl" AdvertisementFile="adverts.xml"
runat="server" />
Previous versions of the AdRotator control relied on a text file to specify the advertisements and the schedule for display
of each one. As the whole world is now going XML crazy, the new control follows the trend by using an XML file to define
the schedules. The file path is specified in the
AdvertisementFile property, as shown in the sourcecode for the page
above (you can't change this property in the demonstration page).
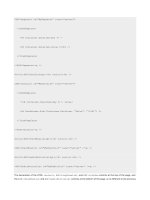
The AdRotator Schedule File
An example of the format of the XML schedule file is:
<Advertisements>
<Ad>
<ImageUrl>ads/asptoday.gif</ImageUrl>
<NavigateUrl>
<AlternateText>ASPToday</AlternateText>
<Impressions>20</Impressions>
<Keyword>Articles</Keyword>
</Ad>
<Ad>
<ImageUrl>ads/wrox.gif</ImageUrl>
<NavigateUrl>
<AlternateText>Wrox Press</AlternateText>
<Impressions>20</Impressions>
<Keyword>Books</Keyword>
</Ad>
more <Ad> elements here
<Advertisements>
The ImageUrl and NavigateUrl are self-explanatory. The AlternateText is used as the HTML alt attribute of the
<img> element that the AdRotator control creates, and the Impressions value is used to control how often this
banner will appear. The total for this element in all the
<Ad> elements in the schedule file is calculated, and the ratio of
impressions can then be calculated by the control and used to select the advertisement to display.
The
Keyword element is used to allocate each advertisement to a 'category' with that name. When you set the
KeywordFilter property, only advertisements with the specified value for their Keyword element are included in the
selection and display process.
The ASP:Calendar Control
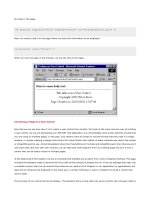
By far the most complex server control in ASP.NET is the
Calendar control. This creates a fully interactive
'one-month-at-a-time' calendar as an HTML table. The next screenshot shows the default output from the
Calendar
control, and you can see that it really is a 'rich' control in that it saves an incredible amount of effort on behalf of the
developer:
The code we used to insert the control into the source of the page is:
<ASP:Calendar id="MyControl" runat="server" />
Notice that it automatically defaults to the current date if we don't specify a date.
If you scroll to the bottom of this page, you can see some of the properties that we can set to change the appearance.
These don't include the various calendarspecific style properties that are available, such as
DayHeaderStyle,
DayStyle, MonthStyle, and so on:
The Calendar control also exposes a couple of events that we can use to detect when the user interacts with the control.
We can write an event handler for the
SelectionChanged event, and obtain the date that the user selected by querying
the
SelectedDate property of the control within that event handler.
We can also create an event handler for the
VisibleMonthChanged event. In this case, the second parameter of the
event handler is a
MonthChangedEventHandler object, which exposes two properties named NewDate and
PreviousDate that contain the original (before the month was changed) and current dates (the date after the month
was changed).
The ASP:Xml Control
The final control we're looking at is the
ASP:Xml server control. This can be used to display the content of an XML
document, or to perform a server-side transformation on the document using a suitable XSL or XSLT stylesheet. Note that
this control does not inherit from
WebControl. It inherits directly from Control, and so doesn't have all the
displayoriented properties that the other Web Form controls do.
Don't be confused into thinking that this control creates an IE 5-style
<xml> element - it doesn't. It is a server-side object
that outputs XML or the result of an XSL or XSLT transformation to the client.
There are six properties available for the
Xml control. We specify the source document using one of the first three
properties in the following table, and the stylesheet (if we're using one) in one of the next two properties shown in the
table:
Property Description
Document
A reference to an
XmlDocument object that contains the XML document we want to display
or transform. We look at how we create and use the
XmlDocument object in Chapter 11.
DocumentContent
A string containing the text of the XML document we want to display or transform.
DocumentSource
A string that contains the physical or virtual path to the XML document we want to display
or transform.
Transform
A reference to an
XslTransform object that contains the XSL or XSLT stylesheet to use for
transforming the XML document before displaying it. We look at how we create and use the
XslTransform object in Chapter 11.
TransformSource
A string that contains the physical or virtual path to the XSL or XSLT stylesheet we want to
use for the transformation.
TransformArgumentList
A reference to an
XsltArgumentList object that contains the arguments to be passed to
the stylesheet.
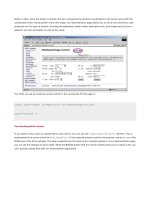
In our demonstration page, we have set the DocumentSource property to books.xml. The control loads this document
from disk and displays it in the page. Of course, the XML elements aren't visible, because the browser attempts to render
the XML as though it were HTML and so only the text content of the elements is shown in the page. If you view the source
in your browser, however, you'll see the XML that the control sends to the client. We have also included a hyperlink in the
page so that you can open the XML document in a separate browser window and see it:
The code we used to insert the control into the source of the page is:
<ASP:Xml id="MyControl" DocumentSource="xml/books.xml" runat="server" />
If you compare the original disk file with the output of the control, you will also see that the control has removed
'insignificant whitespace' from the result. In other words, it strips out all the carriage returns, spaces, and tab characters.
Using an XSL Stylesheet
We have also provided three simple XSL stylesheets that you can use to transform the XML document. They transform the
XML into HTML (because we are displaying it in the browser in our application). For example, the
reportview.xsl
stylesheet generates a sales report from the data in the XML document:
Summary
In this chapter, we have looked at the second major set of server controls that are provided as part of the default ASP.NET
installation - the Web Form controls. These are a mixture of simple controls that emulate the HTML controls we looked at
in the previous chapter, and more complex controls that provide 'rich' output containing more than one HTML element.
The Web Form controls also have other advantages over the HTML controls. They provide a consistent object model, using
the same property name in all the controls for the same 'value'. An example is the
Text property, which sets the visible
text within the control irrespective of which HTML element is output, and which HTML attribute carries the text content.
This makes working with them easier, and also simplifies the task of building tools or applications that will create a user
interface automatically.
The Web Form controls we examined in this chapter fall into three groups:
The basic controls, such as Image, Hyperlink, TextBox, and RadioButton
The list controls, such as ListBox, DropDownList, and RadioButtonList
The rich controls, such as AdRotator, Calendar, and Xml
We showed you the common properties for each one, and demonstrated them through a sample application that we
provide. We a lso looked a t how we react to events that these controls expose, and some of the other issues involved when
we come to use them.
The topics we covered in this chapter were:
The ASP.NET Web Form server controls in general
The basic Web Form input and navigation server controls
The Web Form server controls used for building lists
The 'rich' Web Form controls that provide complex compound interface elements
However, we didn't examine all the list controls in this chapter, as there are some very specialist ones such as
Repeater,
DataList, and DataGrid. We look at these in the next chapter.
List Controls and Data Binding
Most dynamic web sites, and just about every web-based application, will need to access a data source at some point. ASP
has long been capable of accessing various kinds of data store, such as relational databases, e-mail servers, XML
documents, or text files and it's relatively simple to manipulate, format, and display data in a range of ways. However,
though it's simple to do, it always requires writing code - and that code can become quite extensive, making it difficult to
manage and debug.
ASP.NET introduces some new ways to manage and present data of all kinds. In later chapters we'll be looking at the
whole concept of data management for both relational and XML data. However, in this chapter we'll stick to looking at
some of the new ways that we can display data in our web pages and applications.
This might seem to be an odd ordering of topics, but data presentation in ASP.NET is managed mainly through a series of
new server controls that are specially designed to work with a whole range of types of data- not just relational or XML data.
This means that the techniques for working with these controls are akin to the techniques for creating ASP.NET pages that
we've examined in previous chapters.
What's more, we don't need a deep understanding of where the data comes from, or how it is extracted from a data store,
to be able to use the new data presentation controls. The fundamentally disconnected design of the data management
features within the .NET Framework means that we can easily separate the business rules that create and expose data
from the code that creates the display.
So, in this chapter, we'll deal with the way that the controls work, and how we use them. In later chapters we'll be free
to examine relational and XML data management techniques, without getting bogged down in presentation issues. The
topics we'll cover here are:
What data binding actually is, and how it works
How we can bind controls to single data values
How we can bind list controls to sets of data values
How we can change the appearance of data-bound controls
How we can use data-bound controls to edit and update the source data
Obtaining the Sample Files
All the examples used in this chapter are included with the sample files available for this book from
You can also run many of them on-line at
You'll find a default.htm menu page in a folder named data-binding:
Some of the examples require a connection to a database. We've provided a Microsoft Access .mdb database file and two
SQL scripts to create the database in SQL Server. These files, and instructions on creating the database, are included in
the
data-binding/database folder.
You must edit the file named
connect-strings.ascx (found in the data-binding/global folder of the samples) to
specify the path to the
.mdb file and/or the name of your database server.
Data Binding - The Concepts
The exact meaning of data-binding can be quite difficult to pin down. In programming languages such as Visual Basic, and
applications such as Microsoft Access, the term data binding describes the way that values from a collection of data, such
as a recordset, are connected to controls on a form. As the form is used to navigate through the records, the values of
each of the columns are automatically displayed in the controls. The controls are bound to the columns in the recordset,
and we don't have to write any code to display the values or update the original data source.
However, the disconnected nature of the HTTP protocol means that the traditional client/server data binding used in Visual
Basic and Access cannot be used over an HTTP-based network connection. When Internet Explorer 4 appeared, it included
some clever client-side and server-side COM components that allowed a similar technique to be used over HTTP. This was
referred to as client-side data binding, and worked well. However, the browser-specific requirements of this technology,
combined with suspicions about security that it raised, meant that it didn't really catch on in a big way.
Doing It All on the Server
The continuing diversification of client devices means that any browser-specific technology is unlikely to have long term
appeal. Accordingly, the .NET Framework vision is to provide support for all types of client. Ultimately, this means that
either we have to build applications that detect the client device type and change their behavior accordingly, or implement
all the functionality on the server.
In many cases doing it all on the server is a good plan, as it allows us to exert control over output and security within our
applications. Developments in server and Web farm technologies make it much easier to provide scalable and reliable
sites, and ASP.NET is designed to create fast responses to client requests through pre-compilation and caching.
So how does this relate to the topics of this chapter? The answer is that in .NET we are moving towards the concept of
server-side data binding. We can take advantage of the time saving and code saving features of data binding - just as we
would with Visual Basic and Access - but use it across HTTP in a disconnected environment like the Web.
With data binding in ASP.NET, we simply tell the controls or the page where to find the data. It extracts the values and
builds the page with this data in it. We'll see how next.
Displaying Data - ASP versus ASP.NET
With ASP 3.0 and earlier, we can use components, or a technology such as ADO, to create a
Recordset object that
contains rows of data for display. To get them into the page, we would usually iterate through the rows- extracting values,
formatting them, and inserting them into the outputsomething like this:
' assuming we've got a Recordset object containing the data
Response.Write "<table>"
Response.Write "<tr><th>Date</th>"
Response.Write "<th>Subject</th>"
Response.Write "<th>User Name</th>"
Response.Write "<th>Content</th></tr>"
Do While Not objRecs.EOF
strDate = FormatDateTime(objRecs("dtDate").value, vbLongDate)
Response.Write "<tr><td>" & strDate & "</td>"
Response.Write "<td>" & objRecs("tSubject").value & "</td>"
Response.Write "<td>" & objRecs("tUserName").value & "</td>"
Response.Write "<td>" & objRecs("tContent").value & "</td></tr>"
objRecs.MoveNext
Loop
Response.Write "</table>"
objRecs.Close
We have to do all this just to get a simple unformatted table containing values from the rows in the recordset. In ASP.NET
we can do the same in only two lines of code by using a server control:
<! the server control located in the HTML section of the page >
<ASP:DataGrid id="MyDataGrid" runat="server" />
' assuming we've got a DataView object containing the data
MyDataGrid.DataSource = objDataView
MyDataGrid.DataBind()
Data access objects such as
DataView are covered in detail in the following chapters.
The server control does much the same as the ASP 3.0 code we saw.It automatically creates an HTML table with the
column names in the first row, followed by a series of rows that contain the values from each of the source data rows.
What's more, we can now change the appearance of the table by just setting a few properties of the
ASP:DataGrid
control; we can add automatic sorting with only a two-line subroutine; we can add automatic paging, with each page
showing the number of rows we require and with links to the other pages, by just setting one property and writing two
lines of code.
And this only scratches the surface. This control can be used in ways that will cater for almost any dataset presentation
requirement. What's more, there are several other controls that are designed to display repeated data such as this, and
even more that work with a single item of data at a time through server-side data binding.
Data Binding Syntax
We actually used data binding in a couple of the examples in Chapters 5 and 6, but we didn't discuss how it worked in any
depth. We'll concentrate on the theory here, and then move on to look at how we can use the new ASP.NET server controls
to really get the benefits of server-side data binding.
The principle behind server-side data binding is to get ASP.NET to insert one or more values from a data source into the
page, or into a control on the page. The basic syntax uses a construct that looks like a server-side script block, with a '
#'
character as an indicator that this is actually a data-binding statement:
<%# name-of-data-source %>
We cannot place code that we want to be executed within this block as although it looks like a server-side script block, it
isn't. Only specific data-binding syntax expressions can be used within the block.
There are two basic scenarios in which we would want to bind a control:
Single-value data binding- when we have a single value that we want to bind to a control. For example we might
want to set one of the properties (or attributes) of that control. In this case, the bound value is often used to set
the displayed content of the control (the
Text or Value property), and is suited to controls that only display a
single value, such as the
<input>, ASP:TextBox, and ASP:Hyperlink controls.
Repeated-value data binding- when the data source contains more than one value. For example, we might want
to bind a list, a collection, or a rowset to a control that can display more than one value. Examples include the
various types of list controls such as
<select>, ASP:ListBox, and ASP:CheckBoxList.
Although the techniques for both these types of binding are fundamentally similar we'll examine the concepts of each
separately. We'll start with single-value data binding.
Single-Value Data Binding
When we bind controls to single values such as properties, methods, or expressions, we use one of the following simple
types of syntax:
<%# property-name %>
or:
<%# method-name(parameter, parameter, ) %>
or:
<%# expression %>
We can see from this that there are several possible sources for the value that will be bound to the control, and we'll look
at these next.
Sources of Data for Single-Value Binding
The source of the value that we can use with single-value data binding includes:
The value of a property declared in either the page, or in another control or object
The result returned from a method declared in either the page or in another control or object
The result of evaluating an expression
All of these must return a single value that can be bound to a control or placed directly within a page. For example, if we
declare a property named
ImageURL within the code of the page like this:
ReadOnly Property ImageURL() As String
Get
'read-only property for the Page
Dim strURL As String
'some code would be here to calculate the value
'we just set it to a fixed value for illustration
strURL = "myimage.gif"
Return strURL
End Get
End Property
We can insert the value directly into the page itself, or as the value of an attribute for a control, using:
<%# ImageURL %>
Our only remaining task is to activate the binding when the page is loaded. This is done using the DataBind method- we'll
look at this in detail shortly:
Sub Page_Load()
DataBind()
End Sub
Using Controls with Bound Values
The real advantage in using bound values is that the data binding statement block can be used within other controls, and
the value of one control can come from another control. For example, we can link a label to a textbox by specifying the
Text property of the TextBox control as the Text property of the Label control:
<form runat="server">
<ASP:TextBox id="MyTextBox" runat="server" />
<ASP:Label id="MyLabel" Text="<%# MyTextBox.Text %>" runat="server" />
<input type="submit" />
</form>
<script language="VB" runat="server">
Sub Page_Load()
DataBind()
End Sub
</script>
Now, each time the page is submitted, the value in the Label control named MyLabel will be the value that was present
in the
TextBox control named MyTextBox - and to accomplish this we don't need to write any code other than to call the
DataBind method.
This technique isn't limited to just setting the
Text property of a control. We can use it to insert a value into almost any
control. For example, to specify the Src property of an ASP:Image control we would use:
<ASP:Image Src="<%# ImageURL %>" ImageAlign="middle" runat="server" />
To specify the text caption of an ASP:CheckBox control we would use:
<ASP:CheckBox Text="<%# ImageURL %>" runat="server" />
To specify the text and target URL for an ASP:Hyperlink control we would use:
<ASP:Hyperlink Text="<%# ImageURL %>" NavigateUrl="<%# ImageURL %>"
runat="server" />
This technique works in the same way for those HTML controls and elements that aren't actually server controls. For
example, to specify the text that appears in an HTML text control element we would use:
<input type="text" value="<%# ImageURL %>" />
To specify the caption of an HTML Submit button we would use:
<input type="submit" value="<%# ImageURL %>" />
Or to specify the target URL and hotlink text in an HTML <a> element we would use:
<a href="<%# ImageURL %>"><%# ImageURL %></a>
If required, we can concatenate explicit values with the bound value. For example, we can use it to specify just the file
name part of a complete URL:
<a href=" ImageURL %>">
View the file named '<%# ImageURL %>'</a>
Activating the Binding
As we noted earlier, once we've specified the data-binding statement blocks in a page we must activate the binding when
some other event occurs (usually when the page is loaded) to get the appropriate values inserted. If we don't, the ASP
engine ignores the data-binding blocks when the page is compiled, and they won't be replaced by the intended value.
We activate the binding process using the
DataBind method, which is available at several places within the hierarchy of
the page:
To bind all the controls on the page we call the DataBind method of the Page object (As Page is the default
object we can use
Page.DataBind or just DataBind as we've done in the examples so far). This is the only
way to activate the binding for the controls that are not specifically designed for use with data binding (which
includes the examples we've looked at so far). It also binds any values that are inserted directly into a page,
rather than into a control of some kind.
To bind just a single control, we call the DataBind method of that control. This only applies to those list controls
that are designed specifically for use with data binding (we'll meet these shortly).
To bind just one row or item object from the data source within a control, we call the DataBind method of that
object. Again, this only applies to those list controls that are designed specifically for use with data binding.
A Single-Value Data-Binding Example
As an example of some of the ways that we can use data binding with single values, we've provided a sample page,
Simple
Single-Value Data Binding
(simple-single-binding.aspx):
This example page shows how single-value data binding can be used with a whole range of controls. Click the [view source]
link at the bottom of the page if you want to see the complete sourcecode for the page. It uses the code we saw earlier
to expose a simple property named
ImageURL. Each of the controls in the page then uses this property value to set one
or more of their properties. Finally, the code in the
Page_Load event handler calls the DataBind method of the Page
object to bind all the controls on the page to the property value:
Sub Page_Load()
Page.DataBind() 'bind all the controls on the page
End Sub
We've also provided a very similar example page that binds to the result of a method rather than a property value. This
page,
Single-Value Data Binding to a Method Result (method-single-binding.aspx) looks identical to the previous
example when it's displayed in a browser. However, it differs in its definition of a method named
ImageURL, which returns
the value "myimage.gif":
Function ImageURL() As String
Return "myimage.gif"
End Function
The only other difference is that now the expressions in the data-binding blocks include parentheses, because the data
source is a method (although in Visual Basic it works just as well without them):
<ASP:Label Text="<%# ImageURL() %>" runat="server" />
Repeated Value Data Binding
Single-value data binding is a useful technique, but data binding becomes a lot more valuable when we have repeating
sets of values that we want to display - for example a rowset from a relational database, or an array of values.
ASP.NET provides eight list controls that are designed to work with repeated-value data binding. They have a set of
properties and methods that allow them to be connected to a data source. Then, they automatically create a display row
or display item for each row or item in the data source. For example, a
<select> list control will automatically create an
appropriate set of
<option> elements to display all the rows or items in the data source.
One obvious advantage with these controls is that we don't have to provide any of the HTML ourselves. The control does
it all automatically (although we can add HTML elements to the output to customize it if required).
The List Controls Designed for Repeated Binding
The eight controls specifically designed for use with server-side data binding are:
The HTML <select> element, implemented by the .NET class
System.Web.UI.HtmlControls.HtmlSelect. When presented with a suitable source of repeating data
values it creates a standard HTML
<select> list with repeating <option> elements.
The ASP:ListBox control, implemented by the .NET class System.Web.UI.WebControls.ListBox. This
control also creates a standard HTML
<select> list with repeating <option> elements. By default, it creates a
list-box rather than a drop-down list like the
<select> element - though the appearance of both can be changed
by setting the number of items to display.
The ASP:DropDownList control, implemented by the .NET class
System.Web.UI.WebControls.DropDownList. Again, this control creates a standard HTML <select> list
with repeating
<option> elements. However, by default, it creates a drop-down list rather than a list-box.
The ASP:CheckBoxList control, implemented by the .NET class
System.Web.UI.WebControls.CheckBoxList. This control creates a list of standard HTML <input
type="checkbox"> elements - one for each row or item in the data source.
The ASP:RadioButtonList control, implemented by the .NET class
System.Web.UI.WebControls.RadioButtonList. This control creates a list of standard HTML <input
type="radio"> elements - one for each row or item in the data source. It also sets the HTML name attribute
(represented by the
GroupName property of the control) to the same value so that the radio buttons in the list
are mutually exclusive.
The ASP:Repeater control, implemented by the .NET class System.Web.UI.WebControls.Repeater. By
default this control generates no visible interface or formatting, and no HTML content. It simply repeats the
content defined within the control once for each row or item in the data source.
The ASP:DataList control, implemented by the .NET class System.Web.UI.WebControls.DataList. This
control repeats the content defined within the control once for each row or item in the data source, either
enclosing each item in an HTML table row, or delimiting the items using an HTML
<br /> element to create a list.
It can also lay out the content in more than one column, and process items vertically or horizontally within the
columns.
The ASP:DataGrid control, implemented by the .NET class System.Web.UI.WebControls.DataGrid. This
is a fully-featured grid control designed for use with data contained in a
DataView, DataSet or DataReader
object, or a collection. It generates a visible interface by way of an HTML table, automatically adding the column
or item names to the header row. There are also many other useful features built in to make it easy to customize
the display (which we'll look at later on).
The next screenshot (taken from the example page we'll look at shortly) shows the physical appearance of these controls:
The Properties of a Repeated Binding Control
All the controls designed for use with server-side data binding expose properties and methods that we use to manage the
binding. The properties are:
Property Description
DataTextField
Specifies which field or column in the data source contains the values to be used for display. For
example, the values used as the text for <option> elements in a list box, or the captions of the
checkboxes in a
CheckBoxList control.
DataValueField
Specifies which field or column in the data source contains the values to be used as the
Value
property of the control elements. For example, the values used as the
value attribute for <option>
elements in a list-box.
Table continued on following page
Property Description
DataTextFormatString
The format string to be used for the values from the column or field specified in the
DataTextField property when displaying these values in the control. For example,
"
{0:C}" for formatting currency values, or "{0:dddd MMMM dd, yyyy}" for formatting
dates. (We'll look at this topic in more detail later on.)
DataMember
Specifies the set of rows to bind to when the data source contains more than one rowset. For
example the name of the table when binding to a
DataSet object.
There are many other properties that are specific to individual controls, and which govern how the content is displayed.
We'll be looking at most of these as we see some example pages that use the controls later in this chapter.
The Methods of a Repeated Binding Control
All of the controls designed for use with repeated-value data binding expose at least two methods that we use when
working with bound data. They are:
Method Description
DataBind
Causes the control to populate itself with the data from the data source- in effect activating the bindings
that we specify within the declaration of the control.
FindControl
Used to get a reference to a child control within the container (that is, within the bound control). This is
useful when we want to check the value in another child control (such as a table cell) within the same row
as the current control. It is normally used within event handlers that are executed once for each row or
item- for example the
DataBinding event.
The Events of a Repeated Binding Control
There is a wide range of events raised by the list controls, of which many are specific to the control type. However, there
are two that are common across all list controls designed for use with data binding:
Event Description
DataBinding
Occurs for each row or item in the da ta source as that row or item is created within the control
during the execution of the
DataBind method. The row or item is passed to the event within
the event parameters, and code can examine and modify the content of that row or item as
the container control is populated.
SelectedIndexChanged
Occurs when the currently selected item changes and the page is posted back to the server.
It allows code to change the display to reflect the user's selection.
Sources of Data for Repeated-Value Binding
So, having looked at the controls, the next question to ask is what kind of data source can we bind to them? In technical
terms, the list controls can be bound to any data source that implements the
IEnumerable, ICollection, or
IListSource interface. In practical terms this means that the list controls can be bound to:
A Collection, such as the collection of values in Request.Form, the collection of tables in a DataSet
object's
Tables collection, or a collection we create and populate ourselves.
An ArrayList, which contains a simple list of values. This is a good way to create a list of items for display in,
for example, a list-box.
A HashTable, which contains items that are identified by a key, rather like a Dictionary object. Each item has
a
Key and a Value property, which makes this type of data source ideal for things like list-boxes, in which the
text to be displayed and the value to be returned when that item is selected are different.
An ADO.NET DataView object, which contains rows from a DataTable that is populated from a database, or is
manually created and populated using code. (We'll discuss the whole topic of creating and manipulating
relational data in later chapters.)
An ADO.NET DataSet object, which contains one or more DataTable objects that are populated from a
database, or which are manually created and populated using code. This is a disconnected object that is easy to
pass between the tiers of an application. The actual table to which the control is bound is specified in the
DataMember property of the control.
An ADO.NET DataReader object, which provides connected forward-only and read-only access to a database
for extracting data. It can expose one or more rows of data, and essentially behaves in the same way as a
DataView object for binding. For performance reasons we should aim to use a DataReader rather than a
DataView or DataSet when possible. We'll explore the scenarios that do require the use of a DataView or
DataSet later in the chapter.
Chapter 15 provides a full examination of the various types of collection in the .NET Framework. Chapters 8, 9, and 10
contain a full examination of how we can work with relational data and the
DataView, DataSet, and DataReader
objects.
The Syntax for Repeated-Value Data Binding
When we bind controls to single values, such as properties, methods, or expressions (as we saw earlier), we use this
simple syntax: