Beginning Ajax with ASP.NET- P17 doc
Bạn đang xem bản rút gọn của tài liệu. Xem và tải ngay bản đầy đủ của tài liệu tại đây (412.75 KB, 15 trang )
Switch back to the design view and double-click the btnLongRequest button. This action will switch
you to the code window and wire up a button click event method.
Update the
Manager class by inheriting from the ComfortASP.ComfortASP_Page class. The only other
changes required for this demonstration are to add a short delay when the button is clicked and to print
a message on the label when the request is completed.
Notice that you are not setting the page’s
HiddenFormPostBack property. The ComfortASP.NET
Manager control is responsible for notifying the application that this page is Ajax-enabled.
public partial class Manager : ComfortASP.ComfortASP_Page
{
protected void Page_Load(object sender, EventArgs e)
{
}
protected void btnLongRequest_Click(object sender, EventArgs e)
{
System.Threading.Thread.Sleep(5000);
this.lblResult.Text = “Done”;
}
}
Now run the page to demonstrate its behavior.
Experiment with the manager settings by changing the
HiddenRequestTimeout property to 3 in the
ASPX file. This allows the page to time out before the server is done processing, and you see how the
framework will notify the user of a timeout. Change the
DisableFormWhilePostBack property, and
note how the controls on the page are no longer disabled when you make a call to the server. Finally, you
can see the effect of the
TransferDifference property by setting it to false and clicking on the button.
The ComfortASP.NET demo version includes a bar graph that represents the amount of information sent
across the wire. When
TransferDifference is turned off, you can see by the graph how much more
data is transported to the client.
Example 4: PanelUpdater Control (Periodic Refresh)
The ComfortASP.NET PanelUpdater is a control that allows you to target specific areas of a page to
update. You may decide that you want to change the contents of a section of your page, but the rest of
the page should remain unchanged. The
PanelUpdater wraps up many of the implementation details,
allowing you to easily access page segments.
The
PanelUpdater works by being nested within an ASP.NET Panel control. The panel acts as the
overall container and the
PanelUpdater, simply by being placed inside the panel, will expose the con-
tainer to ComfortASP.NET. The control exists on the page to service interaction between the browser
and the server and will not render anything visible to the user.
The ComfortASP.NET
PanelUpdater is associated to its parent panel, so you may have multiple
Panel/PanelUpdater combinations on a single page.
216
Chapter 9
12_78544X ch09.qxp 7/18/06 3:16 PM Page 216
Imagine for a moment that you want to create a page that will continually engage with the server to see
if there are new messages available for the user. The
PanelUpdater is a perfect choice for a requirement
like this for two reasons:
❑ Reason one is that the control will allow you to target a portion of the page and allow the system
to update only that region of the page you have specified.
❑ Reason two is that the
PanelUpdater features a timer interval that, once set, will instruct the
control to send requests to the server at every n number of seconds. This pattern is known as the
Periodic Refresh pattern, and you will also implement this same behavior in the next section,
using MagicAjax.
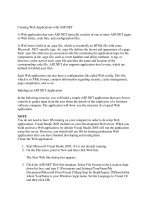
The following example implements a page with the requirements just described. Figure 9-5 is an example
of how the finished product will look.
Figure 9-5
The ComfortASP.NET demo version will automatically print the bar graph at the top of the page, indicat-
ing the amount of data transferred with a link back to the ComfortASP.NET web site. The full version does
not have this feature.
The page includes a panel that will contact the server every 3 seconds to update the page with the new
message count.
217
Other Ajax Frameworks for .NET
12_78544X ch09.qxp 7/18/06 3:16 PM Page 217
Try It Out Using PanelUpdater Control
Begin by adding a new web form to the solution, naming it PanelUpdater.aspx. Make sure that you are
in source view, and add the following line after the Page directive line found at the top of the ASPX page.
<%@ Register Assembly=”ComfortASP” Namespace=”ComfortASP” TagPrefix=”cc1” %>
The Register tag will make the ComfortASP.NET framework available to the page.
Continue by adding the following markup between the
<div> tags:
<asp:Panel ID=”pnlContent” runat=”server”>
<cc1:ComfortASP_PanelUpdater
ID=”ComfortASP_PanelUpdater1”
TimerIntervalUpdate=”3”
Active=”True”
runat=”server” />
Message Count:
<asp:Label
ID=”lblMessageCount”
runat=”server” />
</asp:Panel>
The ASP.NET panel is the container for the section of the page to update. The ComfortASP.NET
PanelUpdater control will handle generating the client-side code to create the timeout behavior. Be sure
to activate the
PanelUpdater by setting the Active property equal to true. The TimerIntervalUpdate
property will take a value for the number of seconds you want the browser to wait before contacting the
server. Finally, the label at the end of the listing will take the latest information from the server and print
the message count back to the user.
Now switch to the code window to update the
PanelUpdater class.
public partial class PanelUpdater : ComfortASP.ComfortASP_Page
{
private int MessageCount
{
get
{
if (this.ViewState[“messageCount”] == null)
{
return 0;
}
else
{
return Convert.ToInt32(this.ViewState[“messageCount”]);
}
}
set
{
this.ViewState.Add(“messageCount”, value);
218
Chapter 9
12_78544X ch09.qxp 7/18/06 3:16 PM Page 218
}
}
protected void Page_Load(object sender, EventArgs e)
{
this.HiddenFormPostBack = true;
this.UpdateMessageCount();
}
private void UpdateMessageCount()
{
this.MessageCount++;
this.lblMessageCount.Text = this.MessageCount.ToString();
}
}
As always, the class will inherit from ComfortASP.ComfortASP_Page instead of System.Web.UI.Page.
You will Ajax-enable the page by turning on
HiddenFormPostBack property in the load method. The
MessageCount property is a strongly typed wrapper to a ViewState entry that persists the message
count. If the
ViewState entry does not exist, the wrapper will initialize the value to 0. Finally, the
UpdateMessageCount method will simply increment the MessageCount property and report the new
count to the label on the page.
You can now run the page to demonstrate its behavior.
What You Have Learned
The ComfortASP.NET framework is an Ajax library that is unobtrusive for a .NET developer. The frame-
work allows you to implement Ajax functionality in your ASP.NET pages without having to manually
code JavaScript or deal with XML. ComfortASP.NET also features a number of useful controls that allow
you to administer the framework’s settings and behaviors from a centralized location.
MagicAjax
URL: www.magicajax.net
MagicAjax is a panel-based, changed-HTML framework that makes it easy for you to add Ajax function-
ality to your ASP.NET applications. The architects of MagicAjax created a framework that integrates into
your application with a light touch. Once the site is configured to communicate with MagicAjax, most
Ajax functionality can be achieved by adding a MagicAjax Panel to the page. You do not have to inherit
from a base class, nor are there any custom controls to declare. Other than adding the MagicAjax Panel
to your page, the ASPX and code-behind code is unchanged from how you would write your pages in
the traditional postback model.
Setup
Before you begin using MagicAjax, you must first download the files and then reference them in a web pro-
ject. The following steps help you build a solution that houses all the samples you create for the MagicAjax.
219
Other Ajax Frameworks for .NET
12_78544X ch09.qxp 7/18/06 3:16 PM Page 219
Downloading Files
1. If you haven’t already done so, download the zip file containing the MagicAjax DLL from
DLLs.zip.
2. Extract the files and place them in a convenient location.
Creating the Solution
1. Open Visual Studio 2005.
2. Click File➪New➪Website.
3. Select the ASP.NET Website template.
4. Choose File System under location.
5. Set the path to c:\BeginningAJAX\Chapter9\MagicAjaxDemo.
6. Choose C# as the language.
7. Click OK.
Referencing ComfortASP.NET
1. In the Solution Explorer, right-click on the project name and select Add ASP.NET Folder.
2. Choose App_LocalResources to create the ASP.NET folder.
3. Copy MagicAjax.dll (from the zip file you extracted) to the App_LocalResource folder.
4. Create a reference to the MagicAjax.dll.
Updating Web.Config
Open the Web.Config file and add the following code just after the open <system.web> tag:
<pages>
<controls>
<add
namespace=”MagicAjax.UI.Controls”
assembly=”MagicAjax” tagPrefix=”ajax”/>
</controls>
</pages>
<httpModules>
<add
name=”MagicAjaxModule”
type=”MagicAjax.MagicAjaxModule, MagicAjax”/>
</httpModules>
Your application is now configured to use MagicAjax.
Using MagicAjax
Now that you have MagicAjax set up on your machine, you may begin implementing the examples.
Each example will expose a new layer of the MagicAjax framework giving you a taste of the library’s
220
Chapter 9
12_78544X ch09.qxp 7/18/06 3:16 PM Page 220
features and strengths. The coming examples will demonstrate some of MagicAjax stock capabilities as
well as a providing few more involved examples to show you how you might use these techniques in
the real world.
Example 1: Hello World
Your MagicAjax examples begin with a Hello World page. With no base class to inherit from and the
Web.Config settings exposing the framework to each page, the page-level configuration is minimal. To
give a MagicAjax page asynchronous functionality, you simply must declare some ASP.NET controls inside
a MagicAjax Panel. This exercise is much like the page you implemented for the ComfortASP.NET frame-
work in that a button click will initiate a request to the server, which in turn will return fresh data to the
client, all without a postback.
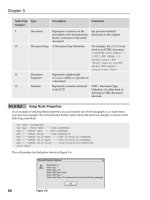
Figure 9-6 is a screenshot of what the page will look like.
Figure 9-6
When you click the Test button, the text “Hello World” plus the current date and time is returned to the
browser.
Try It Out Implementing “Hello World”
Begin by adding a new web form to the solution and name it HelloWorld.aspx. Switch to source view,
and add the following markup between the
<div> tags:
221
Other Ajax Frameworks for .NET
12_78544X ch09.qxp 7/18/06 3:16 PM Page 221
<ajax:ajaxpanel ID=”Ajaxpanel1” runat=”server”>
<asp:Button
ID=”Button1”
OnClick=”Button1_Click”
Text=”Test”
runat=”server” />
<asp:Label
ID=”Label1”
runat=”server” />
</ajax:ajaxpanel>
The reason you do not have access to IntelliSense for the ajaxpanel is that you used a configuration
option that added the MagicAjax functionality to each page in
Web.Config. If you were to change the
configuration to use a
Register directive, then you would see the IntelliSense listings.
Now switch to the code view, and update the
HelloWorld class.
public partial class HelloWorld : System.Web.UI.Page
{
protected void Page_Load(object sender, EventArgs e)
{
}
protected void Button1_Click(object sender, EventArgs e)
{
this.Label1.Text = “Hello World “ + DateTime.Now.ToString();
}
}
Notice that there is no change to the code-behind as compared to a normal ASP.NET implantation with
postbacks. MagicAjax.NET does all the work by adding the controls into an
ajaxpanel.
You can now launch the page in a browser to test its behavior.
Example 2: Delay
Every Ajax framework must deal with the likely event that the server will take a few (or perhaps more)
seconds to complete a given command. When your application experiences such a delay, you must pro-
vide feedback to the user to give them a clue of what is happening. MagicAjax provides a “Loading ”
message out of the box to help you keep your users informed of what is happening on the page.
This next example will force the server to wait 5 seconds before returning data to the server. This delay
will give you an opportunity to see how MagicAjax responds to such a hesitation.
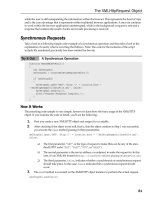
Figure 9-7 is a screenshot showing what the “Loading ” message looks like.
222
Chapter 9
12_78544X ch09.qxp 7/18/06 3:16 PM Page 222
Figure 9-7
Try It Out Demonstrating the Delay Message
Add a new web form to the solution, and name it Delay.aspx. Open the source view of the page and
update the markup between the
<div> tags with the following code:
<ajax:AjaxPanel ID=”AjaxPanel1” runat=”server”>
<asp:Button
ID=”btnDelay”
Text=”Delay”
OnClick=”btnDelay_Click”
runat=”server” />
<asp:Label
ID=”lblDelay”
runat=”server” />
</ajax:AjaxPanel>
Now switch to the code view to update the Delay class.
223
Other Ajax Frameworks for .NET
12_78544X ch09.qxp 7/18/06 3:16 PM Page 223
public partial class Delay : System.Web.UI.Page
{
protected void Page_Load(object sender, EventArgs e)
{
}
protected void btnDelay_Click(object sender, EventArgs e)
{
System.Threading.Thread.Sleep(5000);
this.lblDelay.Text = “Done”;
}
}
When you click the Delay button, the server will hesitate for 5 seconds displaying the MagicAjax
“Loading ” message at the top right of the screen.
You can now launch the page in the web browser to test its behavior.
Example 3: Ajax Call Helper (Periodic Refresh)
If you recall from the examples in the ComfortASP.NET section, you created a page that implemented
the Periodic Refresh pattern. The next example will teach you how to implement the same behavior
using MagicAjax.
The design goals are the same; create a page that will check the server for changes in data at a regular
interval without requiring the user to initiate the request. The page in this example will use MagicAjax’s
AjaxCallHelper class. This class has utilities that help automate your Ajax development. For this
example, you will use the
SetAjaxCallTimerInterval method, which will register a timeout on the
browser and create a request to the server every n seconds.
Figure 9-8 is a screenshot showing what the page will look like when you are done.
Try It Out Using the Ajax Call Helper
Begin by adding a new web form to the solution, and name it AjaxCallHelper.aspx. Switch to source
view, and update the page with the following markup between the
<div> tags:
<ajax:AjaxPanel ID=”AjaxPanel1” runat=”server”>
Message Count:
<asp:Label
ID=”lblMessageCount”
runat=”server” />
</ajax:AjaxPanel>
The ASPX code in this example is straightforward. You create a label to hold the current count and place
it inside a MagicAjax Panel.
224
Chapter 9
12_78544X ch09.qxp 7/18/06 3:16 PM Page 224
Figure 9-8
Now switch to the code window to update the
AjaxCallHelper class.
public partial class AjaxCallHelper : System.Web.UI.Page
{
private int MessageCount
{
get
{
if (this.ViewState[“messageCount”] == null)
{
return 0;
}
else
{
return Convert.ToInt32(this.ViewState[“messageCount”]);
}
}
set
{
this.ViewState.Add(“messageCount”, value);
}
}
protected void Page_Load(object sender, EventArgs e)
{
225
Other Ajax Frameworks for .NET
12_78544X ch09.qxp 7/18/06 3:16 PM Page 225
if (!this.Page.IsPostBack)
{
MagicAjax.AjaxCallHelper.SetAjaxCallTimerInterval(5000);
}
this.UpdateMessageCount();
}
private void UpdateMessageCount()
{
this.MessageCount++;
this.lblMessageCount.Text = this.MessageCount.ToString();
}
}
If you implemented the ComfortASP.NET demo, this code is familiar to you. The MessageCount prop-
erty encapsulates the
ViewState container for the number of messages for this series of requests.
Upon the first request to the page, you register a timeout on the browser by using the
SetAjaxCall
TimerInterval
method. This command will take care of rendering all the appropriate JavaScript to
the page to fire a request to the server every 5 seconds.
When the page is in “postback” mode, the message count increments and the label is updated.
Now launch the page in a browser to test its behavior.
Example 4: Direct Scripting (Micro-content)
In previous examples, you saw how the ASP.NET page event lifecycle is preserved by MagicAjax, allow-
ing you to make drastic changes to a page’s contents using Ajax and doing it all from code-behind. This
model is powerful and will probably aid you in most of your Ajax development, but what if you need to
create interaction on the page that is not native to the ASP.NET architecture? What if you want to update
an element on the page when the user clicks away from the control?
The following steps walk you through the process of creating a page that allows a user to directly edit
text on the page. For example, when the user encounters the page title, he or she may click on the title
text, edit its contents, and continue browsing. In the background, the page recognizes the change and
is responsible for contacting the server to persist the latest data.
The Ajax design pattern being implemented in this example is called micro-content. The micro-content
pattern states that certain areas of a page may be editable by the user without having to manually switch
the page into an “edit mode” by clicking on buttons or changing page locations. Small or “micro” areas
of the content on the page are open for the user to edit simply by clicking on the text. You will often see
this pattern implemented in wikis that are Ajax-powered.
This exercise will make use of not only MagicAjax but also some custom Cascading Style Sheet definitions
to power the change in the user interface to give clues as to what is happening.
Figure 9-9 is a screenshot of how the user will first encounter the page.
The page will provide initial clues that parts of the page are editable by drawing a border over the text
when the cursor hovers over the editable area. Figure 9-10 shows how the control will look when the
mouse is hovering over the control.
226
Chapter 9
12_78544X ch09.qxp 7/18/06 3:16 PM Page 226
Figure 9-9
Figure 9-10
227
Other Ajax Frameworks for .NET
12_78544X ch09.qxp 7/18/06 3:16 PM Page 227
The next step is to change the appearance of the control when the user has placed this area of the page in
“edit mode.” Figure 9-11 shows the page after the user clicks within the border of the control.
Figure 9-11
Finally, when the focus is lost from the control, MagicAjax will contact the server and allow the back-end
processing to persist the latest data. Under normal circumstances, you would probably persist the data
to a data store of some kind. For demonstration purposes, this exercise will simply store the information
in Session state. This way, after you make a change to the data, you can navigate off the page and return
to see your latest changes, but avoid having to implement a data layer just for this example.
Try It Out Using Direct Scripting
Begin by adding a new web form to your solution, and name it DirectScripting.aspx. Next, switch
to the source view, and add the following Cascading Style Sheet entries and JavaScript to the page just
after the
<title> tag:
<style type=”text/css”>
input
{
border:solid 1px #fff;
}
.focus
{
background-color:#eee;
228
Chapter 9
12_78544X ch09.qxp 7/18/06 3:16 PM Page 228
border:dashed 1px #ccc;
}
.blur
{
background-color:#fff;
border:dashed 1px #fff;
}
.mouseOver
{
border:solid 1px #c00;
}
.mouseOut
{
border:solid 1px #fff;
}
</style>
These style sheet entries give the page the visual clues to help the user understand what is happening on
the page. The first entry will place a one pixel white border around the page’s input control. This white
border is necessary because later you will apply a colored border to the control, and if there is no exist-
ing border, the page contents will appear to shift.
The
focus, blur, mouseover, and mouseout CSS classes are named consistently with the events that will
use them. When focus is brought to the control, the background color is turned a light grey, and a dashed
border is applied to the control. When focus is lost from the control, or the focus is blurred, the
blur style is
applied. The
blur style will change the background and border back to white. When the user mouses over
the control, the border is turned red as dictated by the
mouseover class. Finally, when the user moves their
mouse off of the control, the border is returned to the original white state by the
mouseOut event and class.
Next, add this JavaScript block directly below the closing
<style> tag:
<script type=”text/javascript”>
function ChangeCSSClass(element,className)
{
element.className = className;
}
</script>
This function will handle the work of programmatically applying the stated style sheet entry to a con-
trol. The function is defined here and wired up to the control in code-behind.
Next, update the markup between the
<div> tags with the following code:
<ajax:AjaxPanel ID=”AjaxPanel1” runat=”server”>
<asp:TextBox
ID=”txtTitle”
text=”Title”
OnTextChanged=”txtTitle_TextChanged”
runat=”server” />
</ajax:AjaxPanel>
229
Other Ajax Frameworks for .NET
12_78544X ch09.qxp 7/18/06 3:16 PM Page 229
The markup is simple. A single ASP.NET TextBox control in a MagicAjax panel is all that is required.
When the browser recognizes a change to the contents of the textbox, the
OnTextChanged event will
fire. You will implement your persistence logic in the resulting method.
Finally, switch to the code window, and update the
DirectScripting class with the following code.
public partial class DirectScripting : System.Web.UI.Page
{
protected void Page_Load(object sender, EventArgs e)
{
if (!this.Page.IsPostBack)
{
this.txtTitle.Attributes.Add(“onfocus”,
“ChangeCSSClass(this,’focus’);”);
this.txtTitle.Attributes.Add(“onblur”,
“ChangeCSSClass(this,’blur’);” +
MagicAjax.AjaxCallHelper.GetAjaxCallEventReference(this.txtTitle) +
“ return false;”);
this.txtTitle.Attributes.Add(“onmouseover”,
“ChangeCSSClass(this,’mouseOver’);”);
this.txtTitle.Attributes.Add(“onmouseout”,
“ChangeCSSClass(this,’mouseOut’);”);
if (this.Session[“title”] != null)
{
this.txtTitle.Text = this.Session[“title”].ToString();
}
}
}
protected void txtTitle_TextChanged(object sender, EventArgs e)
{
this.Session.Add(“title”, this.txtTitle.Text);
}
}
When the page is first served to the browser, each event’s JavaScript call is wired up to the control. The
final portion of this code block inspects Session state for a current
“title” value. If the value is found,
the control will display the value; otherwise, the page renders the default text defined in the HTML.
While each event function is attached using the familiar
Attributes.Add approach, one event stands
out among the rest. The
blur event is responsible for contacting the server when the user leaves the
focus of the control. This type of interaction with the code-behind is not native to the ASP.NET architec-
ture. In order to create a link between the client and server at this time, the MagicAjax
AjaxCallHelper
class must do the work of talking to the server.
The
AjaxCallHelper exposes a method named GetAjaxCallEventReference, which will contact the
server simulating a “postback” in code-behind, telling the page that whatever control is passed in as an
argument is the sender for the request. Once the server recognizes the request, the page will run the
230
Chapter 9
12_78544X ch09.qxp 7/18/06 3:16 PM Page 230