HTML in 10 Steps or Less- P10 docx
Bạn đang xem bản rút gọn của tài liệu. Xem và tải ngay bản đầy đủ của tài liệu tại đây (566.16 KB, 20 trang )
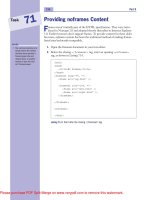
Providing noframes Content
F
rames weren’t initially part of the HTML specification. They were intro-
duced in Netscape 2.0 and adopted shortly thereafter in Internet Explorer
3.0. Earlier browsers don’t support frames. To provide content for these older
browsers, noframes content has been the traditional method of making frames-
based sites backwards-compatible.
1. Open the frameset document in your text editor.
2. Below the closing
</frameset> tag, enter an opening <noframes>
tag, as shown in Listing 71-1.
<html>
<head>
<title>No Frames</title>
</head>
<frameset rows=”75, *”>
<frame src=”top.html” />
<frameset cols=”150, *”>
<frame src=”left.html” />
<frame src=”right.html” />
</frameset>
</frameset>
<noframes>
</html>
Listing 71-1: Start after the closing </frameset> tag
note
•
The common practice is to
simply inform the visitors
that they have reached a
frames-based site and
redirect them to another
version of your site that
isn’t frames-based.
156 Part 8
Task
71
Please purchase PDF Split-Merge on www.verypdf.com to remove this watermark.
tip
•
If you don’t have a copy of
an older browser to test
your noframes content
with, copy and paste the
content into an ordinary
document, save it, and test
it that way.
3. Enter any type of text you’d place in the body section of a normal
HTML document, as shown in Listing 71-2.
<html>
<head>
<title>No Frames</title>
</head>
<frameset rows=”75, *”>
<frame src=”top.html” />
<frameset cols=”150, *”>
<frame src=”left.html” />
<frame src=”right.html” />
</frameset>
</frameset>
<noframes>
<p>Your browser doesn’t support frames.<br>
Don’t panic. Simply go <a href=”index-2.html”>here </a>
</p>
</html>
Listing 71-2: Adding text to explain to people what to do if their browsers don’t
support frames
4. Close the
noframes section with a closing </noframes> tag:
<noframes>
<p>Your browser doesn’t support frames.<br>
Don’t panic. Simply go <a href=”index-2.html”>here </a>
</p>
</noframes>
Working with Frames 157
Task
71
cross-reference
•
The likelihood that anyone
has a browser so old that it
doesn’t support frames is
pretty slim. But there is a
good chance that most
folks have Internet
Explorer. Task 72 covers a
frame option that only it
can handle: inline frames.
Please purchase PDF Split-Merge on www.verypdf.com to remove this watermark.
Working with Inline Frames
I
nline frames are an invention of Microsoft. When rendered, they create a float-
ing, scrollable pane within the body of a regular HTML file. Microsoft must
have figured that since Netscape invented frames, they could do them one better.
The only problem is that, unlike frames which are supported by virtually all
browsers, no one but Internet Explorer supports inline frames. Still, developers
do occasionally make use of them. For example, when designing for an intranet (a
closed group of users, typically within an office, who have access to a private Web
server), where the browser being used is identical to all members, taking advan-
tage of a proprietary feature isn’t such a risk.
1. To insert an inline frame, insert an opening
<iframe> tag within the
body section of a document.
2. Add a
src attribute and set it equal to the pathname of the document
you want displayed within the frame:
<iframe src=”content.html”>
3. Add a name attribute to allow the inline frame to be targeted and set
it equal to an appropriate value:
<iframe src=”content.html” name=”iframe_1”>
4. To specify the inline frame’s dimensions, include width and height
attributes and set them equal to pixel or percentage values:
<iframe src=”content.html” name=”iframe_1” width=”400”
height=”200”>
5. To control the margins inside the inline frame, add marginwidth
and marginheight attributes as you would to a standard
<frame> tag:
<iframe src=”content.html” name=”iframe_1” width=”400”
height=”200” marginwidth=”25” marginheight=”25”>
6. To float the inline frame to the left or right, similar to an image or
table, add an
align attribute and set it equal to left or right:
<iframe src=”content.html” name=”iframe_1” width=”400”
height=”200” marginwidth=”25” marginheight=”25”
align=”left”>
7. Follow the opening <iframe> tag with some form of instructional
content you want rendered by browsers that don’t support this tag.
notes
•
An inline frame aligned to
the left makes any body
text on the same line wrap
down the right side. If it’s
aligned to the right, text
wraps down the left side.
•
Any content placed
between the opening and
closing <iframe> tags is
rendered by non-Microsoft
browsers.
158 Part 8
Task
72
Please purchase PDF Split-Merge on www.verypdf.com to remove this watermark.
cross-reference
•
See Part 3 to learn about
aligning images. Part 6
covers aligning tables.
8. Insert a closing </iframe> tag to complete the inline frame. Listing
72-1 shows a simple inline frame document. Figure 72-1 shows the
effect in Internet Explorer.
<html>
<head>
<title>Inline Frames</title>
</head>
<body bgcolor=”#333333” text=”#FFFFFF”>
<iframe src=””
width=”50%” height=”50%” align=”left”>
<a href=””> Go here!
</a>
</iframe>
<p>
<font face=”Arial, Helvetica, sans-serif” size=”2”>
<b>This is one of my favorite web sites. It hasn’t been
updated in years </b></font></p>
</body>
</html>
Listing 72-1: A simple inline frame document.
Figure 72-1: Showing a simple inline frame in Internet Explorer
Working with Frames 159
Task
72
Please purchase PDF Split-Merge on www.verypdf.com to remove this watermark.
Please purchase PDF Split-Merge on www.verypdf.com to remove this watermark.
Part 9: Cascading Style Sheets
Task 73: Writing Style Rules
Task 74: Creating an Embedded Style Sheet
Task 75: Creating an External Style Sheet
Task 76: Defining Style Classes
Task 77: Defining the font-family Property
Task 78: Defining the font-size Property with Keywords
Task 79: Defining the font-size Property with Lengths
Task 80: Working with Font Styling
Task 81: Using the Font Property Shorthand
Task 82: Working with Foreground and Background Colors
Task 83: Controlling Character and Word Spacing
Task 84: Controlling Line Spacing and Vertical Alignment
Task 85: Defining the text-decoration Property
Task 86: Defining the text-transform Property
Task 87: Controlling Text Alignment and Indentation
Task 88: Working with Background Images
Task 89: Defining CSS Padding Properties
Task 90: Defining Border Style Properties
Task 91: Defining Border Width Properties
Task 92: Defining Border Color Properties
Task 93: Using the Border Property Shorthand
Task 94: Working with Margin Properties
Task 95: Defining Element Dimensions
Task 96: Working with the float Property
Task 97: Controlling List-Item Bullet Styles
Task 98: Controlling List-Item Number Styles
Task 99: Creating Layers with Absolute Positions
Task 100: Creating Layers with Relative Positions
Task 101: Defining a Layer’s Clipping Area
Please purchase PDF Split-Merge on www.verypdf.com to remove this watermark.
Writing Style Rules
T
o quote its creators, “Cascading Style Sheets (CSS) is a simple mechanism for
adding style (e.g., fonts, colors, spacing) to Web documents.” The purpose is
to separate structure from style, leaving HTML to deal with the former while
CSS takes over the latter. With the birth of CSS, any HTML markup that deals
purely with how things should look is deprecated (no longer approved of). Instead,
CSS should be used. CSS’s syntax is slightly different from HTML. Angle brack-
ets, equal signs, and quotation marks disappear in favor of curly braces, colons,
and semicolons. Where HTML uses tags and attributes, CSS rules use selectors
(the element that the style defines), selectors have declarations (which contain
properties), and properties are assigned values (see Figure 73-1).
Figure 73-1: Anatomy of a CSS style rule
1. Define a selector for the style rule.
2. Follow the selector with an opening curly brace.
3. Enter a property name, followed by a colon.
4. Follow the colon with a space, supply a value for the property, and
conclude the property/value pair with a semicolon.
5. Move to a new line, and enter the second property/value pair.
Conclude each pair with a semicolon.
6. When the declaration contains all the properties you want to add,
end the declaration with a closing curly brace.
Selector Declaration
note
•
Value types vary with
the property. See our
Web site at www.wiley
.com/compbooks/
10simplestepsorless
for more information.
162 Part 9
Task
73
Please purchase PDF Split-Merge on www.verypdf.com to remove this watermark.
cross-references
•
You can see a list of
CSS property names
and value types on
our Web site, www
.wiley.com/compbooks/
10simplestepsorless.
•
You can embed style defini-
tions in the head section of
an HTML document (see
Task 74), place them in
their own CSS document
and link to them (see Task
75), or define them inline,
using the style attribute, as
shown in Step 7.
Listing 73-1 shows a style rule for the <p> tag.
p { font-family: Arial, Helvetica, sans-serif;
font-size: 12px;
color: #000000 }
Listing 73-1: A style rule with three defined properties
7. To assign a single declaration to a series of selectors, simply enter the
selectors as a comma-separated list, as shown here:
h1, h2, h3 { font-family: Arial, Helvetica, sans-serif }
8. To set selectors so that they only affect a tag when it appears under
specific circumstances, separate a number of selectors with a space.
For example:
h1 b { color: red }
This type of style definition (called a descendant style) tells the browser
only to apply this style to bold text used with level-1 headings.
9. To use CSS syntax within the flow of an HTML document, add a
style attribute to the tag you want to affect and set it equal to an
appropriate series of property/value pairs, each separated by semi-
colons, as shown in Listing 73-2.
<p style=”font-family: Arial, Helvetica, sans-serif; font-
size: 12px; color: #000000”>
Listing 73-2: CSS syntax applied inline to a paragraph tag
Cascading Style Sheets 163
Task
73
Please purchase PDF Split-Merge on www.verypdf.com to remove this watermark.
Creating an Embedded Style Sheet
B
y embedding a style sheet we mean placing CSS code within the HTML
document itself. The code is written within a style element (defined by
opening and closing
<style> tags) located in the head section of the document
(defined by opening and closing
<head> tags). Embedded style sheets affect only
the specific HTML document in which the CSS code resides.
1. In the head section of an HTML document, enter an opening
<style> tag.
2. Define a
type attribute for the <style> tag and set it equal to
text/css.
3. Insert one or two new lines and enter an opening comment tag, so
that your head section resembles Listing 74-1.
<head>
<title>Embedded Styles</title>
<style type=”text/css”>
<!
</head>
Listing 74-1: The opening <style> tag
4. Insert another line or two and begin entering selectors and declara-
tions, as described in Task 73.
5. To close the embedded style sheet, enter a closing comment tag,
followed by a closing
</style> tag.
164 Part 9
Task
74
caution
•
Each declaration must be
encapsulated within open-
ing and closing curly
braces. Each property/
value pair must be sepa-
rated by semicolons.
Please purchase PDF Split-Merge on www.verypdf.com to remove this watermark.
tip
•
To define an identical style
for a series of selectors,
separate each selector by a
comma. For example:
p, td { font-
family: Verdana }
To create something called
a contextual selector, enter
a series of selectors in a
row, separated only by
spaces, then follow it with
a declaration, like so:
td p { font-family:
Verdana }
This creates a style for
paragraphs only when they
occur inside a table cell.
Listing 74-2 shows a completed embedded style sheet.
<head>
<title>Embedded Style Sheets</title>
<style type=”text/css”>
<!
p { font-family: Verdana, Arial, Helvetica, sans-serif;
font-size: 11px;
color: #000000; }
h1 { font-family: Verdana, Arial, Helvetica, sans-serif;
font-size: 22px;
color: #000000; }
h2 { font-family: Verdana, Arial, Helvetica, sans-serif;
font-size: 18px;
color: #000000; }
h3 { font-family: Verdana, Arial, Helvetica, sans-serif;
font-size: 14px;
color: #000000; }
>
</style>
</head>
Listing 74-2: An embedded style sheet
Cascading Style Sheets 165
Task
74
cross-reference
•
An embedded style sheet
only defines styles for the
specific document.You can
use an external style sheet
to attach styles to multiple
documents.The advantage
of this approach is that you
only need to edit a single
style sheet document to
affect style changes across
all linked documents (see
Task 75).
Please purchase PDF Split-Merge on www.verypdf.com to remove this watermark.
Creating an External Style Sheet
E
xternal style sheets are separate documents containing nothing but style rules.
You attach these style sheets to HTML documents using a link reference,
effectively allowing you to attach a single style sheet document to as many Web
pages as you like. This way you only need to change one style sheet document to
update the formatting of elements across every page to which the style sheet
document is attached.
1. Open a new blank document in your editor and enter the styles you
wish to define. Listing 75-1 provides an example.
body { color: #000000;
background: #FFFFFF;
margin-left: 100px;
margin-right: 100px;
margin-top: 100px }
h1 { font-family: Arial, Helvetica, sans-serif;
font-size: 20px;
font-weight: bold }
p { font-family: Arial, Helvetica, sans-serif;
font-size: 12px;
text-align: Justify }
Listing 75-1: A sample style sheet
2. Save the file with a .css extension within the directory you’re using
for your local site files (see Figure 75-1).
Figure 75-1: Saving the style sheet
3. Open the HTML documents to which you want to attach the style
sheet. Within the head section of each document, insert a
<link>
tag with a rel attribute set equal to stylesheet, and a type
attribute set equal to text/css.
166 Part 9
Task
75
Please purchase PDF Split-Merge on www.verypdf.com to remove this watermark.
cross-reference
•
As these code samples
indicate, CSS provides
many different properties
that HTML doesn’t dupli-
cate. To learn more about
margin properties, see
Task 94. To learn more
about font properties, see
Tasks 77–81. To learn more
about background proper-
ties, see Tasks 82 and 88.
4. Add a final attribute to the <link> tag, href, and set it equal to the
appropriate pathname of the .css file you saved in Step 2. Listing
75-2 shows the complete code and Figure 75-2 shows the document
rendered in a browser.
<html>
<head>
<title>External Style Sheets</title>
<link rel=”stylesheet” type=”text/css”
href=”10_steps.css” />
</head>
<body>
<h1>Creating an External Style Sheet</h1>
<p>External style sheets are separate documents containing
nothing but style rules. These types of style sheets are
attached to HTML documents using a link reference,
effectively allowing you to attach a single style sheet
document to as many web pages as you like. Using this
approach you only need to make change to the individual
style sheet document to update the formatting of elements
across every page to which the style sheet document is
attached.</p>
</body>
</html>
Listing 75-1: A sample HTML document containing a link reference to an external style
sheet
Figure 75-2: An HTML page whose formatting is defined solely in an external style
sheet
Cascading Style Sheets 167
Task
75
tips
•
When you develop a Web
site, structure your local
files as they would appear
on the Web server.This
allows you to assign rela-
tive pathnames when
creating hyperlinks and
other file references within
your HTML code.
•
The rel attribute stands
for “relationship.”The
text/css value of the
type attribute indicates that
the code is text-based and
written in CSS.
Please purchase PDF Split-Merge on www.verypdf.com to remove this watermark.
Defining Style Classes
W
hen you create a style class, you specify your own unique selector name and
attach a style declaration to it. You can apply your classes to any tag by
using the
class attribute.
1. Type a period followed by a unique class name in the selector posi-
tion of your style rule. For example:
.citation
2. Follow the class selector with a declaration by entering an opening
curly brace, defining your desired properties, and completing the
declaration with a closing curly brace:
.citation { font-family: “Times New Roman”, Times, serif;
font-size: 12px;
font-style: italic }
3. Apply the class to your chosen HTML tag by adding a class attribute
and setting it equal to the class name (without the period):
<div class=”citation”>
4. Limit classes to a particular tag by preceding the class selector with
the tag character. The following example makes sure the class can
only be implemented with the
<p> tag:
p.citation { font-family: Times New Roman, Times, serif;
font-size: 12px;
font-style: italic }
5. Specify unique ID classes by preceding a class name selector with a
pound sign and applying them to a tag using the ID attribute:
#preamble { font-family: Arial, Helvetica, sans-serif;
font-size: 20px; }
<h1 ID=”preamble”>Preamble</h1>
Listing 76-1 shows an embedded style sheet that makes use of both a
standard and ID class. Figure 76-1 displays the results in a browser.
168 Part 9
Task
76
caution
•
An ID class can only be
used by a single element
per document, so its use is
more limited than standard
classes.
Please purchase PDF Split-Merge on www.verypdf.com to remove this watermark.
cross-reference
•
For more coverage of CSS,
see our Web site at www
.wiley.com/compbooks/
10simplestepsorless.
<html>
<head>
<title>Style Classes</title>
<style type=”text/css”>
<!
.citation { font-family: “Times New Roman”, Times, serif;
font-size: 12pt;
font-style: italic }
#preamble { font-family: Arial, Helvetica, sans-serif;
font-size: 20pt; }
>
</style>
</head>
<body>
<h1 ID=”preamble”>Preamble</h1>
<p class=”citation”>”We the People of the United States, in
Order to form a more perfect Union, establish Justice,
insure domestic Tranquility, provide for the common defense,
promote the general Welfare, and secure the Blessings of
Liberty to ourselves and our Posterity, do ordain and
establish this Constitution for the United States of
America.” </p>
</body>
</html>
Listing 76-1: Example of standard and ID classes
Figure 76-1: A standard class (the citation) and an ID class (the heading) rendered in
the browser
Cascading Style Sheets 169
Task
76
tip
•
Define your classes in
embedded or external style
sheets. Because style
classes require a selector,
it isn’t possible to create
an inline style class.
Please purchase PDF Split-Merge on www.verypdf.com to remove this watermark.
Defining the font-family Property
T
he font-family property in CSS functions identically as the face attribute
of the
<font> tag in HMTL. Use this property to specify a prioritized list of
fonts with which the browser should attempt to render an element. Just as it does
with the
face attribute, the browser renders text with the first font that matches
the one installed on the visitor’s computer.
1. Within the declaration of your style rule, include a font-family prop-
erty as shown here:
p { font-family: }
2. Follow the semicolon with the name of your first choice font. For
example:
p { font-family: “Times New Roman” }
3. Enter a comma and follow your first font choice with a second or
third, as shown here:
p { font-family: “Times New Roman”, Times }
4. Conclude the list with the generic font family name to which the
other fonts belong. For example:
p { font-family: “Times New Roman”, Times, serif }
Listing 77-1 shows an embedded style sheet sample. Figure 77-1
shows the resulting document in a browser.
170 Part 9
Task
77
Please purchase PDF Split-Merge on www.verypdf.com to remove this watermark.
tips
•
Capitalize all font names.
Any font name that con-
tains more than one word
should be placed in quotes.
Otherwise, browsers may
ignore the spaces between
words and not recognize
the font name you request.
•
By concluding the list of
fonts with the generic font
family name, you ensure
that even if the visitor’s
computer lacks any of your
initial choices, it will still
use whatever default font it
has that falls within that
family. Common generic
families include serif (e.g.,
Times), sans-serif (e.g.,
Arial), and monospace
(e.g., Courier).
<html>
<head>
<title>The font-family Property</title>
<style type=”text/css”>
<!
.code { font-family: Courier, monospace }
h1 { font-family: Arial, Helvetica, sans-serif }
p (font-family: “Times New Roman”, Times, serif }
>
</style>
</head>
<body>
<h1>Defining the <span class=”code”>font-family</span>
Property</h1>
<p>The <span class=”code”>font-family</span> property in CSS
is similar in function to the <span class=”code”>face</span>
attribute of the <span class=”code”><font></span> tag
in HMTL. Use this property to specify a prioritized list of
fonts with which the browser should attempt to render the
element. Identically to the <span class=”code”>face</span>
attribute, a browser renders text with the first font that
matches one installed on the visitor’s computer.</p>
</body>
</html>
Listing 77-1: The font-family property in practice
Figure 77-1: Rendering the font-family property in the browser
Cascading Style Sheets 171
Task
77
cross-reference
•
The example in this task
uses an embedded style
sheet, but an external style
sheet could be used just
as easily (see Task 75).
Please purchase PDF Split-Merge on www.verypdf.com to remove this watermark.
Defining the font-size Property
with Keywords
A
s you might have guessed, the CSS font-size property fulfills the same
function as the
size attribute of the <font> tag in HTML.
1. Within the declaration of your style rule, include a
font-size
property.
2. Use the absolute-size keyword values
xx-small, x-small, small,
medium, large, x-large, and xx-large to define values corre-
sponding to the HTML font size scale of 1 to 7, respectively. Listing
78-1 shows seven paragraph style classes using each value. Figure
78-1 shows how the browser renders the code.
<html>
<head>
<title>The font-size Property</title>
<style type=”text/css”>
<!
p.one { font-size: xx-small }
p.two { font-size: x-small }
p.three { font-size: small }
p.four { font-size: medium }
p.five { font-size: large }
p.six { font-size: x-large }
p.seven { font-size: xx-large }
>
</style>
</head>
<body>
<p class=”one”> font-size: xx-small = size=”1” </p>
<p class=”two”> font-size: x-small = size=”2” </p>
<p class=”three”> font-size: small = size=”3” </p>
<p class=”four”> font-size: medium = size=”4” </p>
<p class=”five”> font-size: large = size=”5” </p>
<p class=”six”> font-size: xx-large = size=”6” </p>
<p class=”seven”> font-size: xx-large = size=”7” </p>
</body>
</html>
Listing 78-1: Absolute-size keyword values
3. Use the relative-size keyword values
larger or smaller to increase
or decrease the size of text relative to the font size of the parent
element.
172 Part 9
Task
78
Please purchase PDF Split-Merge on www.verypdf.com to remove this watermark.
cross-references
•
See Task 14 to learn how
to use the size attribute
of the <font> tag.
•
See Task 76 to create style
classes.
•
These code listings all
demonstrate the use of
embedded style sheets.
See Task 75 to learn how
to define external style
sheets.
Figure 78-1: Text rendered with absolute-size keyword values
Listing 78-2 shows the
<div> tag (the parent element in this case) set
to large and two
<p> tag style classes which increase and decrease the
font size relative to that value.
<html>
<head>
<title>The font-size Property</title>
<style type=”text/css”>
<!
div { font-size: large }
p.increase { font-size: larger }
p.decrease { font-size: smaller }
>
</style>
</head>
<body>
<div>
<p class=”increase”> This line is larger </p>
<p> This line is large </p>
<p class=”decrease”> This line is smaller </p>
</div>
</body>
</html>
Listing 78-2: Relative-size keyword values
Cascading Style Sheets 173
Task
78
Please purchase PDF Split-Merge on www.verypdf.com to remove this watermark.
Defining the font-size Property
with Lengths
T
he CSS specification provides an extensive range of absolute and relative
length values not found in HTML. The inclusion of specific units of measure
provides greater control over how content is displayed across different output
devices (monitors, printers, and so on).
1. Add a
font-size property to the declaration of your style rule.
2. Set the property equal to an absolute-size length value. Listing 79-1
shows a few possible values. Figure 79-1 displays the results in a
browser.
<html>
<head>
<title>The font-size Property</title>
<style type=”text/css”>
<!
p.point { font-size: 12pt }
p.pica { font-size: 1pc }
p.cent { font-size: .4cm }
p.mill { font-size: 4mm }
p.inch { font-size: .15in }
>
</style>
</head>
<body>
<p class=”point”>12 points</p>
<p class=”pica”>1 picas</p>
<p class=”cent”>.4 centimeters</p>
<p class=”mill”>4 millimeters</p>
<p class=”inch”>.15 inches</p>
</body>
</html>
Listing 79-1: Absolute-length values assigned to the font-size property
3. Use relative-size length values to indicate a length relative to some
other property. For example:
• em: The relative height of the font’s uppercase letters
• ex: The relative height of the font’s lowercase letters
• px: The relative pixel resolution of the user’s monitor
• %: A percentage of the font’s default size value
174 Part 9
Task
79
Please purchase PDF Split-Merge on www.verypdf.com to remove this watermark.
tips
•
Make sure you don’t
inadvertently put a space
between your numeric
value and the abbreviation
of the unit of measure.
•
Write all units of measure
in lowercase.
Figure 79-1: Text rendered with absolute-length values assigned to the font-size property
Listing 79-2 shows possible relative values. Figure 79-2 displays the
results.
<html>
<head>
<title>Font Size</title>
<style type=”text/css”>
<!
p.em {font-size: 1em}
p.ex {font-size: 2ex}
p.px {font-size: 16px}
p.percent {font-size: 100%}
>
</style>
</head>
<body>
<p class=”em”>1 default uppercase letter high</p>
<p class=”ex”>2 default lowercase letters high</p>
<p class=”px”>16 pixels high</p>
<p class=”percent”>100 percent of the default font size </p>
</body>
</html>
Listing 79-2: Relative-length values assigned to the font-size property
Figure 79-2: Text rendered with relative-length values assigned to the font-size property
Cascading Style Sheets 175
Task
79
cross-reference
•
To find out more about
CSS, check out CSS For
Dummies, by Damon
Dean (Wiley Publishing,
Inc., 2001).
Please purchase PDF Split-Merge on www.verypdf.com to remove this watermark.