Tài liệu Photoshop cs5 by Dayley part 31 pdf
Bạn đang xem bản rút gọn của tài liệu. Xem và tải ngay bản đầy đủ của tài liệu tại đây (458.75 KB, 6 trang )
213
CHAPTER
Processing Photos in
the Camera Raw
Workspace
IN THIS CHAPTER
Light settings
Color correction
Targeted adjustments
Fun effects
Finishing touches
N
ow that you are familiar with the Camera Raw workspace and the
preferences and menus, it’s time to jump in and start adjusting your
raw images. In some cases, you will find the tools and controls so
easy to use that you may start opening your JPEGs and TIFFs in Camera Raw
in order to quickly make the basic adjustments. In other cases, if you are
familiar with Photoshop, you will be frustrated that the tools are so com-
pletely foreign and have so little actual capability compared to what is avail-
able to you in Photoshop.
The Camera Raw Tools
Before you can make adjustments in Camera Raw, you must understand the
tools and how they work. The tools are found at the top of Camera Raw, as
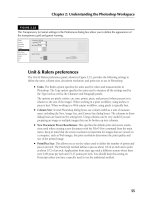
shown in Figure 8.1. Some of them are fairly basic, and you are probably
already familiar with how they work, such as the Zoom and Hand tools.
Other tools have detailed functions, such as the Targeted Adjustment tool
and the Graduated Filter. I cover the more detailed tools in depth later in
this chapter. For now, I’ll provide you with a quick reference list:
l
Zoom tool: Use this tool to get a closer look at an area of your
photo. The photo zooms to the point where you click the Zoom
tool. To zoom back out, just press and hold the Alt or Option key to
change the plus sign in the magnifying glass to a minus sign. You
also can use the Zoom menu at the bottom of the document win-
dow to choose a setting.
13_584743-ch08.indd 21313_584743-ch08.indd 213 5/3/10 10:22 AM5/3/10 10:22 AM
Part II: Working with Camera Raw Images
214
l
Hand tool: Use this tool when your image is bigger than the document window; you can
grab it with the Hand tool and move it around in your window to look at other areas of
your photo.
FIGURE 8.1
The tools in Camera Raw
Crop
Rotate
Adjustment Brush
Hand
Zoom Target Adjustment
Toggle Full
Screen Mode
Straighten
White Balance
Spot Removal
Color Sampler Red Eye Remover
Graduated Filter Open Preferences
l
White Balance tool: Use this tool to select an area of your photo that is white or neutral
gray and change the white balance of your photo based on that selection.
l
Color Sampler: Use this tool to find the RGB values of areas in your image. These values
change as you correct the tone and color of your photo, giving you a numerical represen-
tation of the changes taking place in your image. Simply click a color in your photo to
place a marker and display the RGB settings above the image, as shown in Figure 8.2. You
can place up to ten color samples. To clear the color samples, click Clear Samples.
l
Targeted Adjustment tool: This tool allows you to choose one pixel in your image and
change its value in the histogram, which changes the values of the other colors in the his-
togram as well. Click the area of your photo that you want to adjust and hold down the
left mouse key while you drag side to side or up and down. This changes the value of the
pixel you click, changing the relative values in the histogram. If you clicked a darker pixel,
the darker areas of your photo change dramatically while the lighter areas do not change
as much. This holds true if you click a midtone or light area of your photo as well. Those
areas are more affected than others.
Cross-Ref
Again—and I promise it will happen often throughout the book—knowing how the histogram works and how
colors relate are important to understanding how the Color Sampler and the Targeted Adjustment tools work.
That’s why we gave them their own chapter, Chapter 4. n
13_584743-ch08.indd 21413_584743-ch08.indd 214 5/3/10 10:22 AM5/3/10 10:22 AM
Chapter 8: Processing Photos in the Camera Raw Workspace
215
FIGURE 8.2
The Color Sample RGB information corresponds to the numbered color sample areas
displayed in the photo.
Color Sample RGB values
l
Crop: The Crop tool in Camera Raw is fairly straightforward. Just select it and drag
around the area you want to crop. If you want to straighten as well, just use the rotating
arrow that appears when you hover over one of the corners and rotate the cropped area.
Double-click to finish. One difference you’ll note about cropping in Camera Raw is that
even cropping is a non-destructive edit. Even after opening and closing the image and cre-
ating numerous other settings, you can click the Crop tool to display the entire image and
reset the crop boundaries, as shown in Figure 8.3.
l
Straighten: Use this tool to straighten a photo. Drag it in what should be a straight line in
your photo, and your image rotates to compensate. This tool is also non-destructive; you
can correct the results at any time.
13_584743-ch08.indd 21513_584743-ch08.indd 215 5/3/10 10:22 AM5/3/10 10:22 AM
Part II: Working with Camera Raw Images
216
FIGURE 8.3
I cropped this image the last time I opened it. I can change the crop by clicking the
Crop tool and displaying the entire image.
Cross-Ref
Except for being non-destructive, cropping and straightening work in Camera Raw just like they work in
Photoshop. That’s why they get just a measly little bullet point here. If you want to read more about cropping
or straightening, look in Chapter 3. n
l
Spot Removal: You can use this tool to correct areas in your photo that need touchups. I
cover this tool in greater detail later in this chapter.
l
Red-Eye Removal: Use this tool to correct red-eye. This is covered later in this chapter.
l
Adjustment Brush: You can make adjustments to just one area of your photo in Camera
Raw using this tool. It’s more complicated than it sounds, though, so I take you through it
step by step later in this chapter.
l
Graduated Filter: This tool allows you to make gradual changes to areas of your photo.
For instance, you may have a darker foreground coupled with an overexposed sky. Use
this tool to correct one or the other gradually for realistic results. I show you how later in
this chapter.
13_584743-ch08.indd 21613_584743-ch08.indd 216 5/3/10 10:22 AM5/3/10 10:22 AM
Chapter 8: Processing Photos in the Camera Raw Workspace
217
Synchronizing Adjustments in Multiple
Raw Images
You can correct several photos at once using the Camera Raw dialog box. This is a real timesaver if
your photos have been taken in similar lighting conditions. You might have several outdoor shots
of the same wedding, for example. When you make changes to the photo that is displayed in
Camera Raw, those changes are applied to any selected photo in the filmstrip as well. Using the
Synchronize option, you can choose which changes apply to selected photos and which ones do
not apply to other selected photos in the filmstrip.
To make changes to more than one photo, these photos must first be open in Camera Raw. Select
more than one image in Bridge, and double-click to open them in Camera Raw. You see them dis-
played in the filmstrip in Camera Raw, as shown in Figure 8.4.
FIGURE 8.4
When you open more than one photo in Camera Raw, they appear in the filmstrip.
13_584743-ch08.indd 21713_584743-ch08.indd 217 5/3/10 10:22 AM5/3/10 10:22 AM
Part II: Working with Camera Raw Images
218
You can select more than one image at once by using the Shift key to select images in sequence or
the Ctrl/Ô key to select images one at a time. You also can click Select All to select all the images
in the filmstrip.
To Synchronize which changes are made to all the selected images, click Synchronize. This opens
the Synchronize dialog box, shown in Figure 8.5. Use the drop-down menu or individual check
marks to select which options change across all the selected photos in Camera Raw.
FIGURE 8.5
Use the Synchronize menu to choose which changes will be universally made.
After you are finished making batch changes, you can select your photos one at time to preview the
changes and tweak them individually, but the bulk of the adjustments already are made, saving
you lots of time in processing your files.
Adjusting the White Balance
Your camera has a White Balance setting that tells it what lighting is being used when a photo is
captured. A fluorescent light leaves a greenish-yellow cast on your photos, giving your whites a
greenish-yellow tinge, for example. Your camera can compensate by adjusting the color information
13_584743-ch08.indd 21813_584743-ch08.indd 218 5/3/10 10:22 AM5/3/10 10:22 AM


