Tài liệu Photoshop cs5 by Dayley part 10 pps
Bạn đang xem bản rút gọn của tài liệu. Xem và tải ngay bản đầy đủ của tài liệu tại đây (231.83 KB, 7 trang )
Part I: Getting Started with Adobe Photoshop CS5
78
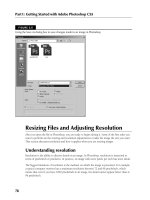
FIGURE 3.5
Using the Save As dialog box to save changes made to an image in Photoshop
Resizing Files and Adjusting Resolution
After you open the file in Photoshop, you are ready to begin editing it. Some of the first edits you
want to perform are the resizing and resolution adjustments to make the image the size you want.
This section discusses resolution and how it applies when you are resizing images.
Understanding resolution
Resolution is the ability to discern details in an image. In Photoshop, resolution is measured in
terms of pixels/inch or pixels/cm. In practice, an image with more pixels per inch has more detail.
The biggest limitation of resolution is the medium on which the image is presented. For example,
a typical computer monitor has a maximum resolution between 72 and 96 pixels/inch, which
means that even if you have 1000 pixels/inch in an image, the detail cannot appear better than at
96 pixels/inch.
07_584743-ch03.indd 7807_584743-ch03.indd 78 5/3/10 10:17 AM5/3/10 10:17 AM
Chapter 3: Image Basics
79
Therefore, when setting the resolution of an image, you should understand resolution capabilities
of the medium from which the image will be outputted. For example, an inkjet printer may be able
to print 300–1200 dpi (dots/inch), so a file with a resolution of 1000 dots/inch prints more detail
than an image that contains only 96 dots/inch.
So why not just keep the resolution at the maximum? There are two reasons. First, the more reso-
lution in the image, the larger the file is. If disk space is of concern, then reducing the resolution
helps. Second, if you are using the image in an application or function that requires a specific reso-
lution range such as a Web image, you need to change the resolution to match those requirements.
Tip
It is a good practice to always maximize the resolution when editing an image until you are ready to output it.
That way, all the editing is done with the maximum amount of detail. Also, if you plan to edit the image again,
you should consider keeping a copy with the higher resolution. n
Changing the image size and resolution
One of the most common editing functions applied to images is to change the size and resolution
depending on the destination of the image. For example, if the image will be placed on a Web site,
the size and resolution likely need to be less than an image being sent to a high-quality printer.
This section discusses the relationship between size and resolution, how Photoshop creates the
resized pixels, and how to make the adjustments in Photoshop.
Understanding the resolution and size relationship
Ultimately, the digital size of an image is simply the number of pixels that are contained, and the
dimension is simply the number of pixels wide by the number of pixels high. However, when you are
outputting the image, size becomes tied directly to the resolution capability of the output device.
For example, when you are viewing an image on a computer screen, the output dimensions of the
image in inches is the number of pixels high/72dpi x the number of pixels wide/72dpi. However, when
you are printing the image to a 1200dpi printer, the document’s output dimensions are the number of
pixels high/1200dpi x the number of pixels wide/1200dpi, which is a much smaller image.
Therefore, you need to know the intended output resolution and the desired dimensions on that
medium to determine the output resolution and size to set in the image. Otherwise, you may end up
with an image that is too large to view on a Web page or a printed image without enough resolution.
Tip
You should leave the image as large as possible when you are editing until you are ready to finally output it. The
more pixels Photoshop has to deal with, the better results you see when editing. If you need to downsize the
image, wait until you have finished editing it. However, if you are upsizing the image, you should change the size
before you edit it. n
07_584743-ch03.indd 7907_584743-ch03.indd 79 5/3/10 10:17 AM5/3/10 10:17 AM
Part I: Getting Started with Adobe Photoshop CS5
80
Understanding Photoshop’s resizing algorithms
An important concept that you need to understand when resizing images is what is happening
with the pixels during the resize. When you reduce the size of an image by one-third, Photoshop
has to take a block of 9x9 pixels and turn them into a block of 6x6 while displaying the same con-
tent. When you increase the size of an image by one-half, Photoshop has to take a block of 6x6
pixels and turn them into a block of 9x9 to display the same content.
The point is that when resizing an image, Photoshop has to make an intelligent determination of
how to combine pixels when reducing the image and how to represent the missing holes when
increasing the size of an image. To do this, Photoshop uses complex algorithms to calculate what
the resulting pixels in the new image should be. These algorithms are known as resample methods.
Note
The algorithms that Photoshop uses to resize images are available as an option at the bottom of the Image Size
dialog box that is opened when you select Image ➪ Image Size from the main menu. n
Photoshop provides five algorithms to resample images. Each algorithm has advantages over the
others; however, each algorithm also produces slightly different results. The following list describes
these algorithms and when to use them:
l
Nearest Neighbor: This method is simplest and fastest for resizing an image. This option
works by simply looking at the pixels surrounding the image and averaging them to create
the pixel in the new image. It’s fast, but it produces the worst overall results, especially in
images that have highly contrasting tones next to each other.
l
Bilinear: This method uses a weighted average of the nearest pixels in the old image to
determine the value of the pixel in the new image. This option is still fairly fast, but typi-
cally it provides much better results than the nearest neighbor method for both upsizing
and downsizing images. The bilinear method is the best overall method to use.
l
Bicubic: This method applies a convolution algorithm that uses a weighted set of numbers
that are applied to the pixels in the old image to determine the value of the pixel in the
new image. This option is not as fast the nearest neighbor or bilinear. However, the bicu-
bic method typically preserves finer detail. A downside of the bicubic method is that it
often results in ringing artifacts (a repeating pattern around edges where there is high con-
trast in the image—for example, white next to black).
l
Bicubic Smoother: This is the same as the bicubic method, except that it applies a
smoothing filter to the set of pixels at the same time to help smooth abrupt edges when
enlarging an image. The bicubic smoother algorithm provides the best overall results
when enlarging an image.
l
Bicubic Sharper: This is the same as the bicubic method, except that it applies a sharpening
filter to the set of pixels at the same time to help keep detail when shrinking an image. The
bicubic smoother algorithm provides the best overall results when shrinking an image.
07_584743-ch03.indd 8007_584743-ch03.indd 80 5/3/10 10:17 AM5/3/10 10:17 AM
Chapter 3: Image Basics
81
Adjusting the image size and resolution
To adjust the image size and resolution in Photoshop, select Image ➪ Image Size from the main
menu to bring up the Image Size dialog box, shown in Figure 3.6. From the Image Size dialog box,
you can set the following options:
l
Pixel Dimension Width: When the Resample Image option is set, this option allows you
to change the overall width of the image in terms of pixels. You can set the units to change
the dimension based on pixel or percentage. If the Constrain Proportions option is set,
when you change this value, the height dimension value also changes so the image main-
tains the original proportions.
l
Pixel Dimension Height: When the Resample Image is set, this option allows you to
change the overall height of the image in terms of pixels. You can set the units to change
the dimension based on pixel or percentage. If the Constrain Proportions option is set,
when you change this value, the width dimension value also changes so the image main-
tains the original proportions.
l
Document Width: This allows you to change the actual document output width of the
image in terms of percent, inches, cm, mm, points, picas, and columns. You can set the
units used to define the new size by selecting it from the drop-down menu. If the
Constrain Proportions option is set, when you change this value, the document height
value also changes so the image maintains the original proportions.
l
Document Height: This allows you to change the actual document output height of the
image in terms of percent, inches, cm, mm, points, and picas. You can set the units used
to define the new size by selecting it from the drop-down menu. If the Constrain
Proportions option is set, when you change this value, the document width value also
changes so the image maintains the original proportions.
l
Resolution: This allows you to change the resolution of the image in terms of pixels/inch
or pixels/cm. If the resample image option is set, the pixel dimensions change when
adjusting this value. However, if the resample image is not selected, the document size
changes when adjusting this value.
l
Scale Styles: When the scale styles option is selected, any style effects that have been
added to the image also are scaled. This is extremely useful if you want to apply effects
before scaling an image.
l
Constrain Proportions: When the Constrain Proportions option is selected, both the
height and width value changes when changing either of them to maintain the document’s
original proportions. This option applies to both the pixel dimension and document size
values. When this option is unselected, you can change the height of the image without
the width to apply distortion and elongation effects.
l
Resample Image: When the Resample Image option is selected, Photoshop changes the
actual pixels in the image to change the total size in pixels. When this option is not set,
you are changing only the document size and resolution settings that are used when out-
putting the image.
07_584743-ch03.indd 8107_584743-ch03.indd 81 5/3/10 10:17 AM5/3/10 10:17 AM
Part I: Getting Started with Adobe Photoshop CS5
82
l
Resampling Method: This provides a drop-down list of resample methods to use when
changing the number of pixels in the image. This option is available only when the
Resample Image option is selected. You can select from the Nearest Neighbor, Bilinear,
Bicubic, Bicubic Smoother, and Bicubic Sharper methods discussed earlier in this chapter.
Note
The Bicubic methods are not available if you are working with a grayscale image. If you are planning on con-
verting the final image to grayscale, you should change the size of the image first to use these options before
converting the image to grayscale. n
FIGURE 3.6
Setting options to change the image size and resolution of an image
Changing the canvas size
The previous section discussed how to change the size of an image. Photoshop also allows you to
change the size of the canvas that contains the image. Changing the canvas size is different than
changing the image size.
Typically, the canvas size is the exact same size, so most people do not distinguish the two.
Changing the canvas size allows you to either add pixels to an image or take pixels away from an
image. Taking pixels away is basically the same as cropping, which is discussed in the next section.
Adding pixels to an image file is useful for a variety of purposes. The most basic purpose is simply
to add a border to the image. Increasing the size of the canvas naturally creates a border of pixels
around the image.
07_584743-ch03.indd 8207_584743-ch03.indd 82 5/3/10 10:17 AM5/3/10 10:17 AM
Chapter 3: Image Basics
83
Another common reason for increasing the canvas size is to add crop marks for printing. Some
printers require crop marks to crop your image precisely. Increasing the canvas size gives you the
space to add crop marks to the image file.
Increasing the size of the canvas does not alter the pixels of the existing image at all. Instead it sim-
ply adds pixels to the image file. To change the canvas size, select Image ➪ Canvas Size from the
main menu in Photoshop to bring up the Canvas Size dialog box, shown in Figure 3.7. The Canvas
Size dialog box allows you to set the following options when resizing the canvas:
l
Width: Lets you specify the width in percent, pixels, inches, cm, mm, points, picas, and
columns. If the Relative option is checked, the width is the actual border size; if the rela-
tive option is not checked, the width is the total width of the canvas.
l
Height: Lets you specify the height in percent, pixels, inches, cm, mm, points, picas, and
columns. If the Relative option is checked, the height is the actual border size; if the rela-
tive option is not checked, the height is the total height of the canvas.
l
Relative: Lets you specify whether to set the width and height based on total canvas or
relative to the image.
l
Anchor: Lets you specify where to anchor the original image in the new canvas. You can
select the top, bottom, one of the sides, or one of the corners. Typically, you want the
image anchored in the center when adding a border to the document.
l
Canvas extension color: Lets you choose the color of the new pixels added to the canvas.
This defaults to the background color; however, it has presets for foreground, white,
black, and gray. You also can select Custom to bring up a Color Picker to specify a differ-
ent color.
FIGURE 3.7
Setting options to change the canvas size of an image
07_584743-ch03.indd 8307_584743-ch03.indd 83 5/3/10 10:17 AM5/3/10 10:17 AM
Part I: Getting Started with Adobe Photoshop CS5
84
Cropping and Straightening Images
In addition to resizing images, you may want to use only a portion of an image and discard or crop
the rest. Photoshop provides a great tool that allows you to quickly crop out the unwanted parts of
your image. Using the same tool, you can straighten the cropping to fix problems such as a tilted
camera.
This section discusses some general guidelines that help when deciding how to crop images. You
also learn how to use the Crop tool and the Trim utility included with Photoshop to crop and
straighten images.
Guidelines for cropping a photo
Photography is really an art form. A photo that is well composed is interesting to look at, leads the
eye of the viewer to the subject, and doesn’t include any distracting elements. All these things can
be improved by the right crop. Getting closer to your subject and cutting out background clutter
are musts to a good crop, but knowing a few basic photography rules, such as the rule of thirds,
helps you to crop your photo to the best advantage.
Get rid of background clutter
A good reason to crop your photo is to get rid of distracting elements in the background. The sub-
ject should be the main focus of any image, and anything else in the image should complement the
subject, lead your eye to the subject, and contribute to the “story” being told about the subject.
Too many objects, distracting colors, or any other background that draws the eye away from the
subject should be cropped out of your photo if possible.
Note
Cropping is an obvious fix for a busy background, but you have other ways to reduce the impact of a back-
ground that can’t be cut out of a photo with the Crop tool. You can cut out your entire background using a
Selection tool, you can blur the background, or you can convert the background to black and white. n
Preserving aspect ratio
Before you pull out your Crop tool and start trimming away, you need to know what you are plan-
ning to do with your photo. If you might want to print your photo in more than one size, leave
yourself plenty of workable area around the edges of your photo. Don’t create a custom crop size
that’s so tight around your subject that you’ll go in later to create a 5x7 print and find that you
can’t do it without cropping out part of your subject.
Also be aware that standard print sizes such as 5x7 and 8x10 are different aspect ratios, so if you
crop your photo to an 8x10 size, you’ll have to trim the edges to make the same photo a 5x7. If
you are printing the same photo in multiple sizes, save the original photo, using it to crop each
size, and then save each cropped photo individually.
07_584743-ch03.indd 8407_584743-ch03.indd 84 5/3/10 10:17 AM5/3/10 10:17 AM

