Complete Guide to the Nikon D200- P5 pptx
Bạn đang xem bản rút gọn của tài liệu. Xem và tải ngay bản đầy đủ của tài liệu tại đây (1.37 MB, 30 trang )
V1.03
Thom Hogan’s Complete Guide to the Nikon D200 Page 121
Once the card is formatted, the Frames Remaining indicator
resets and shows the number of images you can take at the
current image quality setting (if that number is larger than
999, then K is displayed just above the Frames Remaining
indicator; 1.7 in the Frames Remaining indicator with the
K
also showing would mean 1700 frames can be taken).
Note: Alternatively, you can use the Format option on the SET UP
MENU, but the method just documented is usually quicker,
and doesn’t eat up battery power by lighting up the color
LCD.
Note: Formatting a CompactFlash card “removes” all information
and images from the card. Always save your images to a
computer before formatting a card! I use the quotes around
“removes” because the image data isn’t actually erased;
only the directory information that points to it is rewritten.
While it is possible to recover images immediately after
performing an in-camera format, it is a hassle to do, and
won’t be fully successful if anything has been written to the
card since the format.
The D200 tells you when a CompactFlash card is full by
blinking the card indicator and 0 in the Frames Remaining
indicators in the top LCD, and blinking 0 in the viewfinder.
The card isn’t necessarily full, however. It just doesn’t have
enough room to store another picture at the current image
quality setting.
Tip: If you’ve been shooting using NEF or the NEF+JPEG
qualities, both of which chew up considerable space per
image, you can often squeeze a few more JPEG-only images
onto the card because the JPEG compression makes the
resulting image files much smaller.
õ
To remove a CompactFlash card from the D200:
1. Turn the D200’s power switch to the OFF position.
Important: Before moving to Step 2, confirm that the
green CompactFlash Access lamp is not lit (the camera
does not completely shut down until buffered data is
written to the card).
V1.03
Thom Hogan’s Complete Guide to the Nikon D200 Page 122
2. Open the door by moving the CompactFlash Card
Door switch towards the top of the camera
(counterclockwise). The door on the right side of the
camera should open.
3. Press the large, grey, rectangular button just below the
bottom edge of the CompactFlash card. The card
should pop out slightly, allowing you to grab its edge.
4. Remove the card from the camera.
5. Insert another card into the slot, if desired.
6. Close the door that covers the CompactFlash slot.
7. Turn the camera ON. Check to make sure the Frames
Remaining counter shows, and not CHA.
Nikon-Approved Cards
Nikon used to make a big deal about “operation not
guaranteed” unless the CompactFlash card has been tested
and approved by Nikon. The list is short (though subject to
change):
• SanDisk cards to 2GB (SDCFB, SDCF2B, SDCFH (Ultra),
SDCFH (Ultra II), and SDCFX series (Extreme III).
• Lexar Media 4x, 8x, 10x, 12x, 16x, 24x, and 40x cards,
plus Lexar Media Pro 40x, and 80x WA (Write
Accelerated) cards.
• The Lexar Pro 80x WA Locktite card (which includes
encryption abilities so that the files on the card can be
secured for either privacy or chain-of-evidence reasons).
• 1GB, 2GB, 4GB, and 6GB Microdrives.
I’ve used a wide range of other cards in the D200, and have
yet to find any that cause operational issues with the camera.
My understanding is that Nikon technical support no longer
refuses to deal with troubleshooting a camera that uses a card
not on Nikon’s list. That’s not to say that at some point the
card itself can’t be isolated from the problem, so I generally
recommend that you have at least one Nikon tested card
V1.03
Thom Hogan’s Complete Guide to the Nikon D200 Page 123
handy, as this sometimes allows you to remove a specific
storage card from the list of suspects for a problem.
How Much Card?
Files created by the D200 are large; much larger than you’re
used to if you’re coming from a previous Nikon DSLR other
than the D2x. As you’ll find out in coming sections, this can
put a crimp on the number of shots you can get on a card.
Let’s put it in perspective: shooting NEF format you’ll get
about 60 images on a 1GB card. Add a JPEG Fine image to
your NEF shooting, and that drops to 39 (39 NEFs and 39
matching JPEGs). You can recover somewhat by using NEF
compression, which will net you somewhere between 70 and
80 NEF+JPEG images depending upon the data in the images
(more on this when we discuss Compressed NEFs on page
<
H149>). Still, none of those numbers are much more than a
couple of rolls of film (and in the worst case, about the same
as a roll of film).
For uninterrupted shooting, you’re really going to want at
least 2GB cards in your D200. As I write this, 2GB cards are
the best compromise between capacity and price, though you
can often find good deals on high-capacity 4GB and 6GB
Microdrives. If you need to shoot more than 120 NEFs at a
time, you’ll have to spring for 4GB, 6GB or 8GB cards, in
which case I’d recommend the 6GB Microdrive as the most
economical option and the SanDisk Extreme III as the
speediest. Personally, I’m using multiple solid-state 2GB and
4GB cards backed up with an Epson P-4000.
Unlike my books on other Nikon DSLRs I’ve made a separate
section in this eBook about card size to call attention to the
fact that you’re going to chew through storage space. I’ll have
some more to say on that subject as we get down to the
details, but I wanted to warn you up front that, if you’re going
to shoot at the full size this camera is capable of, be prepared
to move beyond your 512K storage cards!
V1.03
Thom Hogan’s Complete Guide to the Nikon D200 Page 124
CompactFlash Troubleshooting
Problem: The capacity of your CompactFlash card seems to
be a little less than the one stated on the label (e.g. you seem
to only be able to store 114MB of data on a 128MB card).
Solution: Actually, this is normal. CompactFlash works just
like a disk drive on a computer, with an area set aside for a
file allocation table and a file directory. In addition to the
reserved space, storage manufacturers sometimes use 1K to
mean 1000 instead of the more correct 1K=1024. Also, the
number of folders created has a small impact on overall
capacity. Like disk drives, sometimes areas of the card are
marked as “bad,” and this, too, reduces capacity.
Problem: It seems to take longer to store information on a
CompactFlash card than it did when you first obtained it.
Solution: If you erase individual files instead of reformatting
the card, it’s possible to get file fragmentation on the card.
When this happens, data for any given file is non-adjacent,
and the camera has to write extra information into the file
directory. This, in turn, can cause slightly longer write times
due to the extra information that must be written in the
directory (and on Microdrives, the extra head positioning that
must be performed slows the process even more).
Likewise, it’s possible for cards to get lost clusters
F
43
and files
on a card. Use the D200’s Format function to erase all
information from a card instead of individually deleting files.
Alternatively, you can reformat cards on your computer if you
have a card reader (it works just like formatting any disk
drive—open a window for the drive in Explorer [Windows] or
Finder [Macintosh] and use the normal formatting procedure
for drives; just make sure that you pick FAT, not FAT32 if
43
Clusters are the basic unit in which information is stored on disk drives (and
CompactFlash). A file is made up of many clusters, and the directory and other
information stored at the beginning of the disk keeps track of which clusters belong to
which files. When a cluster is damaged, the information tracking it is tracking is lost.
This means that your data may still be intact, but that the structure of the disk is
incorrect, hiding that data. As noted elsewhere, having a good disk recovery utility
handy can sometimes help you retrieve precious photos you thought the camera had
lost forever.
V1.03
Thom Hogan’s Complete Guide to the Nikon D200 Page 125
you’re using a recent version of Windows, such as XP, and
aren’t using a 2GB or larger card).
Problem: You get occasional “black” frames instead of
images.
Solution: Two possibilities. First, your battery may be low.
Replace the battery and see if the problem goes away. If not,
there’s likely a bad sector on the card that isn’t marked as
such. Another symptom is sometimes excessively long writes
to the card (or the green “writing to card” light stays lit), or
you get large black areas through your images. You need to
perform a full format
F
44
on the card using a card reader
attached to a PC (which should detect and mark bad sectors).
However, if black frames appear on more than one of your
cards or on a regular basis, you should have your camera
checked by Nikon. Black frames are also a possible indication
of a shutter problem on D200 bodies.
Problem: You can’t find images on the card or the computer
complains about damaged files when you try to transfer
images from camera to PC.
Solution: One of several problems is likely present on the
card: (1) the FAT (File Allocation Table, which tracks clusters
in use) is corrupt; (2) the directory has incorrect information
about files, usually either cross links of data between two
images or missing cluster information; or (3) something else is
wrong with the data or structure on the card, such as a
damaged sector, an incomplete file, an unexpected End-of-
File marker, and so on. In every case, you must immediately
fix the problem or risk the permanent loss of your image data.
You may or may not be able to fix the problem, but if
anything gets written to the card before you begin attempting
a correction, your ability to recover data is compromised.
Macintosh users should be extremely careful when mounting
problematic cards on their computers, as several behind-the-
scene tasks can write to the card without your knowledge.
44
Note that in some versions of Windows the default is to perform a Quick Format.
V1.03
Thom Hogan’s Complete Guide to the Nikon D200 Page 126
So how do you fix the structure and data and recover your
images? The best choice is to use a product such as Photo
Rescue (
H This tool—
versions are now available for both Macintosh and
Windows—generally can find and recover images that are the
result of most structure errors, though you may have to go into
the advanced mode and play with some of the settings in
order to do so. Current versions of Photo Rescue understand
the NEF format, and can resurrect a raw data file, complete
with the proper extension. If you haven’t written anything to
the card after the error occurred, you can often recover every
image on the card. Note that to use Photo Rescue you need a
way to mount the card either by inserting the card into a
PCMCIA adapter on a portable, or by putting the card into a
card reader attached to your desktop machine.
Another possibility is to use
SCANDISK (or CHKDSK, or the
Disk Doctor portion of Norton Systemworks). If the error on
the card is purely structural and no data has been overwritten
or “orphaned” (left without a directory entry), you’re likely to
recover the images. However, since generalized disk tools
know nothing about image file formats, they can’t scan data
on the card and resurrect orphaned data or rebuild
incomplete image files. Personally, I travel with Photo Rescue
installed on my laptop and with both a PCMCIA adapter for
my Microdrives and a card reader for other CompactFlash
cards.
Problem: Images you shot don’t seem to be recorded on the
card. Recovery software finds no record of them, and the file
numbering seems sequential.
Solution: You probably turned the camera off and pulled the
card out before the buffer flushed all the images. Remember,
the camera is buffering images to memory before writing them
to the card. If you have a full buffer of 40 images it can take a
few seconds to clear that buffer to CompactFlash. Fortunately,
the D200 doesn’t have the design problem of previous Nikon
DSLRs, which you could turn off before flushing the buffer
completely (the D1 series only flushed one image before
letting the camera turn off). But you can still get too hasty and
V1.03
Thom Hogan’s Complete Guide to the Nikon D200 Page 127
pull the CompactFlash card out of the camera before all of the
images have been written to the card. Pay attention to the
green CompactFlash Access lamp—if it’s on, the camera is
still writing images to the card and you shouldn’t remove the
card.
Problem: A 4GB or larger capacity card only shows 2GB of
storage space available.
Solution: To fully address the 4GB of space on the card it
must be formatted using FAT32 formatting. If the card was
formatted using FAT (or FAT16 as it is sometimes called), the
maximum capacity is limited to 2GB. Note that some recent
cards with large capacities also have a switch that must be
flipped to enable them to be used above 2GB.
Image Formats
The D200 saves images to the CompactFlash card in two
image formats, JPEG and NEF:
• Saving an image in JPEG format performs the necessary
steps to convert the sensor data into an image using the
camera settings that are in effect, reduces the 12-bit
capture data to 8 bits, copies the camera settings into the
EXIF fields, and applies data compression that loses image
information. (Unlike most previous Nikon DSLRs, all
manipulations of the image data are done in 12 bits prior
to reducing to the final 8 bits required by the JPEG
format.)
V1.03
Thom Hogan’s Complete Guide to the Nikon D200 Page 128
• The NEF format “preserves” the sensor dataF
45
along with
copying the camera settings into the EXIF fields. In
addition to the raw sensor data, NEF format also stores a
JPEG Normal image as a “thumbnail.”
If you want the highest quality image the D200 is capable of,
use NEF (though note that the latter requires that you use
appropriate software to decipher the data; see “NEF Format“
on page <
H145>). If you know your way around digital image
editing programs and immediately convert your JPEG files into
a lossless format, such as Adobe’s PSD (Photoshop data)
format, the actual loss of data using JPEG can be kept
essentially invisible, at least at moderate viewing sizes.
I should probably take a moment here and elaborate on a
sentence in the previous paragraph (the one that starts “If you
want the highest quality…”). The primary difference between
JPEG and NEF is that, for JPEG the camera’s electronics have
to do all the work of assembling an image from the data and
your settings, while with NEF that work is postponed until you
get to a computer. JPEG (potentially) suffers from three things
that can “harm” image quality:
• The camera’s electronics are static. They’re only as good
as the state-of-the-art in early 2005 when they were
locked down in design. Those of us who’ve been using
DSLRs for years know that image processing software is
still getting better every year. By delaying the processing,
you potentially can take advantage of image techniques
that came to be after the camera was designed.
• The camera’s electronics “reduce” the data set. In
particular, tonal data is reduced from 12-bits to 8-bits in
the process of creating a JPEG image. That’s not a big
issue if you never post-process your images, but it can be
if you make drastic changes in software post-processing of
45
Preserves is in quotes because the D200 doesn’t really preserve the actual 12-bit
values when it stores in the compressed NEF format, instead using a “visually
lossless” compression format. It does preserve the data if you don’t use compression
on NEF images, though.
V1.03
Thom Hogan’s Complete Guide to the Nikon D200 Page 129
the image. Note that the D200 doesn’t reduce the data set
until it’s done manipulating the image. All in-camera
adjustments are made in 12-bit by the D200. Still, if
you’re going to make any changes after the fact to the
image, 8-bit data storage is a limiting factor.
• The camera uses the settings you made. Make a mistake
on setting white balance, sharpening, or some other
camera setting? Well, with JPEG that mistake is encoded
into the image data, and it’ll take careful post-processing
to take it back out (if that can be done—not all such
mistakes can be undone). NEF allows you to alter many of
your camera settings after you’ve taken the picture.
If you’re getting the feeling that I’m strongly in favor of the
NEF format, you’re right. For serious photographers, shooting
in NEF is like retaining and working with a negative while
JPEG is like accepting the print that comes out of the lab. The
reason most amateurs avoid NEF format is that they don’t
want to spend any time post-processing their images.
Likewise, some event photographers shoot so many images
that post processing all of them would take too much
computing power and time.
Fair enough. Just realize that you’re going to have to make
some choices about how you shoot with your D200, and
JPEG versus NEF is one of the key ones. Make sure you’re
making the right decision for yourself
F
46
.
Okay, let’s delve into the details so you can better understand
what you just read.
Pixels
Before we get to the individual data formats, let’s make sure
that we have some basic understanding of the underlying
element used in them: pixels.
46
JPEG shooters should note that the D200 does a pretty darned good job of rendering
into the format. It’s not that JPEG quality is bad, it’s that NEF quality can be better in
the right hands. By these comments I don’t mean to try to scare anyone off from
shooting JPEG—I do it myself from time to time when the situation warrants it—but
only to point out that you give something up by doing so.
V1.03
Thom Hogan’s Complete Guide to the Nikon D200 Page 130
A pixel is the smallest element of a digital picture. You’ve
probably seen camera resolution figures expressed in the form
of two numbers, say 3872 x 2592. This means that the camera
produces results that have 2592 rows containing 3872
columns of data. At each row/column intersection, there’s a
pixel, which is used to describe the color that should be
displayed there.
Pixels contain color information, usually expressed as
individual values for red, green, and blue
F
47
. Each color value
is stored in a series of bits. Bits are the smallest data elements
computers understand; a single bit has a value of either
1 or 0
(thus, an example 8-bit value is
0100 1101). While the D200 is
capable of producing 12-bit values for each color (assuming
you shoot NEF and use a converter that retains that data),
most computer imaging programs, including Photoshop,
normally use 8-bit values for most work
F
48
.
In computer jargon, eight bits are called a byte, and most disk
and memory storage capacities are expressed in bytes. For
example, the main memory of your computer might have
67,108,864 bytes (64MBs) of space. The non-round number is
caused by the binary nature of computers, where everything is
expressed as a power of 2. A thousand in computer counting
turns out to actually be 1024; therefore most storage
capacities are slightly understated. CompactFlash cards used
by the D200 have storage capacities expressed in bytes, as
well.
To form one complete digital image you must store 24-bit (for
JPEG) or 12-bit (for NEF) values for each pixel. Why 24-bit for
JPEG? Remember, we need 8 bits to store each of the three
primary colors for JPEG files, while NEF files just contain a
single 12-bit data point for each photosite (the remaining
47
When I write about the Red channel, Blue channel, and Green channel elsewhere
in this eBook, I’m referring to these individual color data points.
48
Photoshop CS now allows most of its image editing tools to function with 16-bit
data, but since all consumer printers and almost all commercial printers only accept
8-bit data, some people still use Photoshop only with 8-bit data.
V1.03
Thom Hogan’s Complete Guide to the Nikon D200 Page 131
color information is deciphered later). You do this in a
compilation of bytes called a file. On a D200 at its highest in-
camera resolution, that amounts to a minimum of 30,108,672
bytes of data (3872 x 2592 pixels at 24 bits each), which we’d
normally just round off and call 30MB. That means that a file
containing that image would contain a string of over 240
million
1’s and 0’s (actually, slightly more than that, since
most file formats require some additional information that
describes the characteristics of the data in the file).
To put that in perspective, this eBook only has a bit over a
half million characters in it, so if you took every letter in this
eBook and made it into a
1 or a 0, you’d need almost 500
eBooks just to contain the data for one image. (Puzzled by the
240 million number? Remember, there are 8 bits in a byte!)
Obviously, we’re talking about a huge amount of data. To
help deal with the storage issues all that data raises, Nikon
compresses the image data (i.e. makes image files smaller).
This is true for both JPEG and NEF
F
49
files on a D200.
JPEG
The D200 normally stores images in JPEG formatF
50
(in
Windows, the three-letter file extension limit reduces this to
.JPG, so you may also have seen this format referred to as
JPG). JPEG (pronounced JAY-peg) stands for Joint
Photographic Experts Group, which developed and ratified
the original standard for this file format.
49
Even an uncompressed NEF image can be thought of as “compressed,” as it doesn’t
have Red, Green, and Blue data points for each image pixel; that saves 16 bits per
pixel location from what would be stored if RGB data were there. Yes, that isn’t
exactly compression, but the point being made here is about file sizes, not the image
impact of compression. From a file size standpoint, a NEF file is a reduced set of data
from the final image, which can be thought of as a form of lossless compression.
50
Technically, JPEG isn’t a file format, but simply a data compression scheme.
However, the fact that most computers use a file extension of
.JPG or .JPEG for such
files has caused users to call it a file format. I’ll bow to this common practice in this
eBook.
V1.03
Thom Hogan’s Complete Guide to the Nikon D200 Page 132
JPEG files can be read by a wide variety of programs, and is
one of the file formats directly supported by HTML, the
standard language from which Web pages are created.
The wide acceptance of the JPEG format means that you can
share a JPEG-encoded file with others, regardless of what type
of computer or software they have.
To produce a JPEG file from raw digital information, the
following steps are performed (note that the words in
parentheses are gross oversimplifications to help you
understand the process):
1. The image is divided into 8 x 8 pixel blocks.
2. The information in each block is run through a series
of “transforms” (calculations) to produce a set of 64
“coefficients” (results) that are then “quantized”
(compressed)
F
51
. Essentially, pixels are converted from
numbers into equations (the calculation used is called
a Discrete Cosine Transform). Blocks are operated on
from top left to bottom right. Essentially, detail within
each 8 x 8 pixel block is reduced, the amount of
reduction determined by the amount of quantization
(compression) applied.
3. The quantized (compressed) results are gathered into a
single binary sequence, and this sequence is further
encoded in a scheme called modified run-length
algorithm, which generally produces further
compression of the information (run-length encoding
assigns the shortest bit sequence to the most-often-
used pixel value, and the longest bit sequence to the
least-used pixel value).
Note that compression happens twice when a JPEG file is
created. The first compression is variable in level, but results
51
An aside: which set of words you use (transforms, coefficients, quantized or
calculations, results, compressed) depends upon whether you’re a mathematician or
a layperson. A nerdy party trick is to use the vocabulary of the one you aren’t.
V1.03
Thom Hogan’s Complete Guide to the Nikon D200 Page 133
in permanent loss of information. Generally, it takes a JPEG
compression ratio of 10:1 or more to produce annoying
artifacts (see “JPEG Artifacts” below). JPEG compression ratios
of 4:1 or lower produce virtually imperceptible artifacts in
most common photo scenes. The second compression step
(run-length encoding) is lossless, meaning that the original
information—in this case, the discrete cosine transform
formula—can be fully retrieved.
The D200 can produce photos encoded in JPEG format. The
D200 uses approximately 4:1 compression when set to Fine,
8:1 compression when set to Normal, and 16:1 compression
when set to the JPEG Basic option. (This is the “lossy”
compression, so Fine is visually “better” than Basic.)
Note: There is wide variance in the way JPEG compression levels
are presented in software user interfaces. Some programs
show you the approximate compression amount as a ratio
(e.g. 4:1), some use descriptions (e.g. “high,” “moderate,”
and “low” or Nikon’s “fine,” “normal,” and “basic”), and
still others use sliders and other controls to continuously
vary the amount of compression. The best programs show
you a preview of the resulting compression, letting you
visually determine how much compression to use.
One interesting side note about JPEG: the process that
converts the pixel values into equations ends up putting the
“average” pixel of each 8x8 block in the upper left corner of
that block prior to compression. Nikon doesn’t use this
average pixel directly (the D200 generates the image’s
thumbnail using other methods; some Coolpix models use this
pixel to generate the thumbnail).
Thus, if you want to create smaller images from the JPEGs that
the D200 produces (say for Web use), the highest quality will
be obtained if you reduce the size to 1/8 (e.g. 484 x 324 from
the Large JPEG size created by a D200). That’s because
you’ll force your image editing program to summarize the 8x8
blocks used in generating the JPEG, and minimize any
artifacts that might be otherwise produced.
V1.03
Thom Hogan’s Complete Guide to the Nikon D200 Page 134
Setting JPEG
The D200 allows you to create three sizes of JPEG images:
L = Large = 3872 x 2592 pixels
M = Medium = 2896 x 1944 pixels
S = Small = 1936 x 1296 pixels
Put into a table:
JPEG Size
Pixels Total Size
Large
3872 x 2592 10mp
Medium
2896 x 1944 5.6mp
Small
1936 x 1296 2.5mp
õ To set the D200 to record JPEG images:
1. Press the MENU key to show the menu system.
2. Use the Direction pad to navigate to the SHOOTING
MENU (green camera icon tab).
3. Use the Direction pad to navigate to the Image
Quality option and press the > key on the Direction
pad to select it.
4. Use the Direction pad to navigate to the JPEG quality
you wish to use (JPEG Fine, JPEG Normal, or
JPEG Basic), and press the > key on the Direction
V1.03
Thom Hogan’s Complete Guide to the Nikon D200 Page 135
pad to select it.
5. Use the Direction pad to navigate to the Image Size
option and press the > key on the Direction pad to see
the options.
6. Use the Direction pad to navigate to the JPEG size you
wish to use (Large (2872x2592/10.0M), Medium
(2896x1944/5.6M), or Small (1936x1296/2.5M), and
press the > key on the Direction pad to select it.
7. Use the Direction pad to navigate to JPEG
Compression and press the > key on the Direction
pad to select it.
V1.03
Thom Hogan’s Complete Guide to the Nikon D200 Page 136
8. Use the Direction pad to navigate to the option you
wish to use (Size Priority or Optimal Quality).
This last bit (Steps 7 and 8) first appeared on the D2x and is
relatively new to Nikon DSLRs. You may think it’s another
way to set Fine or Normal. Not quite. Remember, JPEG
images are compressed and the compression is variable. If
you shoot something with a lot of detail in it (and especially if
you have settings active that enhance acuity, such as
sharpening, then the file size will be noticeably larger with
Optimal Quality setting. When you select Size Priority, you
force the JPEG engine to use cruder compression on highly
detailed images (effectively overriding your Image Quality
setting).
Alternatively, Image Quality can be set by holding down the
QUAL button on the top of the camera and rotating the Rear
Command dial; Image Size can be set by holding down the
QUAL button and rotating the Front Command dial (assumes
you haven’t used Custom Setting #F5 to change the dial
functions):
Top LCD (only one of the options is highlighted at time):
Let’s examine how the three JPEG options impact the look of
an image. Surprisingly, there’s not a very big penalty for using
the various JPEG settings. My overall test scene looks like this:
V1.03
Thom Hogan’s Complete Guide to the Nikon D200 Page 137
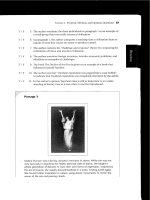
This is a tough, mixed lighting, high-contrast scene that attempts to
provoke the D200 into worst-case images. Some of the colors will
go out of gamut in some of my tests—this is intentional (like I said,
a worst-case test). White Balance is set to Auto. ISO is 100.
JPEG Fine. Here’s what
two sections of the chart
look like close up. We’re
specifically looking for
detail and contrast
changes. Note the clean,
even detail in the
resolution swatches—
there’s little color moiré
in the resolution
swatches, clean edges
(despite low sharpening
settings).
V1.03
Thom Hogan’s Complete Guide to the Nikon D200 Page 138
JPEG Normal. Contrast
has increased slightly
(look at the black in
Mickey’s ears and the
whites). Detail has
remained quite good,
though really close
examination shows that
every now and then a
small interference
pattern (mosquitoes)
appears in the very fine
line separations.
JPEG BASIC. Still
holding up well, with
another slight bump in
contrast. Detail,
amazingly, is holding up
quite well.
V1.03
Thom Hogan’s Complete Guide to the Nikon D200 Page 139
JPEG Fine Basic
Compression Size
Priority. Still quite
good. Contrast continues
to build, and in close
examination the really
small detail starts to
break down (you might
notice a slight
coarseness in Mickey),
but no excessive
artifacts. Had I turned
sharpening up, you’d see
clear problems in the
small detail (one of the
reasons why I
recommend low levels
of in-camera
sharpening).
The biggest issue with using more intense JPEG compression
at the base ISO value appears to be increased contrast.
Contrast is always more difficult to remove from an image
than it is to add it. Thus, I would recommend sticking to
JPEG Fine Optimal Quality whenever possible. The reason
to use the other settings would be to save space at the
expense of potentially irremovable contrast buildup and some
edge detail confusion at high sharpening levels.
JPEG Rendering
The D200 renders JPEG images a bit differently than previous
Nikon DSLRs other than the D2x. While not publicly talked
about, apparently Nikon is using a NuCore JPEG engine to do
the actual rendering. What is known is that all manipulation
of the image is done using 12-bit data. The translation to 8-bit
JPEG is done only after all the demosaicing, color
manipulation, sharpening, and other effects are first handled.
In other words, the D200 takes the 12-bit raw data, renders a
12-bit set of pixels, and then reduces that to 8 bits only at the
point where the actual JPEG encoding is performed.
V1.03
Thom Hogan’s Complete Guide to the Nikon D200 Page 140
While this doesn’t sound earth shattering, it does have an
impact on the images the D200 produces. When you apply
sharpening, tone curves, or color manipulation on 8-bit data,
you risk posterizing bits of the data. Posterization means that
some bit values just don’t exist. Too much posterization can
result in visible artifacts, usually “bunched up” or unnatural
tonal ramps. The problem is compounded if you take an 8-bit
rendered image and do additional post processing on it.
Left: a histogram from an image using Photoshop’s Levels
command. Right: the same image overly manipulated, which
reveals big posterization (gaps) in the darker levels. Posterization of
highlight detail makes for detailless highlights; posterization of
shadow areas makes for blotchy looks in the shadows. Once image
data has been posterized, each additional manipulation can
compound the problem.
For example, one typical problem found by D1x users was
that they’d underexpose slightly to make sure highlights were
properly captured, and later use a Curve to reshape the tonal
ramp (similar to what the example shows above, actually).
Unfortunately, posterization in the shadow detail would often
then become visible, resulting in a blotchy, muddy look in the
darker areas of the image. By keeping the in-camera
manipulations in 12-bit data, the D200 avoids this problem.
Shadow detail in JPEGs made on a D200 is much better than
most previous Nikon DSLRs (though a bit noisy).
JPEG Artifacts
JPEG compression produces two primary types of visible
artifacts. The higher the compression used, the more visible
these artifacts tend to be. Also sharpening set to high levels
tends to trigger these artifacts.
V1.03
Thom Hogan’s Complete Guide to the Nikon D200 Page 141
The first artifact is best described as “visible blocks” (see
example, below). Visible blocks are created because JPEG
operates on images in 8x8 pixel blocks.
Blocks are most often seen in areas where there is little detail
but a continuously variable color (shading on an unevenly lit
wall, for example). The quantization step attempts to throw
away minor differences in colors or gradients, but when there
is a gradual change of color that spans blocks, the block
averages sometimes differ enough that you can see the block
boundaries.
JPEG “blocks” tend to appear in broad
areas of gradually changing color, as in
the highly magnified portion of sky,
here. To the right of the arrow, you’ll
see several left edges of blocks. The
blocks don’t always appear in 8x8
pixel size. This sky, for example, varied
gradually from top to bottom, but not
left to right, resulting in bands of
blockiness rather than distinct blocks.
(I’ve exaggerated the contrast to make
the blocking more visible.) The only
way I can get even a hint of blockiness
from the D200 is to use JPEG
Compression set to Size Priority,
JPEG BASIC as the JPEG Quality, and
to post process on a smooth tone
ramp.
V1.03
Thom Hogan’s Complete Guide to the Nikon D200 Page 142
Here’s an example of
the mosquito artifact.
Look closely at the
very edges of the
letters in this
example. All the
letter edges have
clear edge issues,
and the insides of the
P and R in the word
“PRODUCT” are
completely white.
A second artifact is usually seen at sharply defined edges (see
example, above). At high compression levels, these artifacts
can be extremely annoying, and often are called
“mosquitoes,” as it looks like a large swarm of flying insects
was present when you took the picture. This is the primary
artifact I see (rarely) in D200 JPEG images, though it is
difficult to produce in a way that’s clearly visible. But let’s try:
This is the top of the basketball shot I showed before (in the section on
sensor noise) processed to reveal what’s really happening at the edges of
the rim. You should be able to see that there’s artificial detail happening
just above the actual rim (mostly orange and magenta “halos” as shown
V1.03
Thom Hogan’s Complete Guide to the Nikon D200 Page 143
in this altered image; the edge of the rim should be a perfect boundary
between black and mostly cyan/green pixels the way I’ve processed this).
It’s sometimes difficult to isolate the sensor noise production from the
JPEG-induced artifacts, but in my testing it’s clear that bumping up the
ISO, choosing Size Priority, and using sharpening set to High definitely
will give you false edge detail. It may be masked in the detail or noise, but
it’s definitely there.
Curiously, applying a small amount of “blur” to the original
data before applying JPEG compression reduces the visibility
of artifacts and the size of the resulting file. That’s because
hard edges contain conflicting data the compression scheme
needs to resolve, and more bits are needed to hold that
information. Thus, setting high levels of sharpening with JPEG
files at high ISO values should be avoided, when possible,
with the D200.
The D200 is a bit like the D100, though: something in the
JPEG rendering scheme used tends to make JPEG Fine and
JPEG Normal images relatively immune to over sharpening
and edge artifact issues, at least at lower ISO values and when
you’ve picked Optimal Quality for JPEG Compression.
Indeed, if you run a resolution test on both JPEG and NEF
images from a D200, you’ll find that the NEF image resolves
slightly more detail, an indication that JPEG encoding is
“smoothing” edges a bit.
(Just in case it’s not clear from the preceding: it’s okay to use
higher levels of sharpening on D200 images at the lower ISO
values and higher JPEG quality levels. It’s not okay to use
higher levels of sharpening if you’re using higher ISO values
and lower JPEG quality levels.)
Note: If you rotate a JPEG file and resave it, you may lose
information! That’s because each 8 x 8 block must be
rotated in place to preserve its compression information. If
an image editing program simply grabs rows of pixels and
converts them to columns, when you resave the file, a JPEG
recompression may again be applied to the entire file. If the
8x8 blocks are rotated in place and each block individually
placed in the new orientation, JPEG compression is
preserved and no new recompression takes place.
V1.03
Thom Hogan’s Complete Guide to the Nikon D200 Page 144
ACDSee, IrFanView, Photoshop CS2 and a number of other
programs can rotate JPEG files without recompressing.
Nikon’s supplied PictureProject also preserves data during
rotation (and can do so automatically during downloads if
you’ve set Image Rotation to On). But make sure you
know what the programs you use do! Older software
programs (pre-2003) tend to recompress rather than rotate
correctly.
Note: There’s a persistent myth circulating that any time you
resave a JPEG file that you’ll force a full recompression of
the file, adding artifacts. Well written software doesn’t do
this. For example, beginning with version 6.0 of Photoshop,
the only recompression that is done on JPEG images that are
resaved is on portions of the image that were changed. In
other words, if you bring a JPEG file into Photoshop 6 (or
later version) and make no changes, resaving it results in no
degradation of the image.
This is probably a good point to introduce the interaction
effect of certain camera features, since I’ve already mentioned
a few. The D200 does have a few image quality issues that
you need to be aware of, and we’ve come to one of them.
• JPEG compression has a tendency to increase the visibility
of moiré. For example, if you’re shooting a tight fabric
pattern—which might generate moiré—you probably
should avoid high levels of JPEG compression and
sharpening together. Put those three things together—
moiré, JPEG compression artifacts, and sharpening
artifacts—and you’re asking for trouble. It’ll be extremely
difficult to remove the color fringing that’ll occur.
• Higher JPEG compression produces more artifacts at
higher ISO levels. The noise on the D200 tends to be very
granular and visible at high ISO levels, and this triggers
the compression engine towards mosquito-type artifacts
on hard edges. Avoid JPEG Basic and Size Priority at
ISO 800 and above. Still, the D200 is better than the D2x
in this regard.
V1.03
Thom Hogan’s Complete Guide to the Nikon D200 Page 145
• JPEG compression interacts with sharpening at high ISO
levels. Again, it’s the noise that’s the problem, but
sharpening can further trigger excessive artifacts on edges.
Again, avoid JPEG Basic and Size Priority at ISO 800
and above, and definitely consider lowering the
sharpening level as you increase the ISO value.
In each of these cases you can create image defects that won’t
be easily removed after the fact. Moiré can sometimes be
removed (or at least downplayed) by moiré removal tools (or
a bit of well-applied Gaussian Blur), but if JPEG edge artifacts
get melded into the image data along with moiré or
sharpening, all bets are off.
I’ll describe these interactions more when I get to the shooting
suggestions later in this book.
Overall, however, the D200 exhibits very little tendency
towards producing JPEG artifacts at the lower ISO values.
Only at high ISO values do I see mosquito-type effects, and
some of this is actually noise destruction of edges that triggers
JPEG rendering issues. JPEG blocks are almost non-existent on
the D200, probably because the data is kept in the 12-bit
realm while manipulating it.
NEF Format
NEF format often confuses D200 novices (Nikon and others
sometimes also refer to this format as RAW). Nikon advertises
it as the highest quality format, one that preserves the “raw”
image photosite data. What Nikon doesn’t tell you is that you
need to purchase an additional software product to really get
the most from this format
F
52
. Nikon Capture 4.4 (or later) is
what Nikon recommends, but other alternatives exist (see
“D200-related Software” on page <
H613>).
52
A fully functional 30-day trial version of Nikon Capture can be downloaded from
Nikon’s Web sites by D200 owners (you need to create a user account and supply
your camera’s serial number).