The Adobe Illustrator CS Wow- P14 ppsx
Bạn đang xem bản rút gọn của tài liệu. Xem và tải ngay bản đầy đủ của tài liệu tại đây (2.7 MB, 30 trang )
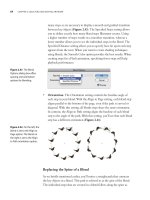
Illustrator now supports the
Adobe Color Picker. Double-click
on the color proxy in the Toolbox
or on the Color palette to open
the Color Picker. Enable the Only
Web Colors checkbox to limit the
Color Picker to Web safe colors.
Pixel units
Control-click (Mac)/Right mouse-
click (Win) on the rulers after
View>Show Rulers and select Pix-
els to display the units as pixels.
Auto-opening select libraries
Set any swatch library (Win-
dow> Swatch Libraries) to open
automatically when you launch
Illustrator by selecting Persistent
from the palette's pop-up menu.
Choose it again to reset the pal-
ette to close by default.
SVG or SVGZ (Compressed)?
SVG compressed is gzipped or
"gnu-zipped," and is the W3C-
sanctioned version of "raw" SVG.
The Adobe SVG Viewer automati-
cally decompresses the file on the
client browser and displays it as
normal. So there is little difference
between the formats, except that
one is much smaller. An exception
occurs when you use a database
to serve information to a client. In
this case, you will need a script to
decompress and then re-compress
the file.—Andrew T. Watanabe
gradients or gradient mesh objects, recognize that you'll
be creating bitmapped images that will result in larger
file sizes.
• If you import or create rasterized art for the
Internet, rasterize at 72 ppi, not the default, to keep file
sizes small.
• To export a file's layers or paths selectively, hide the
ones you don't want before exporting.
• If the object you want to export to Flash contains
a dashed stroke, expand it using the Tip "Outlining
Dashed Strokes" in the Drawing & Coloring chapter. Or
you can use your operating system's clipboard to copy the
stroke from Illustrator and paste it into Flash. To preserve
the dash and gap pattern of the Illustrator object, choose
Preferences > File Handling & Clipboard and then select
PDF for the Copy As option. If you don't do this, the dash
and gap pattern will be converted to the default pattern
in Flash.
• Choosing Export Al Layers to SWF Files turns each
Illustrator layer into a separate Flash file. This is the
preferred method of exporting Illustrator elements for
animation.
SVG
Illustrator supports the export of Scalable Vector
Graphics (SVG). SVG is an emerging standard for a
Web graphic format that contains a combination of ele-
ments such as vectors, gradients, type, raster effects, and
JavaScript events, all based on the popular XML stan-
dard. SVG is also a text-based format, which means it can
be easily edited even after the file has been uploaded to
a Web server. We'll talk more about this later when we
discuss data-driven graphics. SVG is potentially a very
exciting file format, because it combines very small file
sizes with crisp artwork that, like Illustrator vector art,
364 Chapter 11 Web & Animation
Adobe Color picker
can be zoomed into and scaled up or down with no loss
of quality. As with Flash, in order for exported SVG files
to be viewed in a browser, a special viewer (plug-in) is
required. The SVG plug-in is automatically installed in
your browser when you install Illustrator.
The SVG format supports JavaScript interactivity as
well as static image display. To add a JavaScript event to
your artwork you must know JavaScript! Open the SVG
Interactivity palette (Window >SVG Interactivity); then,
with an object selected, choose an event from the pop-up
menu, and type a JavaScript command in the JavaScript
text field.
DATA-DRIVEN GRAPHICS
With Illustrator's Variables palette, you can create art-
work in Illustrator that can automatically be updated or
replaced using a script you write. For example, you can
create a template for a news headline where the actual
word headline is defined as a text variable. With the use of
a script you can retrieve a news headline from a database
and automatically update the text of your headline with
the current news item. The real time saver here is that
your template can be used over and over again for each
new headline—simply by running the script.
There are four different kinds of variables you can
define in Illustrator: text, linked images, graph data,
and visibility. When text is defined as a variable, you
can apply any attributes to the text and they will stick
with the text object (for example: font, color, style infor-
mation), and the text string will be replaced (as in the
headline example we mentioned above). A linked image
variable means that one linked image is replaced by
another. If scaling or effects have been applied to a linked
image, then any image that replaces it will also have the
scaling or effects applied to it. (This can be affected by the
Placement Options command in the Links palette menu.
This command lets you set options for linked objects,
such as whether the incoming art remembers transfor-
mations such as scaling, or whether it's placed according
Pixel preview
Choose View >Pixel Preview and
zoom in to 200% or more to
display a rasterized preview of
your vector artwork.
No more SVG export?
Illustrator now lets you save as
SVG directly from the Save and
Save As dialog box. If you check
the Preserve Illustrator Editing
Capabilities option, a native ver-
sion of the Al file will be included
in the SVG file, allowing for
complete editability in Illustrator.
Go, Go Dynamic!
You can take dynamic graphics a
step further if you're using Adobe
GoLive 6.0 or higher, which under-
stands Illustrator's variable con-
tent. Simply save your file in SVG
format and import it into GoLive
as an Illustrator Smart Object. The
variables you defined in Illustrator
can then be changed in GoLive.
CSS Layers
Illustrator allows you to export
CSS (Cascading Style Sheets) lay-
ers. Newer browsers take advan-
tage of DHTML, which allows
you to overlap artwork layers.
Top level layers can be converted
to CSS layers on export from the
Save for Web dialog box, and you
can specify what layers to export
from the Layers tab there.
Chapter 11 Web & Animation
365
What is Graphics Server?
Adobe Graphics Server is an image
server product that allows you to
automatically generate graphic
content for the Web in real time.
It uses complex scripts to take
Illustrator templates and update
them with a database as a user
browses a Web site.
Exploiting data sets
Illustrator's variables are all based
on the XML standard. You can im-
port and export variable libraries
with ease via the Variables palette
menu. For a detailed description
of how Illustrator's XML variables
are defined, see the XML Gram-
mar guide PDF on the Adobe Illus-
trator CS application CD.
Variables and objects
The following variables can be ap-
plied to the following objects:
• Visibility: any layer, group, or
object
• Text String: any text object
• Graph Data: any graph object
• Linked File: any linked file
object
to other characteristics, such as proportions, file dimen-
sions, or how it fills the bounding box. See the User Guide
for more about Placement Options.)
Graph variables allow you to design a graph using
Illustrator's graph tools and link the graph to a database;
when data changes, the graph is automatically updated.
The final variable type is visibility, which allows you to
show or hide artwork. You define whether artwork is vis-
ible or not simply by showing or hiding the layer or sub-
layer for that artwork in the Layers palette.
To define a variable, open the Variables palette
(Window > Variables). Type some text on the Artboard
and click on the Make Text Dynamic button on the
Variables palette. (The same button changes to Make
Graph Dynamic or Make Linked File Dynamic depend-
ing on your selection.) Use the same technique to define
other kinds of variables. For visibility variables, use the
Make Visibility Dynamic button.
You can also store multiple data sets in Illustra-
tor—which almost makes Illustrator itself into a database.
Once you've defined your variables, click on the Capture
Data Set button (or choose Capture Data Set from the
Variables palette menu). You can then change the data of
your variables, capture another data set, and repeat. At
that point, you can use the Previous Data Set and Next
Data Set icons to step between data sets and see the data
update on your screen. This is a great technique for seeing
how multiple versions of data will look when you design
your template. Or, on the other hand, if you have multiple
versions of a design or layout to present to a client, you
could assign the same variable to equivalent attributes in
each version of the layout design.
366
Chapter 11 Web & Animation
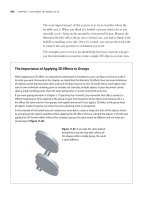
Ivan Torres
Symbols can dramatically reduce file size,
especially in art destined for the Web. Artist
Ivan Torres began this beetle by first creating
individual body parts, many of which were
complex gradient meshes. (To learn more
about creating and editing gradient meshes,
see the Blends, Gradients & Mesh chapter.)
Then he converted the parts into symbols by
dragging and dropping each onto the Symbols
palette. To assemble the beetle from body
part symbols, Torres dragged the parts from
the Symbols palette and dropped them on the
artboard, creating instances of the symbols.
To create the body parts with mirrored twins
on opposite sides of the beetle body, he used
the Reflect tool, chose Vertical and clicked
Copy. When he had completed the illustra-
tion, Torres chose File > Export and selected
Macromedia SWF format. In the pop-up dialog
box, he picked Export As: Al File to SWF File.
After opening Macromedia Flash (SWF), Torres
imported the Illustrator Flash file (File >Import)
and then used Flash's tools to manipulate the
body part symbols to create an interactive
animation.
Chapter 11 Web & Animation
367
Off in a Flash
Making Artwork for a Flash Animation
Overview: Sketch character artwork;
create brushes and blend objects
for moving parts in the anima-
tion; export the artwork as a static
Macromedia SWF file and a SWF
animation; preview animations in
Illustrator.
Character parts sketched with a custom calli-
graphic brush (see the Brushes chapter for help
with brushes)
Symbols palette displayed in Large List View
Seattle artist and animator Kevan Atteberry knows how
to get the most from Illustrator when preparing artwork
for animation in Macromedia Flash. Besides making
his Illustrator file a sketchpad filled with the eyes, ears,
arms, and legs of the character he will animate later in
Flash, Atteberry uses the Layers palette to preview parts
of the animation. He also exports a Flash animation from
Illustrator to view as a draft version as he works on the
final animation in Flash.
1 Sketching characters, drawing body parts. Atteberry
began with a custom calligraphic brush, sketching a
series of facial expressions and figure poses, honing the
visual character of a lemur until he was satisfied with the
characterization and ready to construct the lemur's body
parts. Once you're done drawing your character's parts,
you can keep your artwork as Illustrator objects or turn
the artwork into symbol instances. It takes fewer steps to
convert your artwork to symbol instances in Illustrator
than to bring your artwork into Flash and make symbols
there. Also, if you plan to export a Flash movie from Illus-
trator, turning your character parts into symbol instances
368 Chapter 11 Web & Animation
results in a smaller and faster-loading Flash file.
To make symbol instances, select the artwork for each
part body you drew and Shift-drag it into the Symbols
palette. After you release the mouse button, Illustrator
adds the artwork as a symbol in the Symbols palette and
replaces the selected artwork with an instance of the sym-
bol that was just made. (See the Brushes, & Symbols chap-
ter for more on symbols and instances).
2 Making brushes, creating blends for objects,
expanding blends, and creating symbols. For any part
you animate, you will need to create a sequence of parts—
for example, a leg that moves from straight to bent. Atte-
berry created art brushes for the lemur's moving parts, so
he could paint each part in the motion sequence with the
brush. (This saved the effort of creating separate art for
each part in the sequence.) First, draw a straight version
of the part. When you have the look you want, drag-and-
drop it on the open Brushes palette. In the New Brush
dialog box, choose New Art Brush.
Next, you'll create artwork for the two extremes in the
motion sequence. Draw the straight part, and a few inches
away draw the bent part. Select both paths and apply
the art brush to both. Now, to make other parts in the
movement sequence, make sure both paths are selected
and choose Object > Blend >Make; then choose Object >
Blend > Blend Options and key in the number of steps in
the Spacing: Specified Steps field. Consider using a small
number of blend steps—Atteberry uses three or four—so
that if used as frames in a Flash animation, your SWF file
will have a smaller number of frames and a smaller file
size. Finally, expand the blend (Object >Blend > Expand)
and Ungroup it so you have separate objects to use in con-
structing poses for the motion sequence.
3 Exporting an SWF animation. Once your artwork is
complete, you can export the file as a draft or final anima-
tion that you can view in a browser or in the Flash player.
To prepare your file for animation, first add as many
Two of the brushes Atteberry created for the
moving parts
The straight and bent lemur legs representing
the extremes of a motion sequence that Atte-
berry used to create a Blend
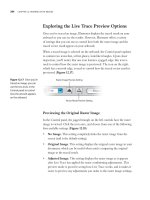
A blend using three steps created between the
straight and bent lemur legs
Al instances to Flash symbols
If you make symbols in Illustra-
tor and want to import them into
Flash, be sure to make instances
of your symbols first. When you
export an SWF file from Illustrator,
the Symbols palette is not export-
ed with the SWF file. Flash will rec-
ognize Illustrator's instances in the
SWF file, however, and add them
as symbols to its own Library.
Exporting an SWF file
Illustrator's three Export As op-
tions for exporting an SWF file
produce files you can import into
the Macromedia Flash application.
Chapter 11 Web & Animation
369
Previewing a motion sequence using Illustrator's
Layers palette as a crude film projector
Pasting into Flash
You can copy Illustrator artwork
and paste in Flash. Be careful,
though—some Illustrator artwork
with complex styles and bitmap
effects will not look correct when
pasted in Flash.
layers as frames needed to show the motion sequence.
Treating each layer as an animation frame, assemble
the artwork for a particular pose or step in the motion
sequence on each layer. Move from layer to layer, creating
renditions of the character on each layer until the char-
acter has performed all of the poses or movements you
want to preview. When you have completed all the layers,
select File >Export. From the Format pop-up, select Mac-
romedia Flash (SWF) and in the Format Options dialog
box, choose Export As: AI Layers to SWF Frames. If your
animation will use a lot of frames, or will include complex
motion sequences that require many intermediate poses
or steps, create the final animation in Flash instead of in
Illustrator. Flash's tweening commands automatically cre-
ate many of the intermediate poses you would otherwise
assemble manually in Illustrator.
There is another animation technique you can use to
preview motion—from within Illustrator itself. Atteberry
constructed a draft version of part of the animation to
preview the look of objects and of the motion sequence.
To do this, you can construct a preview by first following
the steps described above for positioning poses on succes-
sive layers. After you've filled all your layers with artwork,
select Palette Options from the Layers palette menu. Click
on the Show Layers Only checkbox to enable this option
and key in 100 pixels in the Other field. To preview the
animation, position the cursor over a Layers palette scroll-
ing arrow and press the mouse button to cause the layer
thumbnails to scroll like frames in a projector.
4 Exporting an SWF file to import into Macromedia
Flash. Another use of your artwork is to export it as an
SWF file and then import the SWF into Flash to develop
the finished animation. To export, choose File > Export
and from the Format pop-up, choose Macromedia Flash
(SWF). Then, in the Format Options dialog box, choose
the Export As option that saves the SWF in the format
(single frame file, animation file, or multiple files) that
you need.
370 Chapter 11 Web & Animation
Kevan Atteberry
To assist in constructing his animation "Millard
and the Pear," which is described in the previ-
ous lesson, artist Kevan Atteberry developed a
file of recyclable parts—a cartoon "morgue"—
from which he copied parts and pasted them
in the file in which he created the animation.
To trim the file size of the animation, Atteberry
converted the artwork for parts into symbol
instances by Shift-dragging them to the Sym-
bols palette. When he needed to edit a symbol,
Atteberry selected the instance and chose
Object > Expand. After editing the artwork,
Atteberry selected the artwork and Shift-
dragged it to the Symbols palette to automati-
cally convert it back into a symbol instance.
Chapter 11 Web & Animation 371
Layering Frames
Turning Layered Artwork into Keyframes
Overview: Draw artwork for print;
design animation sequences using
artwork; create layers and lay out
art and text in positions for anima-
tion keyframes; export layers as
Shockwave Flash frames.
Artwork originally created for The Red Grape's
printed restaurant menu
Planning an animation sequence by positioning
objects and text at beginning and end of the
sequence
After designing the brand identity, menu artwork, and a
wall mural in Illustrator for The Red Grape, a Sonoma,
California restaurant, Hugh Whyte of Lehner and
Whyte faced one more task. He needed to turn his art-
work into Flash animations for the restaurant's Web site
(www.theredgrape.com). The key to recycling the artwork
was to develop a productive workflow between Illustra-
tor and Macromedia Flash that would allow Whyte and
Mark Murphy of DigitalKick to work within the software
that each designer knew best.
1 Drawing artwork and planning objects and type
for keyframes. While his drawings of people and food
were originally designed for the printed menus, Whyte
returned to the artwork and prepared it for the Web as a
Flash animation.
If you are more comfortable designing in Illustra-
tor than in Flash, stay in Illustrator and use the artwork
you've already created. Think about how your artwork
will move in the animation sequences you plan. Identify
the starting and ending locations of each object in an
animation sequence. Also note where objects will change
direction as they move during the sequence.
2 Arranging artwork on layers. To facilitate their collab-
oration, Whyte and Murphy devised a workflow in which
Whyte created in Illustrator what Murphy would use as
372
Chapter 11 Web & Animation
keyframes in Flash. You can do the same (even if you will
be producing the final animation yourself in Flash) and
enjoy the ease of using Illustrator to build the foundation
of your animation.
Begin by creating a new file (File >New). In the default
layer of the new file, arrange objects and text in the posi-
tions you plan for the first frame of the animation. Next,
duplicate the default layer by dragging the layer name and
dropping it on the Create New Layer icon at the bottom
of the Layers palette (see the Layers chapter for more on
managing layers and the artwork on them). In the new
layer, arrange the objects and text for their next positions
in the animation sequence. These positions might be the
final ones in the animation, or points in the middle of the
sequence where something occurs (for example, a text
object stops moving). Continue creating new layers, copy-
ing and pasting artwork, and positioning the artwork,
until you've created as many layers as you'll need to cover
the beginning, end, and any important intermediate
frames of the animation.
Keep in mind that you don't need to make every
frame that will appear in the final animation. That would
be unnecessary! Instead, create layers and arrange the
text and graphic objects on them for the critical frames
(which will be used as "key frames" in Flash). Once
exported, the Flash software will generate the in-between
frames (or "tweens") to fill in the frames you haven't cre-
ated, saving time and producing a smaller Flash file size.
3 Exporting the Illustrator layers as Shockwave Flash
frames. When Whyte finished building the file, he
deleted any artwork or layers that weren't required as
Flash frames.
To save the file, choose File>Export and from the
Export dialog box, choose Macromedia Flash (SWF) from
the Format pop-up. Click Export, and in the Macromedia
Flash (SWF) Format Options dialog box choose AI Layers
to SWF Frames. Set the other dialog options as you prefer
and then click OK.
Artwork for the final animation sequence ar-
ranged on three layers; the Layers palette show-
ing the layers in the sequential frame order of
the animation
Macromedia Flash (SWF) Format Options dialog
Chapter 11 Web & Animation
373
Webward Ho!
Designing a Web Page in Illustrator
Overview: Set up a document for
Web page design; use layers to struc-
ture artwork for pages and frames;
save layouts as template images; slice
text and artwork and save an HTML
file and sliced image files.
Gordon constructed the Cartagram Web site
around a two-frame design; the black rectangle
represented the top frame's Web page, used for
the logo and main navigation controls; the other
colored rectangles served as a design grid for
dividing areas of the Web pages that would load
in the bottom frame
216 colors, or millions?
The palette of 216 non-dithered.
Web safe colors was designed for
text and graphics displaying on
8-bit monitors. But how many
people are restricted to 8-bit
color anymore? Not many. Most
computers are now equipped with
24-or 32-bit video boards, render-
ing Web safe colors unnecessary.
So you can choose from millions
of colors, not just 216.
If you are comfortable designing and drawing in
Illustrator, why go elsewhere to design your Web pages?
Steven Gordon uses Illustrator to design and preview
Web pages, create comps for client approval, export a lay-
out as a template for use in Adobe GoLive, and slice and
optimize artwork before saving it for use on Web pages.
1 Choosing document settings. With Illustrator, you can
draw and organize artwork to design a simple Web page
or a more complex page with multiple frames. To start
your page, create a new document (File >New). In the
New Document dialog box, set Units to pixels, specify
an Artboard size in pixels equal to that of your intended
Web page size, and choose RGB Color for Color Mode.
You may want to create a grid (Preferences > Guides &
Grid) that will help you align and constrain artwork.
Also, if your artwork will be exported in a bitmap
format like GIF or JPEG, consider turning on pixel
preview (View > Pixel Preview) —this lets you see the anti-
aliasing of your artwork. (See Tip, "Anti-antialiasing," for
a technique that helps you reduce the amount of blurring
that affects artwork when it is antialiased.)
2 Structuring pages with layers and adding artwork. Let
the Layers palette help you organize the layout and con-
tent of your Web page. (See "Nested Layers" in the Layers
374 Chapter 11 Web & Animation
chapter for more on making and manipulating layers.)
Gordon created separate layers for the top and bottom
frames of his page, and sublayers for multiple pages he
designed for the bottom frame. He toggled layer visibility
on to preview the layout and content of different pages in
the bottom frame of his page design.
Once you've set up the layer structure of your docu-
ment, you're ready to add content to your page design.
As you create text and graphics, and import images,
use familiar Illustrator tools and palettes to help make
and arrange objects. Gordon relied on the Align palette
to easily align and distribute navigation buttons in the
top frame and to center or justify colored background
rectangles for both frames (using the Align to Artboard
option in the Align palette).
3 Saving a Web page design and importing it into
GoLive. Once your page design is complete, export it as
a GIF or JPEG and import the file into Adobe GoLive as
a "tracing image" to help you construct a finished HTML
page. If you set up the Artboard to match the dimen-
sions of the Web pages you'll construct in GoLive, you
can crop your Illustrator artwork so that it matches those
dimensions when exported as a bitmapped image. To do
this, either create cropmarks from the Artboard (see the
Type chapter for instructions on making cropmarks) and
then use File > Export, or skip the cropmarks and choose
File > Save for Web (which automatically crops artwork to
the Artboard).
When you begin working in GoLive, import the image
you just exported from Illustrator and use it as a template
to guide you in building the page. First, choose Window >
Tracing Image; then, in the Tracing Image palette, click
the Source checkbox and the Browse icon to select your
Illustrator-exported image. Next, adjust the HTML page's
frame widths, and create text boxes and other objects in
GoLive that match the Illustrator image. Repeat these
steps with other exported images when building other
pages in GoLive.
The layer structure for the Web page design,
showing the top and bottom frames, and two
sublayers representing separate pages designed
to load in the bottom frame
The Tracing Image palette in Adobe GoLive5;
Gordon clicked the Browse icon to locate the
layout image file he had exported previously
using Illustrator's Save for Web command
Anti-antialiasing
When artwork is saved as a
bitmapped image, straight lines
and other objects may be anti-
aliased (blurred). To minimize
this, first set Keyboard Increment
to 0.5 pixels in the Preferences >
General dialog box. Then make
sure both View >Pixel Preview and
View >Snap to Pixel are turned
on. Next, draw and position your
objects. Finally, turn off View >
Snap to Pixel, and nudge aliased
objects in 0.5 pixel increments as
needed, using the Arrow keys.
—Mordy Golding
Chapter 11 Web & Animation 375
Object or clipping path?
When making a slice using the
Object>Slices>Create from
Selection command, you'll need
to decide whether the clipping
path or the artwork it masks will
become the slice. Clicking on a
masked object will make a slice
out of the object instead of the
clipping path. Click carefully!
The numbered slices created after using the Ob-
ject >Slices >Create from Selection command
In the Save for Web dialog box, a preview of
the slices is displayed; Gordon clicked in a slice
with the Slice Selection tool to select it and
then specified settings related to file format and
other image characteristics in the Settings por-
tion of the dialog box
4 Slicing artwork. Instead of using your Illustrator artwork
as a template in GoLive, consider using Illustrator's slices
to turn text, artwork, and placed images into elements
you can use when building your HTML pages. Slices also
let you divide a large image or layout into smaller areas
that you can save as separate, optimized images. These
images will load simultaneously, and usually faster than a
single large image in a Web browser.
You can use artwork selections, guides, or the Slice
tool to divide your Illustrator design into slices. Gordon's
design was divided by colored backgrounds and a masked
image. (You can use non-contiguous objects for slic-
ing; Illustrator will add slices to fill in any gaps between
objects.) To make the slices, first choose Object >Slice >
Clip to Artboard, then select an object and choose
Object > Slice > Create from Selection. Repeat these steps
until you've created all of the slices you need. If you need
to remove a slice, select and delete it; or in the Layers pal-
ette drag its name (<Slice>) to the palette's trash icon.
5 Saving slices, and using and previewing the HTML
page. When you've finished slicing your artwork, you
can save the slices as text and images. Choose File > Save
for Web; in the dialog box, click on the Slice Select tool
and click one of the slices. Pick the settings that you want
to use in saving the selected slice. Gordon set GIF as the
file format for the two blocks with solid color fills and
text. For the globe image, he chose JPEG as the file for-
mat and enabled Optimized to make the file size smaller.
After clicking on Save, Gordon entered a file name for the
HTML file (which automatically became the root name of
each of the sliced image files), and made sure that HTML
and Images were selected in the Format pop-up menu.
After Illustrator saved the HTML file and the sliced image
files, Gordon opened the HTML file in GoLive to add
head tags (like meta tags) and then previewed the file in a
Web browser.
376 Chapter 11 Web & Animation
Steven Gordon / Cartagram
To build image-mapped buttons at the top
of a travel Web page, Steven Gordon first
placed a TIFF image in Illustrator to serve as
a background image. Next, he drew a but-
ton shape with rounded corners and gave
it a white Fill and a 25% Opacity using the
Transparency palette. He copied the button
six times and arranged the buttons in a row
above the background image. To space the but-
tons evenly, Gordon positioned the left and
right buttons, selected all buttons, and then
clicked the Horizontal Distribute Space icon
in the Align palette. To map the buttons to
URLs, he selected each button shape and in the
Attributes palette (Window >Attributes) chose
Rectangle from the Image Map pop-up menu.
He then keyed in the button's URL link in the
URL field. In the Save for Web dialog box, Gor-
don selected JPEG as the output file format,
clicked Save, and then chose HTML and Images
from the Format pop-up menu. He entered a
file name in the Name field and clicked Save.
Chapter 11 Web & Animation 377
Making Waves
Transforming and Blending for Animation
Advanced Technique
Illustrator with Photoshop
Overview: Create "key"frames with
transformation tools; blend to create
steps; transform your steps; bring the
steps into Photoshop.
The first key frame; next, Rotating a copy; then
using the Add Anchor Point and Direct Selection
tools to transform the copy into the next frame
Making certain that the first and last frame have
the same number of anchor points in similar
alignment for smooth blending (see "Unlocking
Realism" in the Blends chapter for more on pre-
paring objects for smooth blending)
Illustrator's transformation tools, used in combination
with the Blend tool, are wonderful animation timesavers.
Commissioned by Adobe Systems for a special promo-
tion, Bert Monroy used these techniques to prepare many
of the objects within a room for animation.
1 Establishing the "key" frames. To create an animation,
you must first establish the "key" character positions.
How many key frames you'll need will depend on the
character, and how it will be animated. Create a character
in a neutral position, and if you'll need help maintain-
ing registration, draw an unstroked, unfilled bounding
rectangle, amply surrounding the character. Select the
objects making up the character and the bounding rect-
angle and Option-drag/Alt-drag a copy to the side of the
original. On the copy of the character (not the bounding
box), use the transformation tools and Direct Selection
editing to create the next extreme position (for more on
transformations, see the Basics and Zen chapters). In
Monroy's animation, the characters were: fan, clock sec-
ond hand, clock pendulum, plant, and the "wave." He first
drew the wave in horizontal position using a gray rect-
angle and a second object for the blue liquid. To create the
left-tilted position, he rotated a copy of these two objects,
then used the Add Anchor Point and Direct Selection
tools to adjust the liquid anchor points manually.
Chapter 11 Web & Animation
378
2 Using the Blend tool to generate the in-between
steps. Also called "tweening," the secret to smooth ani-
mation is to create the correct number of steps between
the key frames. For video animations, smooth illusion
of motion is achieved with 24 frames per second (fps) of
animation; for film it's 30 fps; for on-screen animation
it's simply as many frames as is needed for your anima-
tion to run smoothly. To make the steps between your
first two key frames, select each pair of like objects and
blend between them (for help with blends see the Blends,
Gradients & Mesh chapter); you can only apply a blend
reliably between two objects, so you'll have to apply the
blend separately for each pair of like objects (including
your bounding rectangle), making sure that each pair has
the same number of anchor points, and that you select
the correlating anchor point in each object when blend-
ing. For the wave, Monroy first blended in 12 steps from
box to box, and then from liquid to liquid. Since the same
number of steps was chosen for each transition, the liquid
blends were perfectly registered within the box blends.
3 Transforming blends to extend the animation. Rather
than continually starting from scratch, it's often easier to
rotate, scale, shear or reflect your blends to extend your
animation. Monroy selected the blended boxes and waves,
and Reflected them vertically as copies (see the Zen chap-
ter, Exercise #9) to create the right-side rocking motion.
4 Pasting into Photoshop. With Illustrator still open,
launch Photoshop and create an RGB document larger
than your biggest key frame. In Illustrator, copy each
character frame and bounding box, and then move to
the Photoshop file and paste "As Pixels" to create a new
layer with that step. With that object still in memory,
also paste "As Paths" for easy re-selection. Monroy used
his paths to make selections for applying special effects
locally—using Alpha Channels to create effects such as
the darkening and bubbles in the liquid. (For more about
Photoshop see the Illustrator & Other Programs chapter.)
The outer objects after blending (left column),
then blending the inner wave (right column)—
Note: Selecting the upper right point on the
wave gives the smoothest blend
The option to "Paste As Pixels" or
"Paste As Paths" when pasting from Illustrator
to Photoshop; the frames after pasting into lay-
ers; the wave after effects using Alpha Channels
Chapter 11 Web & Animation 379
Illustrator & Other Programs
382 Introduction
382 Placing Artwork in Illustrator
383 Illustrator & Other Programs
384 Illustrator & Adobe Photoshop
385 Illustrator & Adobe InDesign
385 Illustrator, PDF & Adobe Acrobat
386 Illustrator & Adobe Streamline
386 Illustrator & 3D programs
387 Gallery: Bert Monroy
388 Illustrator with Photoshop: Software Relay:
An Illustrator-Photoshop Workflow
391 Gallery: Rob Magiera
392 Advanced Technique: Illustrator with Photoshop:
Shape Shifting: Exporting Paths to Shapes in Photoshop
394-407 Galleries: Judy Stead, Timothy Donaldson, April Greiman,
Lance Hidy, David Pounds, Ron Chan, Louis Fishauf,
Filip Yip, Chris Spollen, Bryan Christie, Eliot Bergman,
Tom Willcockson, Joe Jones
Illustrator & Other Programs
Prevent color shifts
If at all possible, you'll want to
avoid color space mismatches and
conversions, especially if you use
any kind of transparency. If you
use color management, choose
your settings in Illustrator and
then use the same settings in Pho-
toshop and InDesign; and when
you exchange PSD files between
Illustrator, Photoshop, and InDe-
sign, include the color profiles in
the files. —Pierre Louveaux
Is EPS obsolete?
If your application (e.g., Illustra-
tor, Photoshop, or InDesign) can
place or open the native Al, native
PSD, or PDF 1.4 formats, it's bet-
ter to use those than EPS, because
they may preserve transparency,
layers, and other features.
Any BMP, EPS, GIF, JPEG, PICT,
PCX, PDF, PNG, Photoshop, Pixar,
Targa, or TIFF file can be placed
linked (rather than embedded).
So you think it's linked?
Applying a filter or flattening
transparency of a linked image
will automatically embed the
image. In addition to increasing
the file size, Illustrator will no
longer be able to update the link.
This chapter showcases some of the ways you can use
Illustrator together with other programs. Although the
range of work you can create using Illustrator is virtually
limitless, using other programs together with Illustra-
tor increases your creative opportunities, and in many
instances can save you significant time in creating your
final work. One of this chapter's highlights is the step-by-
step technique by renowned artist Rob Magiera for bring-
ing Illustrator images into Photoshop.
We'll begin by discussing how you can place artwork
in Illustrator, and then we'll provide a general look at
how Illustrator works with other programs. Next we'll
examine how Illustrator works with specific programs,
including Photoshop, InDesign, Acrobat, Streamline, and
other 3D programs. For information about working with
Illustrator and other web or animation programs, see the
Web & Animation chapter.
PLACING ARTWORK IN ILLUSTRATOR
Illustrator can place more than two dozen different types
of file formats. The major choice you'll need to make is
whether to link or embed the file. When you link a file,
you don't actually include the artwork in the Illustrator
file; instead a copy of the artwork acts as a placeholder,
while the actual image remains separate from the Illus-
trator file. This can help reduce file size, but keep in mind
that linking is supported only for certain formats (see
Tip at left). On the other hand, when you embed artwork,
you're actually including it in the file. The Links palette
keeps track of linked files, but also lists all the raster
images used in your document, regardless of whether
they were created within Illustrator or embedded via the
Place command (see the Illustrator Basics chapter for
more). For details on how to place artwork (by linking
and/or embedding it), see "Importing Artwork," in Chap-
ter 2 of the User Guide.
382
Chapter 12 Illustrator & Other Programs
Which formats can you link?
In general, you should embed artwork only when:
• The image is small in file size.
• You're creating web graphics.
• The placed file interacts with other parts of the document
via transparency. Embedding will ensure proper flatten-
ing and printing.
• You want more than just a placeholder with a preview
(e.g., you want editable shapes and transparency).
• Linking isn't supported for the format your artwork is in.
In contrast to linked images, embedded image objects can
be permanently altered.
And you should link (rather than embed) when:
• Your illustration uses several copies of the same image.
• The image is large in file size.
• You want to be able to edit the placed image using its
original application.
• File will be used in Illustrator 88 through version 6.x.
Another argument for linking files is that you can make
changes to a linked file and resend only the linked file to
your service bureau or client. As long as it has exactly the
same name, it'll auto-update without further editing of
the Illustrator document itself.
ILLUSTRATOR & OTHER PROGRAMS
The first consideration when moving artwork between
Illustrator and other programs is to decide which objects
in your artwork have to remain as vectors and which can
be allowed to become rasterized. Next, is whether you
want to move the artwork between two open programs on
your desktop (e.g. by using Copy and Paste or Drag and
Drop) or if you will be moving your artwork via a file for-
mat. Finally, consider whether you want to move only a
few objects or the whole file. The details of how to do the
above vary depending on the program and are described
in the corresponding program sections below.
Depending on the application, when you drag or
paste objects between Illustrator and another open pro-
gram, your objects will either drag or paste as vectors or
Resolution of placed images
Greatly reduce your printing time
and ensure optimal image repro-
duction by properly setting the
pixel-per-inch (ppi) resolution of
raster images before placing them
into Illustrator. The ppi of images
should be 1.5 to 2 times the size of
the line screen at which the final
image will print. For example, if
your illustration will be printed
in a 150 dpi (dots per inch) line
screen, then the resolution of
your raster images would typically
be 300 ppi. Get print resolution
specifications and recommenda-
tions from your printer before you
begin your project!
Open sesame
If you're working in an applica-
tion that doesn't allow you to
save in a format that Illustrator
imports (such as EPS or PDF), but
does print to PostScript, you may
be able to get the vector data by
printing to File and then opening
the raw PostScript file from within
Illustrator.
Faster and smaller "saves"
Turning off the PDF option when
you save reduces file size and
makes saving faster. However, if
you're going to be importing your
artwork into certain programs
(e.g. InDesign and LiveMotion), be
sure to leave PDF compatibility on.
Chapter 12 Illustrator & Other Programs
383
See Bert Monroy's Photoshop and Illustrator
lesson, "Pattern Brushes" in the Brushes & Sym-
bols chapter
Illustrator File Handling and Clipboard Prefer-
ences dialog box. To copy and paste vectors
to Photoshop set the clipboard preferences as
shown above. (See the User Guide for more
about these options)
See Adam I Lein's Gallery in the Transparency
& Appearances chapter to find out how he used
the Excel Chart Wizard and for this Pie Chart
as raster objects. In general, any program that supports
PostScript drag and drop behavior will accept Illustrator
objects via Drag and Drop (or Copy and Paste). For Mac
OS only, you need to be sure that the AICB (Adobe Illus-
trator ClipBoard) is selected in the File Handling & Clip-
board panel of the Preferences dialog box at the time you
copy the objects between AI and the other application.
When you are dragging and dropping, your Illustrator
art will automatically be rasterized at the same physical
size, or pixel-per-inch ratio, that you have specified in the
raster-based program to which you're dragging the art.
You can Save (via Save, Save As, Save for Web, or Save
for Microsoft Office) or Export your Illustrator artwork
to many formats, including: EPS, GIF, JPEG, Legacy.ai,
PDF, PICT, PNG, Photoshop (PSD) SVG, SWF, and TIFF.
Knowing what file formats your other application sup-
ports and the type of information (vector, raster, layers,
paths) you want to bring from Illustrator into the other
program will help you determine which format to use.
See the User Guide for detailed information about these
file formats.
ILLUSTRATOR & ADOBE PHOTOSHOP
As the lessons and galleries in this chapter demonstrate,
the creative possibilities for using Illustrator and Photo-
shop together are limitless.
By default, artwork that you move from Illustrator
to Photoshop via the Clipboard (or by using drag and
drop) will be rasterized (see figure at left for how to keep
vectors as vectors). Moving artwork via a file format can
be more straightforward, since Illustrator can open and
export Photoshop PSD files. But the rules governing
how Illustrator layers get translated into Photoshop lay-
ers (and whether or not those layers get rasterized in the
process) are complex. How to use these methods to move
most types of Illustrator objects (such as simple paths,
text, compound paths, and compound shapes) between
Illustrator and Photoshop is covered in detail in the cor-
responding sections of the User Guide.
384 Chapter 12 Illustrator & Other Programs
ILLUSTRATOR & ADOBE INDESIGN
When you Copy and Paste artwork from Illustrator into
InDesign, the artwork is pasted as either PDF or AICB,
depending on which option you specified in the Illustra-
tor File Handling & Clipboard panel of the Preferences
dialog box. PDF preserves transparency, while AICB can
break your artwork into smaller opaque native InDesign
objects that mimic the transparency of your original
artwork.
To place Illustrator files in InDesign, you must have
saved your Illustrator artwork with the Create PDF
Compatible File option enabled. Doing so preserves your
gradients, patterns, and transparency (which will allow
underlying artwork to show through). But be aware that
your artwork is imported as one object, which is not
editable using InDesign, and not listed in InDesign's
Links palette. For more about moving artwork between
Illustrator and InDesign, search the InDesign online help,
using the word "Illustrator."
ILLUSTRATOR, PDF & ADOBE ACROBAT
Acrobat's Portable Document Format (PDF) is platform
and application independent—this means the format
allows easy transfer of files between different operating
systems, such as Mac OS, Windows, and even UNIX, as
well as between different applications.
Illustrator CS now includes more options for specify-
ing how PDFs are created. These options were previously
available only in Acrobat Distiller. You can now save your
layered Illustrator CS files as layered Acrobat 6 files. In
the Save As dialog box, choose Adobe PDF (pdf), and
then in the Adobe PDF Options dialog box, enable the
"Create Acrobat Layers From Тор-Level Layers" option.
Illustrator and Acrobat share many other features,
including Overprint Preview, the transparency grid,
and native PDF 1.5 support. To save your file for use in
Acrobat, be sure that you enable the Create PDF Compat-
ible File option in the Illustrator Save As dialog box that
appears when you Save your Illustrator file.
Illustrator in page layout apps
If you save Illustrator files with
the PDF compatibility feature
enabled, you'll be able to place
.ai files directly into InDesign and
Pagemaker. You'll notice that
InDesign imports these "native"
files through its PDF import op-
tion. Though this PDF format,
it may not be supported by all
programs, most should be able to
place your files if you Save or Save
As with Acrobat compatibility set
to Acrobat 4, 5 or 6. However, the
surefire way to ensure that you
can place Illustrator files into lay-
out programs that can't see native
.ai files is to choose Save As and
choose the EPS option.
Using Illustrator with PDF
Illustrator offers particular ad-
vantages to those working with
Acrobat. If you use Save As,
Adobe PDF, you can include the
editable Illustrator artwork. You
can then use Acrobat to add com-
ments and interactive elements.
Then, you can reopen the PDF in
Illustrator to make any changes.
In Illustrator, you won't see the
Acrobat content you added; how-
ever, when you resave the docu-
ment as PDF and later reopen it
in Acrobat, your Acrobat content
will still be there!
—Sandee Cohen (from Adobe Ac-
robat 5 Master Class: For Interac-
tivity and Digital Documents)
Chapter 12 Illustrator & Other Programs
385
Crop Areas & Acrobat
You can now set the crop area in
PDF files in Illustrator. First set the
crop area in your lllustrator.ai file
(create a rectangle and choose
Object >Crop Area) then File >
Export it as PDF 1.5. When you
open the file in Acrobat 6, the
file will be cropped to the crop
area you specified in Illustrator. If
you want to change the crop area
in Acrobat, choose Document >
Pages >Crop and enter the new
desired crop area. Best of all, you
will not lose any art you created in
Illustrator that was clipped by the
Illustrator specified crop area.
—Brenda Sutherland
Antialiased artwork in Acrobat
If your Illustrator artwork looks
coarse or jagged in Acrobat 6, it's
probably being displayed without
antialiasing. To fix this, choose
Preferences>Smoothing in Acro-
bat б and enable all the Smooth
options. —Pierre Louveaux
PDF files created by other programs can be edited in
Illustrator, but you can only open and save one page at
a time, and text that appears to be all in one flow or text
box in the PDF may be broken up into multiple text boxes
when opened in Illustrator.
ILLUSTRATOR & ADOBE STREAMLINE
A number of artists use Streamline to creatively translate
scanned drawings or photos into Illustrator art.
Streamline was designed by Adobe to convert scanned
black-and-white or color raster images into editable
vector paths and fills that can be brought into Illustra-
tor, Photoshop, and other programs that accept Illustra-
tor vector art. For bitmapped art, Streamline gives you
much more control for specifying how the auto tracing is
done than Illustrator's Auto Trace tool. You can choose
whether to trace the outline of shapes, or create vectors
that follow the centerlines of the shapes, or a sophisti-
cated combination (see figure on previous page). For ras-
ter images, the basic technique is to posterize the image,
and then auto trace the resulting shapes and fill them
with the corresponding colors, custom colors, or tints of
custom colors.
ILLUSTRATOR & 3D PROGRAMS
In addition to Illustrator's 3D effects (see the Live Effects
& Graphic Styles chapter) you can also import Illustrator
paths into 3D programs to use as outlines and extrusion
paths. Once you import a path, you can transform it into
a 3D object. Strata's 3D StudioPro and Lightwave 3D are
just two of many 3D programs you can use in combina-
tion with Illustrator.
Joe Lertola's Skin Deep image for TIME used Il-
lustrator and Lightwave 3D. See his Gallery in
the Brushes & Symbols chapter
386 Chapter 12 Illustrator & Other Programs
Bert Monroy
(Photoshop)
Bert Monroy capitalized on layered, resolution-
independent artwork that he created in Illus-
trator and brought into Photoshop to create
this image of a neon sign. In the image, Mon-
roy used techniques similar to those detailed in
his Rendez-vous Cafe image (see the Brushes &
Symbols chapter). Monroy's techniques for cre-
ating photorealistic images from 2D software
are illustrated in his books, Bert Monroy: Photo-
realistic Techniques with Photoshop & Illustrator
and Photoshop Studio with Bert Monroy (both
New Riders Publishing).
Chapter 12 Illustrator & Other Programs
387
Software Relay
An Illustrator-Photoshop Workflow
Illustrator with Photoshop
Overview: Create paths in Illustra-
tor; build a registration rectangle;
organize layers for Photoshop
masking; export as a PSD file;
copy Illustrator paths and paste in
Photoshop for masking.
Two stages in the construction of the image in
Illustrator: left, the shapes as drawn; right, the
shapes with fills
Why crop area?
Creating a crop area will auto-
matically set the canvas size of a
PSD file you export from Illustra-
tor. Also, by making the crop area
the same size as the Artboard, you
can easily register the image after
you've modified it in Photoshop.
Just choose File >Place, select the
image file, click Okay, and then
drag a corner until it snaps to a
corner of the Artboard.
To illustrate mascots for Salt Lake City's 2002 Olympic
Winter Games, Utah artist Rob Magiera drew shapes in
Illustrator. He then exported the artwork as a Photoshop
(PSD) file so he could airbrush highlights and shadows
in Photoshop. While working in Photoshop, Magiera
sometimes copied an Illustrator object and pasted it in
Photoshop to serve as a selection or to modify a Quick
Mask. (See the "Shape Shifting" lesson in this chapter to
learn another way to move artwork between Illustrator
and Photoshop.)
Although Magiera's illustration would be completed
in Photoshop, his client needed the original Illustrator
artwork for other uses.
1 Placing a sketch in Illustrator, drawing shapes, and
making a registration box. Magiera began by scan-
ning pencil sketches and saving them in TIFF format. He
created a new Illustrator file with dimensions that were
larger than the drawings he would make and then created
388
Chapter 12 Illustrator & Other Programs
a crop area the size of the document by choosing Object >
Crop Area >Make (this will help when you place the
Photoshop image back into Illustrator). Next, he placed
the scanned image on a template layer in Illustrator (see
the Layers chapter for more on templates) and drew the
mascot shapes with the Pen and Pencil tools. He filled the
shapes with color, leaving the outlines unstroked.
In order to more easily modify rasterized shapes
once you get them into Photoshop, make sure you orga-
nize your major artwork elements onto separate layers
(for help see the "Organizing Layers" lesson in the Lay-
ers chapter). (On export to PSD, Illustrator preserves as
much of your layer structure as possible without sacrific-
ing appearance.) For objects that overlapped other objects
(like the bear's arm or the coyote's leg), Magiera created
new layers and moved the overlapping objects onto sepa-
rate layers so he could easily mask them in Photoshop
when he began airbrushing them.
Knowing that he would bring some of the paths he
had drawn into Photoshop to help with masking, Magiera
devised a way to keep paths registered to other pasted
paths and to the raster artwork he would export from
Illustrator. You can accomplish this by making a "regis-
tration" rectangle in Illustrator that will keep your art-
work in the same position relative to the rectangle (and
the Photoshop canvas) each time you copy and paste. To
make this rectangle, first create a new layer in the Layers
palette, and then drag it below your artwork layers. Next,
draw a rectangle with no stroke or fill that is the same size
as the Artboard. Center the rectangle on the Artboard.
With the rectangle matching the size and position of the
Artboard, copies of the rectangle will be pasted in Photo-
shop automatically aligned with the canvas.
Now you're ready to export your Illustrator artwork.
Select File > Export, and from the Export dialog box
choose Photoshop (PSD) from the Format pop-up.
2 Working with Illustrator paths in Photoshop. After
opening the exported PSD file in Photoshop, Magiera
The Illustrator Layers palette organized with
separate layers for shapes (shown as selected
objects) to be masked in Photoshop
Illustrator's Export: Photoshop Options dialog
The Photoshop Layers palette showing the layer
structure of the Illustrator-exported PSD file
Chapter 12 Illustrator & Other Programs
389