The Adobe Illustrator CS Wow- P7 docx
Bạn đang xem bản rút gọn của tài liệu. Xem và tải ngay bản đầy đủ của tài liệu tại đây (3.53 MB, 30 trang )
Layers
156 Introduction
160 Controlling the Stacking Order of Objects
162 Making Selections using the Layers Palette
163 Gallery: David Nelson/Mapping Services
164 Digitizing a Logo: Controlling Your Illustrator Template
166 Tracing Details: Tracing Intricate Details with the Pencil
168 Colors with Layers: Coloring Black & White Images with Layers
170 Organizing Layers: Managing Custom Layers and Sublayers
173 Gallery: Nancy Stahl
174 Nested Layers: Organizing with Layers and Sublayers
176 Advanced Technique: Varied Perspective:
Analyzing Different Views of Perspective
Layers
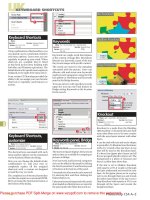
Layers palette navigation
• To hide a layer, click the Eye
icon. Click again to show it.
• To lock a layer, click in the col-
umn to the right of the eye (a
lock displays). Click again to
unlock.
• To Lock/Unlock or Show/Hide all
other layers, Option-click (Mac)
or Alt-click (Win) on a layer's
Lock or Eye icon.
• To duplicate a layer, drag it to
either the Create New Layer or
Create New Sublayer icon.
• To select multiple contiguous
layers, click one layer, then
Shift-click the other. To select
(or deselect) any multiple layers,
-click (Mac) or Ctrl-click (Win)
a layer in any order.
• Double-click any layer to open
Layer Options for that layer.
Layer Options (double-click a layer name)
Used wisely, layers can ease your workflow by dramati-
cally improving organization of complicated artwork.
Think of layers as sheets of clear acetate, stacked one
on top of the other, allowing you to separate dozens of
objects and groups of objects. New documents begin with
one layer, but you can create as many layers and sublayers
as you wish. You can also re-arrange the stacking order
of the layers; lock, hide, or copy layers; and move or copy
objects from one layer to another. You can even open a
layer to view and identify and select individual paths or
groups contained within a layer!
A few shortcuts will help when you're adding layers
to the Layers palette. Click the Create New Layer icon to
add a layer in numeric sequence above the current layer.
Hold Option/Alt when you click this icon to open Layer
Options as you add the layer. To add a layer to the top of
the Layers palette, hold /Ctrl when you click the Create
New Layer icon. To make a new layer below the current
layer and open the Layer Options, hold -Option/Ctrl-
Alt when you click the Create New Layer icon. Finally,
you can easily duplicate a layer, sublayer, group, or path
by dragging it to the Create New Layer icon at the bottom
of the Layers palette. To delete selected layers, click on the
Trash icon or drag the layers to the Trash. (See Tip at left.)
Note: To bypass the warning that you're about to delete
a layer containing artwork, drag the layer to the Trash or
hold Option (Mac)!Alt (Win) when you click the Trash. If
you're not sure whether a layer has artwork or guides you
may need, select the layer and click the Trash so you'll only
get the warning if there is something on the layer.
Sublayers can help you to stay organized. Sublayers are
contained within the layer listed above them, if you delete
a container layer, all of its sublayers will be deleted as well.
WARNING: Sublayers may not export properly to other
programs (see the "Shape Shifting" lesson in the Illustrator
& Other Programs chapter for one instance).
Chapter 5 Layers156
Using Layer Options
You can double-click on any group, path, compound
path, clipping path, blend, mesh, guide, type, object,
placed object, or raster object in the Layers palette to set
Options such as the Name, Show and/or Lock status. If
you would like to know what the items are once you've re-
named them, retain the name of the subcomponent. For
example, you can rename a group to help organize your
layer list, but keep the bracket description as part of the
renaming of the layer: e.g. floral <Group>.
Double-click a layer name to access the Layer Options
discussed below:
• Name the layer. When creating complicated artwork,
giving layers descriptive names keeps your job, and your
brain, organized.
• Change the layer's color. A layer's color determines the
selection color for paths, anchor points, bounding boxes,
and Smart Guides. Adjust the layer color so selections
stand out against artwork (see the Tip "Color-coding
groups of layers" to the right).
• Template layer. Illustrator's template layers are special
layers that don't print or export. They're useful when-
ever you want to base new artwork on existing art—for
example, you can place the existing art on a non-printing
template layer, and then trace over it on a regular print-
ing layer. There are two recommended ways to create a
template layer: You can select Template from the Layers
pop-up menu, or check Template when placing an image
in Illustrator. By default, Template layers are locked. To
unlock a Template in order to adjust or edit objects, click
the lock icon to the left of the layer name.
Note: Template layers shouldn't be confused with Illustra-
tor CS's new Templates feature. Templates are a special file
format ending in .ait; whereas template layers are simply
a special kind of layer. For more about Templates, see the
Illustrator Basics chapter.
Color-coding groups of layers
Select a set of layers and double-
click any one of the layers to open
the Layer Options dialog box.
Then set the layer color for all
selected layers (for help, see les-
sons later in this chapter). You can
also use this technique to adjust
other options globally on a set of
selected layers.
Reordering objects
To change the stacking order of
several objects:
• Reorder the layers they are on.
• Move grouped objects from one
layer to another.
• Cut the bottom objects, se-
lect the topmost object, and
Paste in Front with Paste Re-
members Layers off.
• Drag the selection indicator
(large square) from one layer to
another, or collapse the disclo-
sure arrow for a container layer
and drag the small square.
• If all of the objects are not on
the same layer, choose Collect
in New Layer (Layers palette
menu) and then drag the layer
or contents of the layer to the
desired location in the layer list.
Chapter 5 Layers 157
Italic layer names?
When a layer name is in
italic, it's set to not print
from within Illustrator (see "Print"
bullet at right for limitations of
non-printing layers). If the name
is italic and you see the Template
icon, it is reliably a non-printing
layer (see the "Template Layer"
section, previous page).
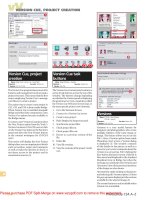
Layers palette pop-up menu
Powerful for print production
You can use layers or sublayers to
separate print production marks
and notes. For instance, use sepa-
rate layers for die tracing, blueline
(or keyline), type, printer remarks,
and one layer each for any linked
or embedded art. Because you
can toggle Hide/Show layers by
clicking the Eye icon in the Layers
palette, you can hide certain lay-
ers when you want to proof your
file from within Illustrator.
— Robin AF Olson
• Show/Hide layer. This option functions the same way as
the Show/Hide toggle, which you access by clicking
the Eye icon (see the Tip "Layers palette navigation" on
the opposite page). By default, hiding a layer sets that
layer not to print.
• Preview/Outline mode. If you have objects that are
easier to edit in Outline mode, or objects that are slow to
redraw (such as complicated patterns, live blends, or gra-
dients), you may want to set only those layers to Outline
mode. Uncheck Preview to set selected layers to Outline
mode in Layer Options, or toggle this option on and off
directly by -clicking (Mac) or Ctrl-clicking (Win) the
Eye icon in the view column.
• Lock/Unlock layer. This option functions the same way
as the Lock/Unlock toggle, which you access by clicking
the lock column of the layer (see the Tip "Layers palette
navigation" at the beginning of this chapter).
• Print. When you print from Illustrator you can use this
feature to override the default, which sets visible layers to
print. If you need to ensure that a layer will never print in
any circumstance (for instance, when placed into a page
layout program), make it into a Template layer.
• Dim Images. You can only dim raster images (not vector
Illustrator objects) from 1% to 99% opacity.
The Layers pop-up menu
You can perform the first six functions in the Layers
palette menu via the Layer palette icons, or Layer Options
(see above). With the ability to nest sublayers within
other layers and create group objects comes the poten-
tial for confusion about how to find objects when they
become buried in the layer list. Use Locate Object, or
Locate Layer when Show Layers Only is checked in Pal-
ette Options, to find selected objects. Merge Selected is
available when two or more layers are selected and will
Chapter 5 Layers
158
place visible objects in the topmost layer. You can consoli-
date all visible items in your artwork into a single layer
using the Flatten Artwork command in the Layers palette
menu. (An alternative method is to Select > All, then Cut
and Paste, with Paste Remembers Layers unchecked.)
Paste Remembers Layers is a great feature: When it's
enabled, pasted objects retain their layer order; when
unchecked, pasted objects go into the selected layer. If
the layers don't exist, Paste Remembers Layers will make
them for you! This feature can be turned on and off even
after the objects have been copied—so if you paste, and
wish that the toggle were reversed, you can Undo, toggle
the Paste Remembers Layers option, then paste again.
IMPORTANT: There is one significant problem with this
feature. If you target a top-level layer and apply strokes,
fills, effects, or transparency and then copy/paste that layer
into a new document, all appearance attributes that were
applied to that layer will be lost in the new document, even
when Paste Remembers Layers is enabled.
Try this workaround by Jean-Claude Tremblay (it also
works to maintain a Clipping Mask applied to the layer):
Since the attributes of a top-level layer are not retained and
you get no warning when pasting into the new document,
you need to nest the top-layer into another layer, making
it a sublayer. Then copy/paste this sublayer into the new
document to retain the appearance attributes.
Collect in New Layer moves all of the selected objects,
groups or layers into a new layer. Release to Layers (Build)
or Release to Layers (Sequence), allows you to make indi-
vidual object layers from a group of objects, such as a
blend, a layer, or art created by using a brush. (This can be
useful when creating animations; see the Web & Anima-
tion chapter.)
Reverse Order reverses the stacking order of selected
layers within a container layer. Hide All Layers/Others,
Outline All Layers/Others, and Lock All Layers/Others
all perform actions on unselected layers or objects.
Last, Palette Options customizes the layer display.
This is a great help to artists who have complicated files
If you can't select an object
If you have trouble selecting an
object, check/try the following:
• Is the object's layer locked?
• Is the object locked?
• Are the edges hidden?
• Is the Object Selection by Path
Only box enabled (Preferences >
General)?
• Locate the thumbnail in the
layer list and click on the
target indicator.
If you keep selecting the wrong
object, try again after you:
• Switch to Outline mode.
• Zoom in.
• Try to locate the thumbnail in
the layer list and click on the
target indicator.
• Hide the selected object; repeat
if necessary.
• Lock the selected object; repeat
if necessary.
• Put the object on top in another
layer and hide that layer, or se-
lect Outline for the layer.
• Use the Move command: Op-
tion-click (Mac) or Alt-click
(Win) the Selection tool in the
Toolbox to move selected ob-
jects a set distance (you can
move them back later).
• Check for objects with transpar-
ency. Overlapping transparency
inhibits selection.
• Try enabling the Type Object
Selection by Path Only checkbox
(Preferences >Type and Auto
Tracing).
Chapter 5 Layers 159
When hidden objects print
In certain situations, hidden selec-
tions will print:
• Objects on hidden layers do not
print, but hidden objects on vis-
ible layers do print once the file
is reopened.
• Hidden objects on layers with
the print option disabled will
print if saved as an .eps file and
exported into QuarkXPress.
There must also be visible art
in the file to cause this to occur.
To prevent this, save a version
of the file without the art you
wish to hide and re-export.
Exporting layers to Photoshop
If you use Illustrator features that
allow you to maintain layer integ-
rity for exporting to Photoshop
(such as using Point type instead
of Path type), you'll be able to
export layers with live objects
and editable type, as well as lay-
ered, rasterized art. For more on
exporting layered files to Photo-
shop, see the Illustrator & Other
Programs chapter.
To select all objects
First, unlock and show everything
in the Layers palette. Click-drag
through the Eye and Lock icons
or make sure Unlock All and Show
All are unavailable in the Object
menu. Then choose Select > All
( -A for Mac/Ctrl-A for Win).
with many layers. Show Layers Only hides the disclosure
arrow so you only see the container layer thumbnail.
Adding sublayers reveals the arrow, but you still can't
target groups or individual paths in this mode. Row Size
defines the size of the thumbnail for a layer. You can
specify a thumbnail size from Small (no thumbnail) to
Large, or use Other to customize a size up to 100 pixels.
Thumbnail lets you individually set thumbnail visibility
for the Layers, Top Level Only (when Layers is checked),
Group, and Object.
CONTROLLING THE STACKING ORDER OF OBJECTS
Layers are crucial for organizing your images, but
controlling the stacking order of objects within a layer is
just as essential. The intuitive layers and sublayers dis-
close their hierarchical contents when you open the dis-
closure arrow. Following is a summary of the functions
that will help you control the stacking order of objects
within layers and sublayers.
Sublayers and the hierarchical layer structure
In addition to regular layers, there are sublayers and
groups, both of which act as containers for objects or
images. When you click on the sublayer icon, a new
sublayer is added inside the current layer. Artwork that
you add to the sublayer will be underneath the art con-
tained on the main layer. Clicking the Create New Layer
icon with a sublayer selected will add a new sublayer
above the current one. Adding subsequent layers adds
the contents at the top of the stacking order or puts the
artwork above the current layer. Clicking the Create New
Sublayer icon creates a new sublayer level nested within
the first one.
Grouping objects together automatically creates
a container "layer" named <Group>. Double-click the
<Group> layer to open its options. Group layers are much
like sublayers. You can target them to apply appearances
that affect all the objects within the group. In some cases,
such as when Pathfinder effects are applied, objects have
160
Chapter 5 Layers
to be grouped and the group layer must be targeted in
order to apply the effect.
Note: If you rename your <Group>, you might get con-
fused when it doesn't behave like a regular layer. Instead
of removing <Group> from the name appended to it, leave
<Group> as part of the renaming of the layer.
Paste in Front, Paste in Back (Edit menu)
Illustrator doesn't merely reposition an object in front
of or behind all other objects when you choose
Paste in Front/Back; it aligns the object exactly on top of
or behind the object you copied. A second, and equally
important, aspect is that the two functions paste objects
that are Cut or Copied into the exact same location—in
relation to the ruler origin. This capability transfers
from one document to another, ensuring perfect reg-
istration and alignment when you copy and use Edit >
Paste in Front / Back. (See the Wowl CD for a lesson using
paste commands: 2a Zen-Layers-Moving_Pasting.ai.)
Lock/Unlock All (Object menu)
In the days before it was possible to open layers up in
Illustrator and select the individual items they contain,
the Lock/Unlock All commands were essential. They're
a little less important now, but can still be useful if you
can't locate your path from within the layer contents.
When you're trying to select an object and you acci-
dentally select an object on top of it, try locking the
selected object (Object >Lock) and clicking again. Repeat
as necessary until you reach the correct object. When
you've finished the task, choose Unlock All to release all
the locked objects.
Note: Use the Direct Selection tool to select and lock
objects that are part of a group (see the section "Selecting
within groups" in the Illustrator Basics chapter)—but if
you select an unlocked object in the group with the Group
Selection or other selection tools, the locked objects can
become selected. Hidden objects stay hidden even if you
select other objects in the same group.
Drawing under grayscale scans
To place color underneath a black-
and-white image, see the "Colors
with Layers" lesson later in this
chapter. To place color under a
grayscale scan, set the Blending
mode for the scan to Multiply
mode using the Transparency
palette (with Multiply mode the
white areas of your sketch will
become transparent). Be aware,
however, that changing the blend-
ing mode invokes Transparency
for your image—see the Transpar-
ency & Appearances chapter for
details on predictable output and
transparency.
Target icon for any layer or subcomponent
Selection is also currently targeted
Selection indicator for a container layer
Selection indicator when all objects are
selected
Selecting vs. targeting
There are now several ways to
make a selection and several other
ways to target an object. The
main difference between the two
is selections don't always target,
but targeting always makes a se-
lection. In this example, "Layer 1"
contains the selected object but
is not currently
the target.
The circled
"<Path>" is the
current target.
Chapter 5 Layers 161
If layers are too slow to open
When opening a file created by an
older version of Illustrator, it can
take a long time for the Layers
palette to draw all the thumbnails
for each path. Before you attempt
to open layers to view their con-
tents, you'll save a lot of time if
you choose Palette Options from
the Layers palette pop-up menu
and uncheck the Objects option
in the Thumbnails grouping. Once
you've reorganized your paths
in the Layers palette, be sure to
re-enable the Objects checkbox
in the Palette Options to view the
thumbnails for your paths.
Problem with New Views
There are unpredictable situations
when using sublayers and New
Views in which the view doesn't
save the state of the sublayer.
Note: You should think of views
as a way to control top-level layers
only (and not sublayers).
A Group command bug
A bug in the Group command can
reorder the relative stacking order
of your objects when you group
(Object>Group, or -G/Ctrl-G)!
This can occur if you group objects
that aren't within any sublayer
with objects that are on a sublay-
er. In order to avoid this, before
you group make sure that all of
your objects are within sublayers,
or that none are in sublayers.
Hide/Show All (Object menu)
Another way to handle objects that get in the way is to
select them and choose Object >Hide >Selection. To view
all hidden objects, choose Object > Show All.
Note: Hidden objects may print if they're on visible layers.
Bring Forward/Bring to Front and more
These commands work on objects within a layer. Bring
Forward (Object > Arrange) stacks an object on top of the
object directly above it; Bring to Front moves an object
in front of all other objects on its layer. Similarly, Send to
Back sends an object as far back as it can go in its stacking
order, whereas Send Backward sends an object behind its
closest neighbor.
Note: Bring Forward and Send Backward may not work
on large files. In cases where they don't, use the Layers pal-
ette to reorder items by moving the selection indicator to
the right of the layer name up or down in the layer list.
MAKING SELECTIONS USING THE LAYERS PALETTE
There are several ways to make selections. Click the
layer's target icon or Option-click (Mac)/Alt-click (Win)
the layer name to select all unlocked and visible objects
on the layer, including sublayers and groups. Click the
sublayer's target icon to select everything on the sublayer,
including other sublayers or groups. Clicking the group's
target icon will also select all grouped objects. Shift-click
the target icons to select multiple objects on different lay-
ers, including sublayers and groups. Always use the target
icon to make a selection when applying an appearance to
a layer, sublayer, or group.
If you have selected artwork on the Artboard, click on
the small square to select all of the objects on the layer or
in the group. A larger square means that all of the objects
on that layer or group are already selected. Clicking in
the small space to the right of the target indicator will
also make a selection of all objects on the layer, sublayer,
or group.
162 Chapter 5 Layers
David Nelson/Mapping Services
Cartographer David Nelson uses the Layers pal-
ette to its fullest extent in this transportation
map of Orlando, Florida. To see more of the
Illustrator techniques that Nelson used to cre-
ate this map, see the "Map Techniques" lesson
in the Brushes & Symbols chapter.
Chapter 5 Layers
163
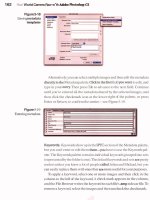
Digitizing a Logo
Controlling Your Illustrator Template
Overview: Scan a clean version
of your artwork; place the art as
a template in Illustrator; trace the
template; modify the curve of drawn
lines to better fit the template image
by manipulating points and by using
the Pencil tool.
A large, dean scan of the artwork
Creating the template and a drawing layer
You can easily use Illustrator's Template layer to re-cre-
ate traditional line art with the computer—easily, that
is, if you know the tricks. San Francisco artist Filip Yip
was commissioned to modernize the classic Cracker Jack
sailor boy and dog logo, and to digitize the logo for use
in a variety of media. Yip scanned the original logo art-
work and several sketches he drew and used the scans as
sources in developing the new logo.
1 Placing a scanned image as a template and using
Filters to modify the image. Select a high-contrast
copy of the original artwork that is free of folds, tears,
or stains. Scan the image at the highest resolution that
will provide the detail you need for tracing. Open a new
file in Illustrator (File > New), select File >Place, click the
Template option, then choose your scan, thus placing it
into a new template layer. Template layers are automati-
cally set to be non-printing and dimmed layers.
If you need to improve the quality of your scanned
image to better discern details, you can edit the image
Chapter 5 Layers
164
with a program like Photoshop prior to placing it in
Illustrator. Alternatively, if you've already brought the
image into Illustrator, use the Filter menu to change focus
or color. (If you placed the image on a Template layer,
you'll need to double-click the layer name in the Layers
palette and disable the Template option; this will then
allow you to edit the image.) Select the image and select
Filter > Sharpen to make the image more crisp. Choose
the Filter > Colors menu and select options like Convert
to Grayscale, Saturate, or Adjust Colors to modify image
properties.
2 Tracing the template. With the template as an on-screen
tracing guide (and the original scanned artwork handy
as an off-screen reference), select the Pen or Pencil tool
and begin tracing over the scanned image. To reduce
visual clutter in small areas of the drawing, try viewing
your active layer in Outline mode (while pressing -D
[Mac] or Ctrl-D [Win], click on the visibility icon next to
the layer's name in the Layers palette). Don't worry too
much about how closely you're matching the template as
you draw. Next, zoom close (with the Zoom tool, drag to
marquee the area you wish to inspect) and use the Direct-
selection tool to adjust corner or curve points, curve seg-
ments, or direction lines until the Bezier curves properly
fit the template. (See the Drawing & Coloring chapter for
more on working with Bezier curves.)
3 Refining lines with the Pencil tool. To modify a line
that doesn't follow the template, click the line to select it,
then choose the Pencil tool and draw over the template
with the Pencil. Illustrator automatically reshapes the
selected line (instead of drawing a brand new line). You
may need to edit the Pencil tool's settings (double-click
the Pencil tool icon and edit the Pencil Tool Preferences
dialog box) to control the smoothness of the revised line
or the pixel distance from the selected line in which the
Pencil tool will operate. (Learn more about using the Pen-
cil tool in "Tracing Details" lesson in this chapter.)
Darkening a scanned grayscale image using the
Filter >Colors >Adjust Colors dialog box
Modifying the fit of a drawn line using the Di-
rect-selection tool to move a direction handle
On the left, electing a previously drawn line, and
on the right, redrawing the selected line with
the Pencil tool
Manually tracing an intricate object may be
more tedious and time-consuming than au-
totracing it; Yip drew the rough-edged parts
of the sailor uniform with chalk on watercolor
paper, which he then scanned, saved as a TIFF,
and autotraced in Adobe Streamline
Chapter 5 Layers 165
Tracing Details
Tracing Intricate Details with the Pencil
Overview: Scan a photo and place it
into a Template layer in Illustrator;
adjust Pencil Options; trace the photo
with the Pencil; create new layers;
adjust layer positions and modes.
Double-clicking the Template layer to access
Layer Options where "Dim Images" percentages
can be customized
Double-clicking on the Pencil tool to set Options
Saving images for tracing
While EPS was once the preferred
format for placed images (see
the Illustrator & Other Programs
chapter), saving images in TIFF will
display more detail for tracing.
Laurie Grace loves the way the Pencil tool permits her to
trace details with precision. Using the Pencil with custom
settings and additional layers, she created this map of
Greenland for a Scientific American article.
1 Scanning and placing the image into a Template
layer. Scan the image you wish to use as a tracing
template and save it in grayscale TIFF format. In a new
Illustrator document, place your TIFF as a template
(see "Digitizing a Logo" in this chapter). Your template
will automatically be dimmed to 50%; to customize the
percentage at which the template is dimmed, double-
click the Template layer.
2 Setting up your Pencil Options for tracing. To draw
with precision, you'll need to adjust the Pencil tool's
default settings. Double-click the Pencil tool and drag the
Fidelity slider all the way to the left, to 0.5 pixels, keep-
ing Smoothness at 0% (higher numbers in Fidelity and
Smoothness result in less accurate, smoother lines). For
this lesson, keep "Keep Selected" enabled, so you can
redraw lines and easily connect a new line to the last.
3 Drawing with the Pencil tool into Layer 1. It's very
simple to attach one line to the next, so don't worry about
tracing your entire template in one stroke. Zoom in on
166 Chapter 5 Layers
your work (see the Illustrator Basics chapter for Zoom
help) and trace one section. When you finish drawing
that section (and it's still selected), move the Pencil tool
aside until you see "x", indicating that the Pencil would
be drawing a new path. Next, move the Pencil close to the
selected path and notice that the "x" disappears, indicat-
ing that the new path will be connected to the currently
selected one, then continue to draw your path. To attach a
new path to an unselected path, select the path you wish
to attach to first. To draw a closed path with the Pencil
(like the islands in Grace's map), hold the Option/Alt key
down as you approach the first point in the path.
Note: With Option/Alt down, if you stop before you reach
the first point, the path will close with a straight line.
4 Creating and reordering new layers. To add the back-
ground water and the coastline terrain details, Grace had
to create additional layers. To create additional layers,
click on the New Layer icon in the Layers palette. Click-
ing on a layer name activates that layer so the next object
you create will be on that layer. To reorder layers, grab a
layer by its name and drag it above or below another layer.
Click in the Lock column to Lock/Unlock specific layers.
5 Hiding and Previewing layers. Toggle Hide/Show
Template layers from the View menu. To toggle any layer
between Hide and Show, click on the Eye icon in the
Visibility column for that layer to remove or show the
Eye. To toggle a non-template layer between Preview and
Outline mode, -click/Ctrl-click the Eye icon. (To move
objects between layers, see Tip "Moving an object from
one layer to another" later in this chapter.)
Zooming more means smoothing less
You can control the amount of smoothing ap-
plied with the Smooth tool by adjusting screen
magnification. When you're zoomed-out, the
Smooth tool deletes more points; zoomed-in, the tool
produces more subtle results. —David Nelson
After drawing part of the coastline it remains
selected (top left); moving the Pencil close to
the selected path then allows the next path to
be connected (top right); continuing the path
with the Pencil tool (directly above)
Drawing with the Pencil tool and holding the
Option key to close the path
Making a New Layer; a blue object created in
the new Layer 3 which is moved below Layer 1;
Layer 1 locked with Layer 3 activated
Toggling between Outline and Preview mode for
a specific layer by / Ctrl-clicking the Eye icon
Chapter 5 Layers 167
Colors with Layers
Coloring Black & White Images with Layers
Overview: Create a sketch; scan and
save it as a bitmap TIFF; set up layers
in Illustrator for the TIFF and colored
objects; place bitmap TIFF into the
upper layer; color the image; group
TIFF with its colors; add background.
Setting up basic layers in Illustrator
A bitmap outline sketch
The scanned sketch placed into the top layer
Overprinting 1-bit TIFF problem
It's usually best to set black TIFFs
to Overprint Fill in the Attributes
palette. If Overprint is disabled,
check www.adobe.com/illustrator
for possible corrective updates.
While the most obvious way to trace an image in
Illustrator is to place the image on a lower layer and use
an upper layer to trace the new Illustrator objects, in
some cases you'll want your tracing layer to be below a
placed image. When creating an illustration for a chil-
dren's magazine, John Kanzler placed his sketch on an
upper layer. This way, he could add color using Illustra-
tor and maintain a hand-sketched look by keeping the
scanned sketch in the file.
1 Setting up your Illustrator layers. In Illustrator, cre-
ate at least three layers for the elements of your image.
You'll need to have a top layer for placing your sketches,
a middle layer (or layers) for coloring your sketches, and
a base layer for background objects. (For help making
layers, see "Digitizing a Logo" and "Tracing Details" in
this chapter.) Illustrator assigns a different color to each
layer name—this helps you keep track of the objects in
each layer (selected paths and anchor points will be color-
coded to match their layer name).
2 Sketching and scanning a black-and-white drawing;
placing the image into the top layer in Illustrator.
Scan a hand-drawn sketch as a 1 bit bitmap format (black
Chapter 5 Layers168
and white only), or draw directly in a painting program
set to a black-and-white (bitmapped) mode. Save your
image as a TIFF file. Kanzler sketched his figure with a
soft pencil on rough paper, scanned it, then saved it as a
bitmap TIFF file. Next, in the Layers palette of your Illus-
trator file, make the top layer active (click on the layer
name) and use the Place command (from the File menu)
to place one of your drawings into the top layer.
3 Coloring your drawings. To make coloring your
drawings easier, it helps to lock all but the layer in which
you will be drawing. You must first unlock and activate
the chosen layer (to the left of the layer you should see the
Eye icon but no Lock icon; to activate a layer, click on its
name in the Layers palette). Then, lock the top layer. Now,
using filled colored objects without strokes, trace under
your placed sketch. To view the color alone, hide the top
layer by clicking on the Eye icon in the visibility column
for that layer in the left side of the Layers palette.
4 Grouping your drawing with its colors; adding a
background. When you have finished coloring the figure,
unlock the top layer, select the placed TIFF with the
objects that colorize that figure, and group them together
(while selected, choose Object >Group). The grouped fig-
ure automatically moves to the top layer.
To add background elements, activate the bottommost
layer and draw on it. Your grouped images can be easily
repositioned within your composition by selecting and
moving them with the Selection tool.
Changing layers by selecting an object
Instead of changing the active layer by selecting a new
layer in the Layers palette, let Illustrator make the
change for you. When you select an object from an
unlocked layer, its layer automatically becomes active.
The next object you create will use the same paint style
as the last selected object and will be placed on that
same active layer.
Drawing into layers below the top layer, which
contains the scanned sketch
The colorized drawing with the sketch visible
and the sketch hidden
Selected objects that are on different layers,
then grouped, automatically move to the layer
where the topmost selected object resides
The background for the illustration, created in
the bottom layer
Moving a grouped, colorized figure around the
composition
Chapter 5 Layers 169
Organizing Layers
Managing Custom Layers and Sublayers
Overview: Sketch and scan a
composition; set up basic, named lay-
ers in Illustrator for the objects you
will create; place art into temporary
sublayers; trace the placed art; delete
the temporary sublayers.
The initial concept for the illustration, used to
set up a photo shoot; the assembled photo-
graphic collage
Hand-traced sketch scanned
Beginning your illustration with well-organized layers
and sublayers can be a lifesaver when you're construct-
ing complex illustrations. Using these layers to isolate
or combine specific elements will save you an immense
amount of production time by making it easy to hide,
lock, or select related objects within layers. When Ameri-
can Express commissioned Nancy Stahl to design a cover
for its internal magazine, Context, she saved time and
frustration by creating layers and using sublayers for
tracing and arranging various components of the cover
illustration.
1 Collecting and assembling source materials. Prepare
your own source materials to use as tracing templates
in Illustrator. For the AmEx illustration, Stahl took
Chapter 5 Layers170
Polaroids of herself posed as each of the figures in her
planned composition and scanned them into Adobe
Photoshop, where she scaled them, composited some ele-
ments, and moved them into position. She then printed
out the assembled "collage," roughly sketched in the
other elements by hand and, with tracing paper, created a
line drawing version of the full composition to use as an
overall template. She then scanned it into the computer.
2 Setting up illustration layers. Before you begin to
import any photos or drawings, take a few moments to
set up layers to help you isolate the key elements in your
illustration. For the cover illustration, before she actu-
ally started drawing in Illustrator, Stahl set up separate
layers for the background, the sky, the rays of light, and
the building in the background, which she called "OZ,"
as well as a character layer for each of the figures. Name
a layer while creating it by Option-clicking/Alt-clicking
on the Create New Layer icon in the Layers palette. You
can also name or rename an existing layer or sublayer by
double-clicking on it in the Layers palette.
3 Placing art to use as templates. Click on the layer in
which you plan to trace your first object, then click on the
Create New Sublayer icon in the Layers palette to create a
sublayer for your template (Option-click/Alt-click on the
icon to name your sublayer as you create it). Use File >
Place to select the scan or artwork to be placed into this
sublayer. The template sublayer should now be directly
below the object layer upon which you will be tracing.
Lock the template sublayer and draw into the layer above
using the Pen, Pencil, or other drawing tools.
Stahl activated a character layer by clicking on it
in the Layers palette, then created a sublayer that she
named "JPEG Images". She placed the hand-traced figures
image into her sublayer, locked it, and traced her first
character into the layer above. Using the Layers palette,
she freely moved the locked JPEG Images template sub-
layer below each character's layer as she drew.
Setting up layers to isolate key elements
The temporary sublayer before placing the scan
Moving the sublayer and setting up the Lock and
Show options for tracing
Chapter 5 Layers 171
Viewing only the essential layers for each task
Clicking on a visible and unlocked sublayer to
make it active for placing new art
Clicking on or dragging the sublayer to the Trash
icon, or choosing Delete from the Layers palette
pop-up menu
Changing placed art
Select the image you
wish to replace. Next
open the Links palette (Window
menu) and click on the Replace
Link icon (the bottom left icon)
or choose Replace from the Links
palette pop-up menu. In the dia-
log box, locate the replacement
image and click Place.
4 Drawing into your layers. Now you can begin draw-
ing and tracing elements into your compositional layers
and sublayers. Activate the layer or sublayer in which
you want to draw by clicking on the layer's name, make
sure the layer or sublayer is unlocked and visible (there
should be an Eye in the Visibility column and an empty
box in the Lock column), and start to work. Use the Lay-
ers palette to lock, unlock, or hide layers or sublayers, as
well as to toggle between Preview and Outline modes,
switch your active layer, or add a new layer or sublayer. By
maneuvering in this way, Stahl could easily trace a sketch
of basic background elements, create rays against a locked
background or develop one character at a time.
5 Adding new placed art to a layer or sublayer. If you
need to import art into an existing layer or sublayer, first
make sure the layer is visible and unlocked, then make
it the active layer by clicking on it. For the AmEx cover,
when Stahl needed additional references, she viewed and
unlocked the JPEG Images template sublayer, clicked on
it to make it active, and then used the Place command to
bring the new scan or art into the template sublayer.
6 Deleting layers or sublayers when you are finished
using them. Extra layers with placed art can take up
quite a bit of disk space, so you'll want to delete them
when you are done with them. When you finish using a
template, first save the illustration. Then, in the Layers
palette, click on the layer or sublayer you are ready to
remove and click on the Trash icon in the Layers palette,
choose the Delete option from the Layers palette pop-up
menu, or drag the layer or sublayer to the Trash icon in
the Layers palette. Finally, use Save As to save this new
version of the illustration with a meaningful new name
and version number (such as "AmEx no JPEG v3.ai").
Stahl eventually deleted all the sublayers she created as
templates so she could save her final cover illustration
with all the illustration layers but none of the template
sublayers or placed pictures.
172 Chapter 5 Layers
Nancy Stahl
Using the same techniques as in "Organizing magazine, Context. When she wanted to move
Layers," Nancy Stahl created this image for selected objects to another layer, she used the
the interior of American Express's internal technique shown in the Tip below.
Moving an object from one layer to another
To move a selected object to another layer: open the Layers palette, grab the colored dot to the
right of the object's layer, and
drag it to the desired layer (see
near right). To move a copy of an
object: hold down the Option/Alt
key while you drag (see far right).
Chapter 5 Layers 173
Nested Layers
Organizing with Layers and Sublayers
Overview: Plan a layer structure;
create layers and sublayers; refine the
structure by rearranging layers and
sublayers in the Layer palette's hierar-
chy; hide and lock layers; change the
Layers palette display.
The completed layer structure for the map show-
ing layers and two levels of sublayers
Selecting and dragging the BYWAY-road sub-
layer up and out of the Hwys sublayer, placing it
on the same level in the hierarchy as Hwys
Layers have always been a great way of organizing art-
work. Now with Illustrator, you can organize your Layers
palette as a nested hierarchy, making it easier to navigate
and manipulate. For this map of the Great River Scenic
Byway in Illinois, Steven Gordon relied on nested layers
and sublayers to organize the artwork he developed.
1 Planning, then creating and moving layers and sub-
layers. Gordon began by planning a layer structure for
the map in which layers with similar information would
be nested within several "master" layers, so he could
easily navigate the Layers palette and manipulate the
layers and sublayers. After planning the organization
of your layered artwork, open the Layers palette (Win-
dow > Layers) and begin creating layers and sublayers.
(Illustrator automatically creates a Layer 1 every time a
new document is created—you can use or rename this
layer.) To create a new layer, click the Create New Layer
icon at the bottom of the palette. To create a new sublayer
that's nested within a currently selected layer, click on the
palette's Create New Sublayer icon.
As you continue working, you may need to refine your
organization by changing the nesting of a current layer
or sublayer. To do this, drag the layer name in the Layers
Chapter 5 Layers174
palette and release it over a boundary between layers. To
convert a sublayer to a layer, drag its name and release
it above its master layer or below the last sublayer of the
master layer (watch the sublayer's bar icon to ensure that
it aligns with the left side of the names field in the Layers
palette before releasing it). Don't forget that if you move a
layer in the Layers palette, any sublayer, group, or path it
contains will move with it, affecting the hierarchy of art-
work in your illustration.
2 Hiding and locking layers. As you draw, you can hide
or lock sublayers of artwork by simply clicking on the vis-
ibility (Eye) icon or edit (Lock) icon of their master layer.
Gordon organized his map so that related artwork, such
as different kinds of names, were placed on separate sub-
layers nested within the Names layer, and thus could be
hidden or locked by hiding or locking the Names layer.
If you click on the visibility or edit icon of a master
layer, Illustrator remembers the visibility and edit status
of each sublayer before locking or hiding the master layer.
When Gordon clicked the visibility icon of the Names
layer, sublayers that had been hidden before he hid the
master layer remained hidden after he made the Names
layer visible again. To quickly make the contents of all
layers and sublayers visible, select Show All Layers from
the Layers palette's pop-up menu. To unlock the content
of all layers and sublayers, choose Unlock All Layers. (If
these commands are not available, it's because all layers
are already showing or unlocked.)
3 Changing the Layers palette display. As you utilize
the Layers palette, change its display to make the pal-
ette easier to navigate. Display layers and sublayers (and
hide groups and paths) in the palette by choosing Palette
Options from the palette menu and in the Layers palette
Options dialog box, clicking Show Layers Only. To view
tiny thumbnails of the artwork on each layer or sublayer,
select a Row Size of Medium or Large, or select Other
and set row size to 20 or more pixels in the dialog.
Top, a "master" layer with two sublayers locked;
bottom, after the master layer is locked, the two
sublayers' edit icons are not dimmed, indicating
that they will remain locked when the layer is
unlocked
Selecting a row size in the Layers palette Op-
tions dialog box
Another way to unlock layers
A quick way to unlock all the con-
tents of a layer: Make sure the
layer itself is unlocked (the lock
icon is gone) and then choose Un-
lock All from the Object menu.
Let Illustrator do the walking
Illustrator can automatically ex-
pand the Layers palette and scroll
to a sublayer that's hidden within
a collapsed layer. Just click on an
object in your artwork and choose
Locate Layer or Locate Object
from the Layers palette's menu.
Chapter 5 Layers 175
Advanced Technique
Overview: Draw and scan a sketch;
create working layers using your
sketch as a template; in each "guides"
layer, draw a series of lines to estab-
lish perspective; make the perspective
lines into guides; draw elements of
your image using the applicable per-
spective guides.
Portion of the original pencil sketch placed on
a template layer with a custom layer ready for
creation of guides
Locking and unlocking guides
• When guides are unlocked
(uncheck View >Guides> Lock
Guides), you can select any
guide as an object and move or
delete it.
• When a layer with guides is
locked, the guides lose their
"snap to" property—yet anoth-
er good reason for you to keep
guides on separate layers.
While any object can be made into a guide, converting
lines into guides is indispensable when adding perspec-
tive to an image. To illustrate this McDonald's packaging
design, Clarke Tate constructed several sets of vanishing
point guides, enabling him to draw a background scene
(Fort Santiago in the Philippines) that would contrast
with the flat cartoon figures of Snoopy and Woodstock.
1 Setting up the layers. Sketch a detailed layout of the
illustration on paper, shaping main elements like Tate's
brick walk and wall with a perspective view. Scan your
sketch and save the scan as a TIFF, then place the TIFF in
Illustrator and choose Template from the Layers palette's
pop-up menu. Analyze the image to determine the num-
ber of vanishing points in your illustration (points along
Chapter 5 Layers
Varied Perspective
Analyzing Different Views of Perspective
176
the scene's horizon where parallel lines seem to converge).
Create new layers (click the Create New Layer icon in the
Layers palette) for compositional elements; add a layer for
each vanishing point in the illustration.
2 Establishing the location of vanishing points. In the
Layers palette, select the first layer you'll use for develop-
ing a set of perspective guides. Referring to your template,
mark the first vanishing point and use the Pen tool to
draw a path along the horizon and through the vanish-
ing point. (Some or all of your vanishing points may need
to extend beyond the picture border.) With the Direct-
selection tool, select the anchor point from the end of
the line that is away from the vanishing point. Grab the
point, then hold down Option/Alt and swing this copy
of the line up so it encompasses the uppermost object
that will be constructed using the vanishing point. You
should now have a V that extends along your horizon line
through your vanishing point, then to an upper or lower
portion of your composition.
To create in-between lines through the same vanish-
ing point, select both of the original lines, use the Blend
tool to click first on the outer anchor point of one of the
lines, and then on the outer anchor point of the other
line. (If you need to specify more or fewer steps, you
can select the blend and edit the number of steps in the
Spacing > Specified Steps field of the Object > Blend >
Blend Options dialog box.) For each different vanishing
point, repeat the above procedure.
3 Making and using the guides. Because Illustrator
cannot create guides from blended objects, you must first
select each blend with the Selection tool and then expand
it (Object >Blend >Expand). Next, transform the blends
into guides by choosing View > Guides >Make Guides.
Now pick an area of the illustration and begin drawing.
You may want to lock the layers containing guides for
other vanishing points so you don't accidentally snap
objects to the wrong perspective.
Top, dragging a perspective line to the
uppermost object from the vanishing point;
bottom, paths blended to create in-between
perspective lines
Perspective line blends before being trans-
formed into guides
Turning off the "snap to" function for guides by
locking the layer (left); locking guides in place
by using the Lock/Unlock toggle in the View>
Guides submenu
Chapter 5 Layers
177
Introduction
Working with Threaded Text
Wrapping Text Around Objects
Character and Paragraph Styles
Taking Advantage of OpenType
The Glyphs Palette
The Every-line Composer
More Type Functions (Type & Window menus)
Converting Type to Outlines
Using the Appearance Palette with Type
Exporting Illustrator Type
Custom Text Paths: Trickling Type with Variations of Type Style
Stretching Type: Fitting Type by Converting to Outline
Galleries: John Burns, Hornall Anderson
Masking Letters: Masking Images with Letter Forms
Gallery: Gary Newman
Book Cover Design: Illustrator as a Stand-alone Layout Tool
Brushed Type: Applying Brushes to Letterforms
Galleries: Joachim Muller-Lance, Tim Girvin, Jennifer Bartlett,
Louis Fishauf, Ellen Papciak-Rose, Bjorn Akselsen,
Pattie Belle Hastings, Frank Jonen
Crunching Type: Transforming Type with Warps & Envelopes
Advanced Technique: Offset Fills:
Covering a Pattern with an Offset Fill
Advanced Technique: Antiquing Type:
Applying Scribble in an Opacity Mask
Gallery: Steven Gordon
180
184
185
185
186
187
188
188
189
191
193
194
196
198-199
200
201
202
204
206-211
212
214
216
218