Understanding Adobe Photoshop CS4- P7 potx
Bạn đang xem bản rút gọn của tài liệu. Xem và tải ngay bản đầy đủ của tài liệu tại đây (2.39 MB, 30 trang )
168
Chapter 10 Color Correction and Enhancement
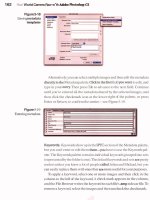
8. Adjust the Luminance slider to better match
exposure. Moving the Luminance slider to
the left darkens the image, to the right bright-
ens the image.
9. Adjust the Color Intensity slider to better
match color. Moving the Color Intensity
slider to the left reduces the color range, to
the right increases the color range and inten-
sifi es the colors.
10. Adjust the Fade slider to lessen the adjust-
ment until it is a visually close match. Moving
the slider to the right reduces the amount of
adjustment.
11. Select Neutralize to further reduce color casts
in the image.
12. When you’re satisfi ed, click OK to apply the
adjustment.
Black & White
If you want to create a dramatic grayscale or duotone effect, the
most effective way is to use a Black & White adjustment layer. But
unlike a simple saturation adjustment, you maintain full control
over how individual colors are converted. This allows you to
emphasize or deemphasize specifi c colors and tonal ranges. Addi-
tionally, you can tint the grayscale by applying a color tone to the
image (such as a sepia tone).
Useful Image Adjustments
169
1. Close any open fi les, and then open the fi le
Ch10_Black White Conversion.tif from the
Chapter 10 folder.
2. Click the Black & White icon in the Adjust-
ments panel.
3. Photoshop performs a default grayscale con-
version. You’ll want to adjust the conversion
using the color sliders. You can also apply an
Auto conversion or use a saved custom mix.
You can adjust the color
sliders to emphasize gray
tones of specifi c colors in
an image. Each image is
unique, so you’ll need to
fi nd the right balance. Drag
a slider to the left to darken
or to the right to lighten. Be
sure to select the Preview
check box so you can see
the results of your changes.
4. With the Black & White
command window open,
click the icon in the Adjust-
ments panel that looks like
a pointing fi nger.
5. You can click on the image
to sample a target. The
mouse pointer changes to an eyedropper
if you move it over the image. Just click and
hold on an image area to target the right
color slider for the strongest color at that
location. You can then drag to shift the color
slider for that color, thus making it lighter
or darker.
6. To create a duotone effect, select the Tint op-
tion. To change the tint color, click its swatch
and use the color picker to choose a new
color that matches your needs.
TIP
Black & White Auto—
A Good Start
Normally, I recommend avoiding
the Auto buttons, but with the
Black & White adjustment layer it
works well. Auto sets a grayscale
mix based on the image’s color
values. It attempts to maximize
the distribution of gray values. The
Auto mix often produces excellent
results and can serve as the starting
point for tweaking gray values us-
ing the color sliders.
VIDEO
TRAINING
Creative Sepiatones
34
170
Chapter 10 Color Correction and Enhancement
Gradient Map
You can use the Gradient Map to dramatically
or subtly stylize images. The effect works best
when used as an adjustment layer. The command
works by mapping the colors of a gradient to
the image based on the luminance values of the
source image. Let’s give the technique a try.
1. Close any open fi les, and then open the im-
age Ch10_Gradient_Map.tif from the Chap-
ter 10 folder.
2. Click the Gradient Map
icon in the Adjustments
panel.
3. In the dialog box, click the
drop-down menu and try a
default gradient. For more
on gradients, see Chapter
6, “Painting and Drawing
Tools.” Click OK when
you’re satisfi ed.
4. To soften the effect, you can change the adjustment layer’s blend-
ing mode. Setting it to Hue or Color creates a nice tint effect.
Useful Image Adjustments
171
Photo Filter
Professional photographers often place glass fi lters in front of the
camera lens. These can be used to “cool” or “warm” a picture, or
to add special effects. Since Photoshop often tries to simulate or
correct for steps not taken in the fi eld, the addition of Photo Filters
was a logical evolution for Photoshop.
Adobe added to the “real-time” color correction options with the
addition of 20 different adjustments. These layers simulate the tra-
ditional colored glass fi lters. Besides the built-in presets, you can
also choose custom colors from the Photo Filter interface using the
standard Color Picker.
There are three main groupings for color effects:
•
Warming Filter (85 and LBA) and Cooling Filter (80 and
LBB): These adjustment layers are meant to even out photos
that were not properly white balanced. The Cooling Filter (80
or LBB) makes images bluer to simulate cooler ambient light.
The Warming Filter (85 or LBA) makes images warmer to
simulate hotter ambient light.
•
Warming Filter (81) and Cooling Filter (82): These adjust-
ment layers are similar to the previous fi lters but cast a more
pronounced color. The Warming Filter (81) makes the photo
more yellow, and the Cooling Filter (82) makes the photo bluer.
•
Individual Colors: The Photo Filter also has 14 preset colors
to choose from. These can be used for two primary purposes:
to add a complementary color to a scene to remove color cast
or for stylistic reasons.
Let’s try applying a Photo Filter
adjustment layer.
1. Close any open fi les, and
then open the fi le Ch10_
Photo_Filter.tif from the
Chapter 10 folder.
VIDEO
TRAINING
Stealing Sunsets
35
172
Chapter 10 Color Correction and Enhancement
2. Click the Photo Filter icon in the Adjustments
panel.
3. In the Filter area, choose Cooling Filter (80)
to adjust the temperature of the photo. The
sky and the image should be “bluer.” You can
adjust the Density slider to control the inten-
sity of the effect.
Shadows/Highlights
Exposure problems often plague photos. Dark shadows may make
a photo seem unusable, but Photoshop offers a powerful com-
mand for fi xing these problems. The image command Shadows/
Highlights is very fl exible for solving problems. The command can
help salvage images where the subject is silhouetted from strong
backlight. You can also use the command to improve subjects who
have been washed out by the camera’s fl ash.
The Shadows/Highlights command does more than lighten or
darken an image. It makes adjustments by analyzing neighbor-
ing pixels. However, when fi rst opened, the tool is very basic. It is
important to select the Show More Options check box, which adds
signifi cant control. Let’s give the command a try.
1. Close any open fi les, and then open the fi le Ch10_Shadows_
Highlight_1.tif from the Chapter 10 folder.
The Shadow/Highlights command is not available as an ad-
justment layer. You can still apply it in a nondestructive man-
ner by fi rst converting the photo to a smart object.
2. Choose Layer > Smart Objects > Convert to Smart Object.
Useful Image Adjustments
173
3. Choose Image > Adjustments > Shadows/Highlights. The im-
age is brightened automatically because the command boosts
the shadowed areas by default.
4. Select the Show More Options check box and be sure to select
the Preview check box.
5. Adjust the Shadows and Highlights of the
image:
•
Amount: Value determines how strong an adjustment is
made to the image.
•
Tonal Width: Small values affect a reduced region; larger
values include the midtones. If pushed too high, halos ap-
pear around the edges of the image.
•
Radius: A tolerance setting that examines neighboring
pixels to determine the affected area.
6. Modify the image adjustments to improve image quality:
•
Color Correction: This slider modifi es the saturation
of the adjusted areas. Essentially, it can counterbalance
washed out images.
•
Brightness: If you’re working on a gray-
scale image, Color Correction is replaced
by a Brightness control.
•
Midtone Contrast: This adjustment
affects the contrast in the midtones of a
photo. Positive values increase contrast,
whereas negative values reduce contrast.
•
Black Clip and White Clip: This
adjustment modifi es the black point of
shadows and lowers the white point of
highlights. This can lower the intensity of
the effect.
7. Click Save if you’d like to store the adjust-
ment to use on another photo. When you’re
satisfi ed, click OK to apply the adjustment.
If you’d like extra practice, you can open the image Ch10_
Shadows_Highlights_2.tif and repeat the command.
VIDEO
TRAINING
Shadows/Highlights
Adjustment
36
174
Chapter 10 Color Correction and Enhancement
Exposure
Starting with Photoshop CS2, support was added for 32-bit im-
ages. Generally referred to as high dynamic range (HDR), these
images offer great fl exibility in exposure. These images can better
handle re-creating the wide range of exposures found in outdoor
scenes or intense lighting conditions. The Exposure adjustment is
usually used on images that exist in 32-bit space and is said to be a
32-bit fl oating point operation (often shortened to fl o a t ).
Creating an HDR image is a combination of
shooting techniques and a Photoshop command.
It requires that the camera be secured fi rmly to a
tripod and that you are careful when triggering
or adjusting the camera to not move it (or allow
anything to move in the shot either). Several pho-
tos at various exposures are taken of the same
scene (a minimum of three; usually fi ve to seven
is adequate). The camera should have its auto-
bracket and ISO features disabled. Each shot
should be about two f-stops apart. The user then
harnesses the Merge to HDR command (File >
Automate > Merge to HDR) to create the 32-bit
image. You’ll create an HDR image later in the
book, but for now let’s jump ahead to an HDR
image that’s already built.
1. Close any open fi les, and then open the fi le
Ch10_HDR.tif. If you click in your menus,
you’ll notice that several features are grayed
out. Most image adjustments do not work for
a 32-bit image. This image was taken in a
very low-light environment, but by combin-
ing multiple exposures together into the HDR
image, a much better photo was captured.
2. Click the Exposure icon in the Adjustments
panel. This command makes tonal adjust-
ments by performing calculations in a linear
color space (Gamma 1.0) rather than the
current color space. This offers extreme fl ex-
ibility for future changes.
Useful Image Adjustments
175
3. Three properties can be modifi ed:
•
Exposure: Modifi es the highlight end of the tonal range
with little effect on the extreme shadows.
•
Offset: Darkens the shadows and midtones with little effect
on highlights.
•
Gamma: Adjusts the gamma of the photo.
4. Additionally, three eyedroppers adjust the image’s luminance
values:
•
Set Black Point eyedropper: Sets the Offset, which shifts
the selected pixel to zero.
•
Set White Point eyedropper: Sets the Exposure, which
shifts the selected pixel to white (1.0 for HDR images).
•
Midtone eyedropper: Sets the Exposure, which shifts the
selected pixel to the middle gray.
5. Make a dramatic adjust-
ment and click OK. Let the
image blow out, because
this will show you the fl ex-
ibility of HDR images.
6. Apply a second Exposure
adjustment and bring the
image back into a more
accurate exposure. Notice
that the blown out areas are
restored (this is often impos-
sible with 8- or 16-bit images captured in a single exposure
because overexposed or underexposed data is discarded).
VIDEO
TRAINING
Creating HDR Images
37
176
Chapter 10 Color Correction and Enhancement
Exposure for Raw
Files
The Exposure command is also
an important part of process-
ing a raw fi le using Camera
Raw. Even though a photo may
appear overexposed, you can
often properly expose it during
the development stage.
1. Close any open fi les, and
then open the fi le Ch10_Re-
cover_Raw.NEF from the
Chapter 10 folder.
2. Adjust the Exposure and
Recovery sliders until the
image is more properly
exposed.
3. Further refi ne the image
using the additional sliders
in the Basic tab. Be sure to
adjust the Fill Light, Blacks,
Contrast, and Clarity sliders
to get the best image.
The fl exibility offered by the
various raw formats and the
Camera Raw developing mod-
ule are excellent reasons for
upgrading your digital photog-
raphy acquisition approach.
VIDEO
TRAINING
Recovering Raw Files
38
Useful Image Adjustments
177
Invert
The Invert image adjustment creates an image
that is a direct inverse or negative. This can
be useful in a variety of situations, including
inversing a Layer Mask, making a positive from
a scanned negative, or switching a black back-
ground to white. When an image is inverted, the
brightness of each pixel is assigned the inverse
value from the 256 color-values scale. This
means that a 0 value would map to 255, whereas
a 35 value would map to 215.
1. Close any open fi les, and then open the fi le
Ch10_Invert.tif from the Chapter 10 folder.
This is a negative image from a scanned fi lm
negative.
2. Choose Image > Adjustments > Invert or
press Command/Ctrl+I. The negative image
changes to a positive image, which can be
further refi ned or color corrected.
Equalize
The Equalize command can restore contrast to a washed out
photo. The command attempts to redistribute pixels so that they
are equally balanced across the entire range of brightness values.
The command works best when you sample a small area that will
drive the overall adjustment. The Equalize command takes the
lightest area and remaps it to pure white and takes the darkest area
and remaps it to pure black. Let’s give it a try.
1. Close any open fi les, and then open the fi le Ch10_Equalize.tif
from the Chapter 10 folder.
2. With the Rectangular Marquee tool, make a
selection inside the largest fl ower.
3. Choose Image > Adjustments > Equalize to
repair the image.
4. Make sure the Equalize entire image based
on selected area check box is selected, and
then click OK.
NOTE
Problematic Adjustments
These adjustments may introduce
new problems in your image:
•
Brightness/Contrast
•
Replace Color
•
Selective Color
•
Posterize
178
Chapter 10 Color Correction and Enhancement
NOTE
Scan it Right
If you are scanning negatives into
a computer, be sure to set up your
scanner correctly and specify that you
are scanning a fi lm negative. You can
use the Invert command to creative a
positive image, but you’ll need to do
additional color correction.
5. If the image appears overexposed, you can
choose Edit > Fade to reduce the intensity of the
Equalize command.
Not-so-useful Image Adjustments
Several image adjustments can be run on your image that can
cause more problems than they solve. Others (like Variations)
are far less effi cient than more professional alternatives. You are
welcome to explore these commands, but professional users rarely
use them.
Brightness/Contrast
The Brightness/Contrast command is an inferior substitute to
Levels and Curves. The Brightness/Contrast command affects
the overall lightness or darkness. The problem with the adjust-
ment is that it goes too far. It is impossible to adjust the shadows
without overaffecting the highlights. The usual problems with an
image are in the midtones, which are better handled by a Levels or
Curves adjustment. A Brightness/Contrast adjustment will often
leave your image washed out. Nothing good comes from this com-
mand, so it’s best to avoid it.
The image on the left has overblown areas. When the Brightness is adjusted so the
highlights are properly exposed, the shadows and midtones are too dark. Photo by
James Ball
Not-so-useful Image Adjustments
179
Replace Color
The Replace Color command creates a mask that you can use to
select specifi c colors in an image. Once a selection is made, the
colors can be manipulated via an adjustment to the hue, satura-
tion, and lightness of the selected areas. While this command
works reasonably well, you’ll see better results when you use the
Color Range command (Select > Color Range), and then add a
Hue/Saturation adjustment layer.
The results may look impressive, but this adjustment is a destruc-
tive edit. It’s best to use the Color Range command and a Hue/
Saturation adjustment layer to allow for future changes.
Selective Color
The Selective Color command is similar to the
Color Balance command. However, it is not as
easy to use, nor does it produce professional re-
sults that a Levels or Curves adjustment would. A
better option is to use the Color Range command
and add a Levels or Curves adjustment layer.
180
Chapter 10 Color Correction and Enhancement
Posterize
The Posterize command reduces the number
of colors used in the image. This leads to a
reduced color panel and creates banding in the
image. While it can be used as a special effect,
lowering image quality is not desirable. Be sure
to use this as an adjustment layer if you just
want to experiment.
Variations
The Variations command allows you to adjust
the color balance, contrast, and saturation of a
photo. This is done by selecting from a variety of
thumbnails of alternatives. This command only
works if the image is basically close to “right”
and you want to experiment with subtle varia-
tions. It only works on 8-bit images, and it is a destructive adjust-
ment that can’t be modifi ed. This command feels like a visit to
the optometrist, and just takes way too long to generate average
results. While it is attractive to a beginner, its long-term benefi ts
are limited and there’s really no need to waste your time with it.
Repairing and
Improving Photos
11
Damage, like fashion, is often very subjective.
If you show the same set of photos to fi ve people
and ask them to comment on mistakes or dam-
age, you’ll likely get fi ve very different answers.
This is because people fi nd different things
distracting: A crooked photo may bother some,
whereas others may dislike a jagged edge. Sev-
eral aspects of an image can be “wrong,” but it is
also impossible to have a “perfect” photo.
Because damage is so subjective, I recommend
asking your clients or end customers (if pos-
sible) what needs repair. Ask them questions
like, would you like anything different or can
anything be better? You’ll often be surprised by
their answers. Sometimes a fi x will be as simple
as a crop or a color correction, but more often it
will involve removing something from (or adding to) the picture.
The world has embraced special effects and digital enhancement.
You may be surprised at how much Photoshop can do.
This chapter tackles issues like physical damage, such as rips,
wrinkles, scratches, and fading as well as digital issues such as
overblown skies and noise. It focuses on techniques that you can
perform in less than 15 minutes. With practice you can fi x 90 per-
cent of the problems in 15 minutes; the other 10 percent you either
learn to live with or spend more time on.
The photo on the right has had several small blemishes
repaired, proper contrast restored, and a small “accident” fi xed.
182
Chapter 11 Repairing and Improving Photos
Image Selection
Most problems can be repaired, but not every problem is worth
trying to fi x. Photographers usually shoot many exposures of a
subject, so they are willing to discard several that they are unhap-
py with. It is best to repair images that are close to their desired
state; otherwise, you may spend too much time on a project (which
could send it over budget in the professional world).
Working with Modern Images
The most common problems in modern photos
are color or exposure issues (both of which were
addressed in detail in Chapter 10, “Color Cor-
rection and Enhancement”). However, modern
photos can still suffer physical damage. If the
print is wrinkled or creased, it’s always best
to use the original source (either a print or the
negative). If the print is dusty or smudged, gently
wipe it with a soft cloth, and then try to scan or
rescan it. If rescanning or reprinting is not an
option (or there are issues with a digital photo),
you can attempt to fi x several problems within
Photoshop.
Working with Historical Images
Historical photos often have more problems than
modern photos. There is a much greater likeli-
hood of physical damage. You may have to repair
creases, tears, water damage, or adhesive stains
(from scrapbooks). It’s likely that the photos will
have faded and need a boost in contrast or ton-
ing. It is generally easiest to remove color from a
historical source while repairing it. The color can
then be added back in during the fi nal stages as
an overlay or sepia tone.
This picture was straightened, color corrected, and had miss-
ing areas fi lled in through cloning and healing.
The Retoucher’s Toolbox
183
The Retoucher’s Toolbox
The process of repairing damage to a photo is
often referred to as retouching. Because there
are many different problems that can manifest
in a photo, Photoshop offers several tools with
which to respond. Knowing which tool to use is
often a dilemma, but with a little bit of study and
practice the process can be greatly accelerated.
Let’s explore how the tools work and give them a
try. But fi rst, realize that most of these tools use a
paintbrush behavior. Be sure your painting tools
are set to Brush size and your other tools to Pre-
cise in the Preferences dialog box (Edit > Preferences). This will
allow you to better see your tools as you move them in your image.
Clone Stamp Tool
The Clone Stamp tool works by
replacing unwanted or dam-
aged pixels with good pixels
that you target. It’s a popular
tool that is relatively easy to use
and achieves accurate results.
The Clone Stamp tool allows
you to set a sample point (where
the good pixels are taken from), and then paint into bad areas (to
cover up damage or blemishes). This technique is very powerful,
because the Photoshop paint engine allows for the softening of the
stamp’s edge.
1. Activate the Clone Stamp tool by pressing S. Roll over the
tool’s icon and be sure you have not accidentally activated the
Pattern Stamp tool.
2. Select a soft-edged brush from the Options bar or Brush panel.
If needed, modify an existing brush.
3. Open the fi le Ch11_Clone.tif from the Chapter 11 folder on
the CD. You’ll notice a distracting shadow in the lower-right
corner of the photo.
184
Chapter 11 Repairing and Improving Photos
4. You need to specify the alignment for the clone:
•
Select Aligned: The sample point and painting point
move parallel as you move. If the user clones and moves
the cursor to the right, the sample point moves as well.
This ultimately creates more variety in the cloning, which
is desirable. However, it can lead to the unwanted material
being repeated into the stroke.
•
Deselect Aligned: If Aligned is not selected, the initial
sample point is used (even after you stop and resume clon-
ing). This option ensures that you are always sampling
from the same pixels when starting a new stroke.
5. If you’re working with a layered image, you can clone from all
visible layers by specifying Sample All Layers. This method
can be used to clone to an empty layer, which makes the clon-
ing nondestructve. If the Sample All Layers option is deselect-
ed, only the active layer is used.
6. Option/Alt-click within the current docu-
ment (or even another open document set to
the same color mode). This defi nes the source
point for sampled pixel data. Click in the
larger sandy area near the horse’s legs.
7. Click and paint as if you were using the Brush
tool. The sampled pixels are taken from the
sample point and cover the unwanted pixels.
Continue cloning until the entire shadow is
painted over. You may need to select a new
sample point to get a realistic clone. Try
blending multiple strokes together for the
best results.
TIP
For Better Results When
Cloning
•
Try cloning at a low opacity and
build up strokes
•
Try sampling from several dif-
ferent places to fi ll in an area
•
Experiment with blending modes
•
Clone to an empty layer by set-
ting the Sample method to use
All Layers.
VIDEO
TRAINING
Clone an Object
39
The Retoucher’s Toolbox
185
Healing Brush Tool
The Healing Brush tool ( J) is an
innovative and powerful tool
that can be used to repair blem-
ishes in a photo. The Healing
Brush tool operates much like
the Clone Stamp tool. However,
instead of just moving pixels
from one area to another, the
Healing Brush tool clones pixels while also matching the texture,
lighting, and shading of the original pixels.
Since the Healing Brush samples surrounding
areas, you may want to make an initial selection
around the damaged area and feather it. This
will give you better results on an area with strong
contrast. The selection should be slightly bigger
than the area that needs to be healed. It should
follow the boundary of high-contrast pixels. For
example, if you’re healing a blemish on a sub-
ject’s face, make an initial selection of the skin
area to avoid mixing in the adjacent background
or clothing. The selection will prevent color
bleed-in from outside areas when painting with
the Healing Brush tool.
1. Close any open fi les, and then open the fi le
Ch11_Healing_Brush.tif from the Chapter 11
folder.
2. Activate the Healing Brush tool by pressing J. (Be sure to closely
examine the icon and not select the Spot Healing Brush tool.)
3. Select a soft brush from the Options bar or the Brush panel.
4. Set the blending mode to Replace. This
option preserves noise and texture at the
stroke’s edges.
5. Specify a source for repairing pixels in the Options bar.
The standard option is to use Sampled. This takes pixels
from the area surrounding the sample point. As the brush
moves, the sample point also moves to ensure variety in the
sampled source.
186
Chapter 11 Repairing and Improving Photos
6. Specify the alignment option. If Aligned is selected, the sample
point and painting point move parallel as you move the stroke.
If Aligned is deselected, the initial sample point is Always. The
Always option ensures that you are always sampling from the
same area.
7. If you want to heal to an empty layer, select the Sample All
Layers check box. This allows you to sample one layer, and
then apply the healing to a new empty layer above. This will
provide greater fl exibility in your workfl ow. If the Sample All
Layers box is deselected, only the active layer is used.
8. Add a new, empty layer above the Background layer.
9. Near the bottom of the bell, Option/Alt-click on the striped area.
10. Click and start to paint as if you were using a
brush. Because the sampled pixels are drawn
from before you click, it may be necessary to
release and start over occasionally to avoid
cloning the problem area.
11. After several strokes, release the mouse to
merge the sampled pixels. Before the pixels
blend, you will have a visible stroke. After-
ward, the stroke should gently blend.
12. Continue to heal the remaining crack in
the bell.
Spot Healing Brush Tool
The Spot Healing Brush tool was added to
Photoshop as a way to harness powerful blending
technology with less work (although the Heal-
ing Brush is pretty labor-free to begin with). It
can quickly remove blemishes and imperfections
in photos without requiring a sample point to
be set. The Spot Healing Brush tool automati-
cally samples pixels from the area around the
retouched area. Let’s give the tool a try.
VIDEO
TRAINING
Restore a Damaged Photo
40
The Retoucher’s Toolbox
187
1. Close any open fi les, and then open the fi le
Ch11_Spot_Healing.tif from the Chapter 11
folder.
Look closely at the image; you’ll see some
acne on the child’s forehead and a wet spot
on her shirt. Both are easy fi xes with the Spot
Healing Brush tool.
2. Activate the Spot Healing Brush tool from
the Tools panel.
3. Choose a soft-edged brush from the Options
bar. Make the brush only slightly larger than
the problem areas. For this image, a brush size of 25 pixels and
a hardness of 25% will work well.
4. Set the blending mode in the Options bar to Replace. This will
preserve noise, grain, and hair texture at the edges of the stroke.
5. Choose a Type of repair in the Options bar:
•
Proximity Match: Pixels from the edge
of the selection are used as a patch for
the selected area. This should be the fi rst
attempt at repair; if it doesn’t look good,
switch to the Create Texture option.
•
Create Texture: Pixels in the selec-
tion are used to create a texture to fi x
the damaged area. If the texture doesn’t
work, try dragging through the area one
more time.
6. Click once on an area you want to fi x. You can
also click and drag over a larger area. After
fi xing the acne, touch up the wet spot on the
child’s shirt. If you are unhappy with the spot
healing stroke, simply undo and try again with
a smaller brush. You can also try stroking in
different directions to modify your results.
Upon close examination you should notice that you have
healed several blemishes in the photo. If only life were so easy.
188
Chapter 11 Repairing and Improving Photos
Patch Tool
The Patch tool uses the same technology as the Healing Brush
tool, but it is better suited to fi x larger problems or empty areas.
Start using the Patch tool by selecting the area for repair and then
dragging to specify the sampled area. For best results, select a
small area.
The Patch tool can be used two different ways:
•
Source: Make a selection in the area that needs repair, and
then drag to an area of good pixels.
•
Destination: Make a selection in an area of good pixels, and
then drag that selection on top of the unwanted pixels.
Let’s give it a try.
1. Close any open fi les, and then open the fi le
Ch11_Patch.tif from the Chapter 11 folder.
2. Select the Patch tool by pressing J to cycle
through the tools. (It’s in the same well as the
Healing Brush tool.)
3. Set the Patch tool to Source.
4. Make a selection around the discarded shoes
on the beach.
5. Drag into the clear sandy area to sample
pixels.
6. Release and let the Patch tool blend.
7. Repeat for the remaining trash on the beach.
TIP
Making Selections
While you can make a selection
with the Patch tool, you can always
make a selection using any other
selection tool (such as Marquees or
Lassos), and then activate the Patch
tool. The Patch tool behaves just like
the Lasso tool (as far as selections
go), but it may not offer the level of
control you need.
The Retoucher’s Toolbox
189
Red Eye Tool
Red eye is caused when the camera fl ash is refl ected in a subject’s
retinas. This happens frequently in photos taken in a dark room,
because the subject’s irises are open wide. There are two solutions
to fi xing red eye in the fi eld:
•
Use the camera’s red eye reduction feature. This will strobe
the fl ash and adjust the eyes of your subject. This strobing will
increase the time from when you click the camera’s shutter and
the photo is taken.
•
Use a separate fl ash unit that can be held to the side.
Getting it right in the fi eld is important, but you can fi x it in Photo-
shop as well. Photoshop CS4 offers a powerful Red Eye tool that can
fi x fl ash problems. It effectively removes red eye from fl ash photos
of people and white or green refl ections in the eyes of animals.
1. Close any open fi les, and then open the
fi le Ch11_Red_Eye.tif from the Chapter 11
folder.
2. Zoom into the red eye area. An easy way is
to take the Zoom tool and drag around the
problem area.
3. Select the Red Eye tool from the Tools panel
or press J repeatedly to cycle through the
tools.
4. Click in the red eye area to remove it. If
you’re unsatisfi ed with the results, choose
undo and modify the two options in step 5.
5. In the Options bar, adjust the Pupil Size to
a smaller number to convert a more con-
strained area (30% works well for this image).
Adjust the Darken Pupil setting as desired to
modify how dark the pupil will be after the
conversion.
190
Chapter 11 Repairing and Improving Photos
Blur and Sharpen Tools
Oftentimes, a photo will need a focus adjustment. While global
changes are often implemented through blur or sharpen fi lters, it’s
frequently necessary to lightly touch up an area by hand. To do
this, you can use the Blur tool (to defocus) or the Sharpen tool (to
add focus or detail). Both tools are driven by brush-like settings,
which allow you to change size, hardness, strength, and blending
mode. Remember, if the Caps Lock key is down, brush previews
are disabled.
1. Close any open fi les, and then open the fi le
Ch11_Blur-Sharpen.tif from the Chapter 11
folder.
2. Select the Blur tool from the Tools panel (it
looks like a water droplet).
3. Specify a brush size of approximately 120
pixels and a Strength of 50%. The Strength
settings modify how quickly the tool alters
the image. Sometimes several built-up strokes
are better for a gentle look.
4. Paint over an area of the edge of the white
bowl to deemphasize it.
5. Choose one of the tool’s blending modes.
The Darken and Lighten modes are particu-
larly useful for isolating the blurring effect to
darken or lighten areas, respectively. Try the
Darken mode and blur the dark fl oor.
6. Switch to the Sharpen tool and try enhancing
parts of the image. The duck’s bill is a good
choice as well as the eyes and edges of feath-
ers. Experiment with the Mode and Strength
settings.
7. Be careful not to oversharpen the image,
because it will quickly introduce visible noise
and distortion.
TIP
Nondestructive Tools
Both the Blur and Sharpen tools can
be used nondestructively. Simply
create a new layer to hold modi-
fi ed pixels. Then in the Options bar
select the Sample All Layers check
box. The blurring or sharpening will
be isolated to the selected layer.
The Retoucher’s Toolbox
191
Smudge Tool
The Smudge tool simulates dragging a fi nger through wet paint.
The pixels are liquid and can be pushed around the screen. With
the default settings, the tool uses color from where you fi rst click
and pushes it in the direction in which you move the mouse. This
tool is useful for cleaning up dust specks or
fl akes in a photo. Set the tool’s blending mode to
Lighten or Darken (depending on the area to be
affected), and you’ll have digital makeup to touch
up the problem.
1. Close any open fi les, and then open the fi le
Ch11_Smudge.tif from the Chapter 11 folder.
2. Select the Smudge tool from the Tools panel
(it looks like a fi nger painting icon).
3. Zoom into the model’s fl yaway hair.
4. Experiment with the Darken and Lighten
modes. These are particularly useful for
isolating the smudge by pushing only dark or
light pixels.
5. Smudge the edges of the hair pixels. Experi-
ment by switching blending modes: You can
always undo the smudge, and then change
the tool’s mode and resmudge. To quickly
cycle blending modes, press the Shift+= or
Shift +- shortcut keys.
Using the Smudge tool’s Darken mode lets you push darker
pixels over lighter pixels.
TIP
Smudge Tool for Historical
Images Too!
The Smudge tool also works great
for touching up blemishes in histori-
cal photos. Rips, tears, and cracks
can easily be fi lled in using the
Smudge tool’s Lighten and Darken
modes. You can also try the Blur
tool in a similar fashion.
192
Chapter 11 Repairing and Improving Photos
Dodge and Burn Tools
The Dodge and Burn tools are known as toning tools. They allow
you fi ner control over lightening or darkening your image. These
tools simulate traditional techniques used by photographers. In a
darkroom, the photographer would regulate the amount of light
on a particular area of a print. These tools are particularly helpful
when touching up faded photos, especially when repairing water
damage. Let’s try out both tools.
1. Close any open fi les, and then open the fi le
Ch11_Dodge_Burn.tif from the Chapter 11
folder.
2. Closely examine the four faces. You should
notice that the two on the right look washed
out, and the two on the left are a bit dark.
3. Select the Dodge tool from the Tools panel.
Adjust the brush to be soft and large (ap-
proximately 80 pixels). Set the tool to adjust
the Midtones.
4. Paint over the shadowed faces on the left half
of the picture to bring out the darkest areas
a bit.
5. Select the Burn tool from the Tools panel.
Adjust the brush to be soft and large
(approximately 80 pixels). Set the tool to
adjust the Highlights and set an Exposure
setting of 20%.
6. Paint over the washed-out faces on the left
half of the picture to restore the contrast a bit.
7. Continue to touch up areas in the photos as
needed. Lower exposure settings are gener-
ally more desirable.
TIP
Protect Those Tones
If you are working on color images,
be sure to use the Protect Tones op-
tion for the Dodge and Burn tools.
Simply select the check box in the
Options bar to get more natural
looking results.