SolidWorks 2010- P6 ppt
Bạn đang xem bản rút gọn của tài liệu. Xem và tải ngay bản đầy đủ của tài liệu tại đây (549.44 KB, 30 trang )
Core Out the Part
119
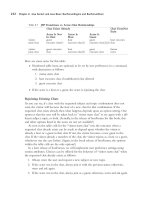
FIGURE 3.48 Defining the bottom wall thickness of the cutout
3. Do the same on the two vertical rectangle segments that are closest
to the part edges.
4. Now all that is left is to define the height of the cutout. Select one of
the two segments on the side of the rectangle, and place the dimen-
sion. Set the height of the rectangle to be 2 inches in the Modify win-
dow, as shown in Figure 3.49.
FIGURE 3.49 Fully defined sketch of the cutout
5. Exit the sketch by clicking the Exit Sketch button in the confirma-
tion corner.
Cut Out the Cavity
Since you started the process by clicking the Cut-Extrude button prior to cre-
ating the sketch of the cutout, when the sketch was exited, the Extruded Cut
command automatically initiated. This approach reduces the number of mouse
clicks and in the long run will save you time while you are modeling, which is
always a good thing.
505434c03.indd 119 1/27/10 1:50:25 PM
Chapter 3 • Creating Your First Part
120
1. Press Ctrl+7 on your keyboard, or select the isometric view in the
Heads-up View toolbar.
2. In the Extrude PropertyManager, set the depth of the extrusion to
be 1.00 inch deep, and click the green check mark to complete the
action, as shown in Figure 3.50.
FIGURE 3.50 Setting the depth of extrusion in the Extrude PropertyManager
3. Press Ctrl+S on your keyboard or press the Save button on the menu
bar to save the changes you have made to the model. Figure 3.51
shows an isometric view of the model so far.
FIGURE 3.51 Part model showing a rectangular-shaped cavity cut out
from the bottom
Add Cutout for Electronics Cover
When the lamp is manufactured and in use, the electronics and wiring will be
housed in the cavity and cannot be allowed to just fall out. This could be a huge
issue for the consumer, not to mention a hazard. This is why you need to add a
505434c03.indd 120 1/27/10 1:50:31 PM
Core Out the Part
121
cutout that a small plastic cover will sit in. The cutout has to be recessed since
this is the side of the base that will ultimately be placed on a desktop, and if it is
above the surface of the base, the base will tilt to one side and be very unstable.
To add the cutout, do the following:
1. Press Ctrl+6 or select the bottom view in the Heads-up View toolbar.
2. Press S on the keyboard, and select Cut-Extrude in the shortcut bar.
3. Select the bottom face of the lamp base model to insert a blank sketch.
4. Since the cutout for the cover will follow the outline of the cavity cutout,
you’ll offset the edge rather than create a new rectangle. Press S on the
keyboard, and select the Offset Entities button on the shortcut bar.
The Offset Entities command allows you to create sketch entities
that are offset by a specified distance from existing sketch entities,
model edges, or model faces. Using the Offset Entities tool, you’ll off-
set the edges of the cavity you created earlier to ensure that the geom-
etry for the cover cutout will be updated as dimensions are changed.
5. In the Offset Distance field in the PropertyManager, enter the value .1.
This is the distance a line will be created from the edge of the cavity.
6. Ensure that the Add Dimensions option is selected in the
PropertyManager. Without this option selected, the newly created
sketch entities will not be defined. Also, make sure that the other
selected options shown in the previous image are selected.
7. In the graphics area, select the bottom face of the cavity to offset the
four edges by the specified dimension.
505434c03.indd 121 1/27/10 1:50:35 PM
Chapter 3 • Creating Your First Part
122
8. Click the green check mark to exit the command and create the off-
set, shown in Figure 3.52.
FIGURE 3.52 Creating an offset entity
The lines that are created by the Offset Entities command take
on the Offset Entities relation, eliminating the need for additional
relations such as Horizontal or Vertical since these relations should
have been applied to the original edges. Also, by selecting the Add
Dimensions option in the PropertyManager, you’re able to create a fully
defined sketch without the need to add more dimensions. With the
sketch fully defined, all that is left to do is to create the extruded cut.
9. By clicking the Extruded Cut command prior to creating the sketch,
you eliminated a couple of extra steps. Once the sketch is complete,
click the Exit Sketch icon in the confirmation corner to initiate the
Extruded Cut command.
10. In the Depth field in the PropertyManager, enter the value of .1, and
make sure that the Blind end condition is selected. Since these are the
only options you need for this feature, click the green check mark to
make the cut. Figure 3.53 shows the part model with the offset entity.
FIGURE 3.53 Part model showing extruded cut to use for cover cutout
505434c03.indd 122 1/27/10 1:50:41 PM
Core Out the Part
123
Add Holes for Wiring
In the previous couple of sections, you created a cavity that will eventually be
used to house the wiring and electronics for the lamp. But you may have noticed
that there is nowhere for the wiring to go. Well, you do, in fact, need to remedy
that, and you are going to do it by creating a hole in the boss from earlier in the
chapter to pass the wires up to the bulb subassembly. You’ll also create a hole in
the back of the lamp base that will be used for the AC plug cord. First is the hole
for running the wires up to the bulb assembly and the counterbore that will be
necessary for the shaft nut.
Sketch a Circle with a Defined Diameter
Here are the steps for adding a hole for the counterbore:
1. If you changed the display style of the part back to Shaded With Edges,
you will need to return to the Hidden Lines Visible view in order to cre-
ate the next couple of features. In the Display Style pull-down on the
Heads-up View toolbar, select the Hidden Lines Visible option.
2. Press S on your keyboard, and select Extruded Cut from the shortcut bar.
3. Rotate the part to show the bottom, and select the face on the bottom
of the wiring cavity to insert a sketch for the extruded cut, as shown
in Figure 3.54.
FIGURE 3.54 Selecting a face for an extruded cut sketch
The following step is another example of how design intent affects
how a sketch is created. In the next step, you can easily decide to
offset the edge of the round boss to specify the wall thickness, if that
was indeed what your design intent required. Since the hole going
through the boss and counterbore require that the shaft and shaft
nut have enough room, you must instead specify the hole diameter.
505434c03.indd 123 1/27/10 1:50:44 PM
Chapter 3 • Creating Your First Part
124
The easiest way to do this is to create a circle and specify the circle
diameter in the sketch.
4. Press S on your keyboard, and select the Circle button in the shortcut
bar. Press Ctrl+8, or select Normal To in the Heads-up View toolbar.
5. To ensure that the circle drawing in the sketch is concentric with the
boss, you will specify that the center of the circle shares the same cen-
ter point of the boss. Without clicking the mouse button, hover over
the edge of the boss with the mouse pointer until the four quadrants
of the circle are shown with small yellow diamonds and the center is
displayed with a small circle with a cross, as shown in Figure 3.55.
FIGURE 3.55 Drawing a circle concentric with the boss
6. Move the mouse pointer over the center mark for the boss, and press
and release the left mouse button.
7. Drag the mouse slowly from the center point to create the circle.
When the radius value displayed next to the mouse pointer shows
the R value to be somewhere close to 0.500, click and release the left
mouse button, as shown in Figure 3.56.
8. Press the S key, and click the Smart Dimension button in the
shortcut bar.
9. Select the circumference of the circle with the mouse pointer, and
click and release the left mouse button. Place the dimension on the
outside of the circle, and enter 1 in the field of the Modify window. If
you properly selected the center of the circle, the circle will be shown
as black after applying the dimension, since the location and size of
the circle will be fully defined, as shown in Figure 3.57.
505434c03.indd 124 1/27/10 1:50:47 PM
Core Out the Part
125
FIGURE 3.56 Drawing the circle, continued
FIGURE 3.57 Fully defined concentric circle
The sketch with the 1.00≤ circle is what will become the counterbore that
makes room for the shaft nut. When the lamp is assembled, the threaded end of
the shaft will be held into place securely fastened to the lamp base with a nut.
Execute an Extruded Cut for the Counterbore
Now it is time to create the actual extruded cut feature that will become the
counterbore. Here’s how:
1. Click the Close Sketch icon in the confirmation corner in the upper-
right corner of the graphics area. Once the sketch is exited, the
Extruded Cut command will automatically be initiated. To make the
next couple of steps easier, press Ctrl+7 on your keyboard to switch to
an isometric view.
2. In yet another example of design intent dictating the modeling of fea-
tures, instead of creating a blind extrusion, you will create the feature
505434c03.indd 125 1/27/10 1:50:56 PM
Chapter 3 • Creating Your First Part
126
to ensure that a specified wall thickness is met. To do this, you will
need to select another end condition in the PropertyManager for the
Extruded Cut command. Click the End Condition field to display the
available ways to terminate the feature.
3. To ensure that the wall thickness is properly specified, select the
Offset From Surface option in the End Condition field.
4. Although you should not have to select it, you should at least be aware
that the Face/Plane field in the PropertyManager is highlighted and
expecting the selection from the graphics area, as shown in Figure 3.58.
FIGURE 3.58 Face/Plane field in PropertyManager
The Face/Plane field, when using the Offset From Surface end con-
dition, is the one that will be used to create the theoretically offset
terminating plane for the feature created. Select the top face of the
boss at the top of the lamp base, as in Figure 3.59.
5. The Offset Distance setting must now be specified in the
PropertyManager. As with the Face/Plane field, you should not
have to select the field in order to input the value since it should
automatically gain focus after specifying the face of the boss. In the
Offset Distance field, enter the value .125 to represent the thickness
505434c03.indd 126 1/27/10 1:50:59 PM
Core Out the Part
127
of material that will be spared after creating the cut, as shown in
Figure 3.60. After entering the value, click the green check mark to
create the extruded cut.
FIGURE 3.59 Specifying the face for the Extruded Cut offset
FIGURE 3.60 Offset Distance field in PropertyManager
The last feature was the counterbore that will be used for the shaft nut. Now
you need to create the hole that allows the shaft to mount to the lamp base.
Create the Through Hole for the Lamp Shaft
This feature, like the counterbore, will be defined with another sketch of a circle
with the diameter specified in order to ensure that the shaft will fit properly in
place. At this point, you can also switch the view display back to Shaded With
Edges since it will no longer be necessary to see the hidden lines of the model.
505434c03.indd 127 1/27/10 1:51:07 PM
Chapter 3 • Creating Your First Part
128
1. Once again, press S on your keyboard, and click the Extruded Cut
command in the shortcut bar. This time, select the top face of the
boss to insert a sketch for the extruded cut, as shown in Figure 3.61.
FIGURE 3.61 Selecting a face on which to draw the sketch
2. While in the sketch, open the shortcut bar, and click the Circle
command.
3. Display the center mark for the edge of the boss by hovering over
the edge with the mouse pointer. Specify that the center point of the
circle will share the center point with the boss, as in Figure 3.62.
FIGURE 3.62 Creating the concentric circle for the thru hole
4. Create the circle, and specify the diameter to be .7, as in Figure 3.63.
Exit the sketch to initiate the Extruded Cut command.
505434c03.indd 128 1/27/10 1:51:13 PM
Core Out the Part
129
FIGURE 3.63 Setting the diameter of the circle
5. In the Extruded Cut PropertyManager, change the end condition of
the feature to be Up To Next. This will terminate the hole on the next
face it encounters, which in the case would be the terminating face of
the counterbore.
6. Click the green check mark to create the hole. The boss with a hole
for the lamp shaft is shown in Figure 3.64.
FIGURE 3.64 Boss with a hole big enough for a lamp shaft
Last but not least is the hole for the AC power cord in the back of the lamp base.
505434c03.indd 129 1/27/10 1:51:20 PM
Chapter 3 • Creating Your First Part
130
Create a Through Hole for the AC Power Cord
Even though you will not be going as far as creating the power cord or even the
grommet that is snapped into the hole to protect the cord, you should still make
sure that the features on this lamp base are as accurate as possible. At a later
date when you become more comfortable with modeling parts in SolidWorks,
it would be great practice to design these components to finish your assembly.
Here’s how to make that hole:
1. Click the Extruded Cut command in the shortcut bar, and select the
back face of the lamp base to insert a sketch for the hole.
2. Press Ctrl+8 on your keyboard to change the view to be normal to
the viewing plane.
3. With the sketch mode active, select the Circle tool in the shortcut bar.
4. Create a small circle in the lower-left area of the face, and apply a
dimension to the circle by selecting the Smart Dimension tool in
the shortcut bar, as shown in Figure 3.65. Make the Diameter of the
circle .400 by entering the value in the Modify window.
FIGURE 3.65 Drawing a circle on the back face of the model
In the future revisions, it may be necessary to specify a new diam-
eter for the hole created for the power cord. Since you want to ensure
that the distance between the bottom edge of the part and the edge
of the hole will always remain the same regardless of the hole diam-
eter, you will specify the gap between the edges rather than to the
center of the circle.
5. From the shortcut bar, select the Smart Dimension.
6. Instead of just selecting the circle to dimension to the center, press
and hold the Shift button on the keyboard while selecting the bottom
quadrant of the circle. This will specify that you are actually dimen-
sioning the edge of the circle, as shown in Figure 3.66.
505434c03.indd 130 1/27/10 1:51:23 PM
Core Out the Part
131
FIGURE 3.66
Selecting a circle while holding Shift to dimension to its tangent
7. While still holding the Shift key, select the bottom edge of the part,
and place the dimension. Specify the distance to be .300 in the
Modify window.
8. While the Smart Dimension tool is still active, select the circle once
again, and select the sketch origin.
9. Place the dimension and specify that the center of the circle will be
2.00 inches from the sketch origin, as shown in Figure 3.67.
FIGURE 3.67 Circle with defined diameter, distance from sketch origin,
and distance from bottom edge
10. Once the sketch is fully defined, click the Exit Sketch icon in the con-
firmation corner.
11. In the Extruded Cut PropertyManager, change the End Condition
field to Up To Next, and click the green check mark. Figure 3.68
shows the lamp base with the newly created holes.
FIGURE 3.68 Solid part with holes added
505434c03.indd 131 1/27/10 1:51:31 PM
Chapter 3 • Creating Your First Part
132
Add Fillets and Chamfers
The main modeling of the lamp base is now complete, but the part is not yet
ready to be manufactured. Even though the shape and size meet the require-
ments of the assembly, all the edges are considered sharp and not very appealing
to the consumer. To finish the model, you need to add some chamfers and fillets
to the many sharp edges to soften up the final look and in some cases make the
part easier to manufacture.
In many designs, a fillet is used to add an overall softer appearance to a part,
and it is rare that a part not utilize a fillet in one way or another. A fillet is often
an edge of a part that is rounded to a specified radius. Depending on whether
the fillet is on the outside or inside corner, the manufacturing process will dif-
fer, but the process in SolidWorks is the same. A chamfer is is used a lot less
often in consumer products because it is not as “soft” as a fillet, but removing
the edge is the same. A chamfer is used to break a sharp edge with an angled
edge, often 45° at a specified distance.
In the lamp base, you will be using both fillets and chamfers, but how you choose
which type to use will mostly depend on the function. For example, you can use fil-
lets to soften the look of a part or make it easier to machine inside corners, but you
can also use chamfers to create lead-in chamfers. Especially when it is necessary to
insert a part into another part, lead-in chamfers make it easier for the person doing
the assembly to quickly find the hole.
Add Fillets Using FilletXpert
You’ll start by adding fillets to the four corner edges of the lamp base. Even
though you can individually select each of the four edges separately, you will
use the little used FilletXpert to help in edge selection to save time. To use
FilletXpert, do the following:
1. Press S on the keyboard, and select the Fillet tool in the shortcut bar.
2. In the PropertyManager, instead of selecting each edge in the Items To
Fillet section, click the FilletXpert button located near the top.
NOte
The FilletXpert has a number of features that aid in the creation
of fillets. The reason for using the FilletXpert in this case is to quickly cre-
ate multiple fillets. This, in my opinion, is one of the best reasons for using
the FilletXpert—it is an amazing time-saver, especially in larger parts.
505434c03.indd 132 1/27/10 1:51:32 PM
Add Fillets and Chamfers
133
3. With the Edges, Faces, Features, And Loops selection box in the
PropertyManager selected, click one of the four outside edges of the
lamp base in the graphics area.
4. After selecting the edge, a context toolbar will pop up next to the
mouse pointer allowing you to specify which edge combination the
fillets will be applied. Hovering the mouse pointer over each button
on the toolbar will highlight the potentially selected edges on the
part and will also display a tooltip explaining the selection set. For
this particular fillet, the outside four edges need to be filleted. Click
the Connected To End Loop button on the toolbar that shows these
edges highlighted, as in Figure 3.69. The four selected edges will be
displayed in the PropertyManager.
FIGURE 3.69 Selecting the edges to be filleted
5. In the Radius field in the Items To Fillet section of the
PropertyManager, enter the value .250, and click Apply button.
505434c03.indd 133 1/27/10 1:51:40 PM
Chapter 3 • Creating Your First Part
134
6. While still in the FilletXpert, select the top edge of the base cre-
ated by the angled cut you created earlier in the chapter. Since you
are applying the fillet to only one edge, there is no need to select an
option from the context toolbar.
7. In the PropertyManager, specify that the radius of the fillet is 1.00,
and click the Apply button to move onto the next fillet.
8. In the PropertyManager, change the radius value to .500, and select
one of the top edges of the part. Since all the edges are connected
with a curved edge, selecting one will select the top edge. This is
called a closed loop, as shown in Figure 3.70.
FIGURE 3.70 Applying a radius to a closed loop
9. Click the Apply button to continue.
10. Change the radius value to .375, and click the bottom edge of the
boss on the top of the base, as shown in Figure 3.71.
11. Click Apply to create the fillet and move onto the next fillet.
12. Set the Radius value to .125, and select the top edge of the boss, as in
Figure 3.72.
With FilletXpert you
can apply a llet
without exiting the
command by click-
ing the Apply button
instead of the green
check mark.
505434c03.indd 134 1/27/10 1:51:45 PM
Add Fillets and Chamfers
135
FIGURE 3.71 Adding a fillet to the bottom edge of the boss
FIGURE 3.72 Adding a fillet to the top edge of the boss
13. Since you are finished adding fillets for the time being, click the
green check instead of the Apply button in the PropertyManager.
Reorder Features
If you rotate the part around to the backside by pressing and holding the scroll
wheel while moving the mouse, you will notice that the last fillet you created is
not continuous around the boss, as shown in Figure 3.73. The radius of the last
fillet is slightly larger than the space between the boss and the edge of the part.
There are two ways you could have avoided this issue; the first is using a smaller
radius for the fillet. If the fillet was smaller, SolidWorks wouldn’t have needed to
change the geometry of the fillet to move around the boss. The second way you
could have avoided this issue was to create the fillet before you added the boss.
505434c03.indd 135 1/27/10 1:51:50 PM
Chapter 3 • Creating Your First Part
136
FIGURE 3.73 Fillet affected by boss
For this part, you are not interested in changing the radius of the fillet, so
that leaves creating the fillet before you created the boss. So, this is when you
break out the time machine and go back a few minutes and add the radius. Of
course, by time machine, we are referring to the FeatureManager design tree.
Here’s how to use the FeatureManager design tree to change the order in
which you added features to your part:
1. In the FeatureManager design tree, select the first fillet that was cre-
ated, Fillet1, with mouse pointer and click and hold the left mouse
button, as shown in Figure 3.74.
FIGURE 3.74 Selecting the fillet to be reordered in the FeatureManager
2. While still holding the left mouse button, drag the fillet feature up in
the FeatureManager design tree, as shown in Figure 3.75. Since the
boss was created as Boss-Extrude2, the fillet needs to be placed above
this feature. When dragging a feature in the FeatureManager, the
feature will be placed after a selected feature. Since the fillet feature
needs to be placed above Boss-Extrude2, when Cut-Extrude1 is high-
lighted by the mouse pointer, release the left mouse button.
You can use the
FeatureManager
design tree to
change the order in
which features are
applied to a part.
505434c03.indd 136 1/27/10 1:51:55 PM
Add Fillets and Chamfers
137
FIGURE 3.75 Moving fillet creation to precede another feature
NOte
When reordering features in the FeatureManager, the mouse
pointer provides you with a visual cue to show that the feature will be placed
below the highlighted feature.
3. After moving Fillet1, do the same with the other two fillets, each fol-
lowing the previous. In the FeatureManager they must be listed in
numerical order; otherwise, they will fail since they are each depen-
dent on the previous.
Edit Fillet Feature
Despite how careful you may be when changing the order of features in the
FeatureManager design tree, there will be times when reordering features will
cause an error. As you might have noticed, reordering Fillet1, Fillet2, and Fillet3
caused Fillet4 to fail. Next to the Fillet4 feature in the FeatureManager, a red
circle with an X is displayed. This is how SolidWorks displays that there is an
error with the feature.
505434c03.indd 137 1/27/10 1:51:57 PM
Chapter 3 • Creating Your First Part
138
There are many reasons a feature might fail, and sometimes trying to fig-
ure out the error can be a little frustrating. SolidWorks does provide you with
information about the error to aid you in debugging the issue. If you hover the
mouse pointer over the error in the FeatureManager design tree, a brief expla-
nation of the error will be display. Hovering over Fillet4 will display the error
shown in Figure 3.76, and it explains that some filleted items are no longer in
the model.
FIGURE 3.76 Error tooltip in FeatureManager
This was caused because Fillet4 could no longer find the original edge that
was used to create the feature. Being able to fix errors in the FeatureManager
design tree is an important skill when using SolidWorks, and this gives you a
great opportunity to learn how easy it is to do.
Here’s how to correct the error by moving the fillet features back in time:
1. In the FeatureManager design tree, select the Fillet4 feature by press-
ing and releasing the left mouse button.
2. In the context toolbar, select Edit Feature (Figure 3.77).
FIGURE 3.77 Editing a feature with errors
505434c03.indd 138 1/27/10 1:52:03 PM
Add Fillets and Chamfers
139
3. You will see in the PropertyManager that the fillet is missing an edge.
At first glance, you may assume that all you need to do is select the
edge once again, but that would be incorrect in this case. As you can
see in Figure 3.78, reordering the feature caused the boss to no lon-
ger be able to make full contact with the part.
FIGURE 3.78 Boss no longer connected with the part
4. Instead of editing the fillet with the error, all you need to do is extend
the bottom of the boss to make full contact with the part where the
fillet resides. In the PropertyManager for Fillet4, click the red X to
exit the command.
5. Select the feature for the boss, Boss-Extrude2, and select the Edit
Feature button in the context toolbar, as in Figure 3.79.
FIGURE 3.79 Editing the boss created earlier
You can also select
the Edit Feature
command by right-
clicking the feature
if you moved the
mouse away from
the context toolbar.
505434c03.indd 139 1/27/10 1:52:10 PM
Chapter 3 • Creating Your First Part
140
6. In the PropertyManager for Boss-Extrude2, select the Direction2
check box, as in Figure 3.80. This will create an additional extrusion
in the opposite direction of the first extrusion.
FIGURE 3.80 Enabling Direction2 for the boss to reconnect to the part
7. In the end condition for Direction2 of the extrusion, select Up To
Next to take the extrusion up to the next logical step. Click the green
check mark to accept the changes.
8. After making the change to the extrusion, the error will be resolved,
and the fillet will be visible once again, as in Figure 3.81.
FIGURE 3.81 Solid part with correctly filleted edge
505434c03.indd 140 1/27/10 1:52:17 PM
Add Fillets and Chamfers
141
Select Edges Through Faces
The last couple of fillets that need to be added are the inside corners of the cavi-
ties on the bottom of the part. The following fillets will give you a chance to use
a little-used process for selecting edges. These corner edges are under the part
and currently out of sight. With the ability to select edges through faces that is
available in the Fillet tool, you can create the fillets without changing the rota-
tion of the view.
1. Press S on your keyboard, and select the Fillet tool in the shortcut bar.
2. In the Fillet PropertyManager, ensure that the Select Through Faces
option is selected. If this option is not selected, the following steps
will not be possible.
3. Change the Radius value to .100, and move the mouse pointer over
the outside of the part to the approximate area where one of the
inside edges of the cavity. If you are still viewing the part from the
backside, you should be able to easily select the corner closest to the
viewing plane, as in Figure 3.82. As the mouse moves over an edge,
it will be highlighted orange. When one of the vertical edges is high-
lighted, press and release the left mouse button.
FIGURE 3.82 Selecting an edge that is not seen in the current view
4. Since you are using the FilletXpert to create your fillets, after select-
ing the vertical edge, the context toolbar will be displayed next to the
505434c03.indd 141 1/27/10 1:52:22 PM
Chapter 3 • Creating Your First Part
142
mouse pointer. Hover over the buttons in the toolbar until you find
the button that highlights the other three edges of the cavity. This
should be the button that displayed the tooltip “Connected to Start
Loop,” as shown in Figure 3.83. Select this button, and click Apply in
the FilletXpert PropertyManager.
FIGURE 3.83 Selecting the vertical edges of the part’s inner cavity
5. In the PropertyManager, change the Radius value to .200, and move
the mouse pointer in the graphics area to right below that last edge
you selected. This should be the edge of the cutout you created for
the cover earlier.
6. Once the smaller vertical edge is highlighted in the graphics area,
click the Connected To Start Loop button in the context toolbar, as
shown in Figure 3.84.
FIGURE 3.84 Selecting the vertical edges of the cover cutout
7. Instead of clicking the Apply button in the PropertyManager, click
the green check mark since this will be the last fillet that needs to be
applied to the model.
8. Since you are more than likely new to applying fillets in this man-
ner, it is not a bad idea to rotate the part to view the cavity. If you did
it correctly, you should see the corners of the cavity with radii, as
shown in Figure 3.85.
505434c03.indd 142 1/27/10 1:52:29 PM
Add Fillets and Chamfers
143
FIGURE 3.85 Inner cavity of a part with filleted edges
Add Chamfers
A chamfer is a beveled surface that connects to surfaces at an angle. The most
common chamfers are usually applied at a 45° angle to the surfaces, and a
height of the bevel is specified. Most often, chamfers are applied to parts to
break the sharp edges, but they are sometimes used to act as a lead-in chamfer
to allow for the easy assembly of parts. The chamfers that you will be applying
to the lamp base are for the latter. The hole for the AC power cord and the shaft
nut will both have generous chamfers to make it easier to assemble. The rest of
the sharp corners will not be broken for this example, but typically you would
break these edges to .005
″ × 45° just to clean up the part.
To add chamfers, do the following:
1. Press and hold the scroll wheel to rotate the part to an angle that
easily allows access to the top edge of the shaft nut counterbore, as
shown in Figure 3.86. Once the appropriate view has been achieved,
release the scroll wheel.
FIGURE 3.86 Rotated view to provide better access to the shaft nut
counterbore
505434c03.indd 143 1/27/10 1:52:35 PM