50 FAST PHOTOSHOP" CS TECHNIQUES- P12 pps
Bạn đang xem bản rút gọn của tài liệu. Xem và tải ngay bản đầy đủ của tài liệu tại đây (2.99 MB, 30 trang )
This
page
left
blank.
302
GETTING LIGHTJET
5000
PRINTS
FROM CALYPSO, INC.
I
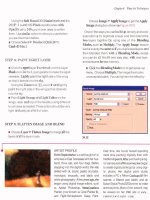
ABOUT THE IMAGE
1
45.1
-
Purple
&
Yellow Itis on
Gmn
Canon EOS ID digital
camera on tripod,
300mm
F12.8 IS with 25mm exten
-
sion tube, IS0 200,
RAW
image quality setting, F18.0
8
1125.1.648
x
2,464 pixels,
slightly edited and con
-
verted to kbits
per
channel,
12.2MB .tif
I
f
you want the ultimate print made from one of your image files,
then you want a Lightjet
5000
print made on Fuji Crystal Archive
photographic paper. These continuous tone photographs are
known for their rich blacks, print permanence, and excellent
color range. Such prints are the preferred prints of many artists
and professional photographers
all
over the world.
Wile there are over
400
sites worldwide that have Lightjet printers, only a
few of those sites keep their printers properly color
-
managed
so
that you
get consistent prints that match the images on your monitor. Calypso, Inc.
(www
.
calypsoinc
.
corn), in Santa
Clara,
California is one wmpany
that
I
recommend due to the efforts they take to provide you with wlor-
managed prints. Their focus
is
on nature, landscape, wildlife, line art, and
travel markets, and they have a list of customers that
includes many of the finest photographers in the
world.
To get prints made at Calypso, you can either
upload image files to their
ITP
site or you
can
write
the image files to a CD
-
ROM and send them via
or a courier service. Calypso offers two different pric
-
ing plans. The
"
preferred
"
pricing plan is for images
that have been prepped, color
-
managed, and profiled
directly to the Calypso
Lightjet
5000.
In
this
uw,
you
take
all
the responsibility for color management Or,
you can pay more and have
them
do some of the
work for you and they
will
be responsible for color-
management. Please visit the Calypso Web site and
read Calypso's Guide to Color Management on the
Lightjet
5000.
This
technique covers the steps you need to
take
to
enjoy the
"
preferred
"
pricing plan. In
thii
technique,
you take a
3.1
megapixel photo of an iris taken
with
a
Canon EOS
D30
digital
camera and follow steps to
size the image and sharpen
it
so that it can be used to
make an
11
"
x
14
"
Litjet
5000
glossy print at
Calypso, Inc.
I had Calypso print a series of increasingly larger
prints
with
the intent of stopping once the image
began to show some degradation. Much
to
my sur
-
prise and jubilation, they stopped printing when
they
got to a
30
"
x
40
"
print due
to
shipping problems and
the costs of shipping larger prints
-
not because of
image degradation!
If
you take into account the
dis
-
tance that you
view
an
image, there was no visible
dif
-
ference between the
11
"
x
14"
print and the
30
"
x
40
"
print. Obviously, you stand back a couple of feet
when you are looking at a print as large as
30
"
x
40",
which
is
much further badc than
if
you were lookingat
an
8
"
x
10"
print.
Digital
cameras make great images
for making large prints
-
test one of your images.
STEP
1:
DOWNLOAD CALYPSO'S
LIGHTJET
5000
ICC COLOR PROFILE
In order to get a print from Calypso that matches the
image
on
your
screen, you
must
have a properly
cali
-
brated monitor and the color of your image file
must
be converted to the appropriate ICC color profile for
the media you
want
To learn more about how to cali-
brate your monitor read Technique
1.
m
To get Calypso's Lightjet
5000
ICC color profile,
gotowww.calypsoinc.com.InthelefI
frame, click Colorsync Profiles. In the frame on
the right, you find both
PC
and
Mac
profiles.
Click the appropriate profile to begin download
-
ing a
ZIP
file containing three color profiles: one
for CD
I1 paperMatte, Gloss, and newsupergloss
paper. Additional files may be added when new
media becomes available and on occasion, new
profiles are substituted for those listed here.
rn
After the tiles have been unzipped, they need to
be copied to the appropriate directory for your
operating system. If you are using Windows
XP,
use Windows Explorer to locate and open the
folder where the unzipped files were saved. Press
Ctrl
while clicking each of the three files to select
them
all.
Right
-
click one of the files to get a pop
-
up menu; choose
Install
hotlles. Windows
XP
automatically installs
the
color profiles for you.
If you are using a Mac, the profiles
will
need to
be copied into the
Colorsync Profiles folder
(HD\Library\ColorSync\Protiles).
GeningLighhjet5000Printsfiom
Calypso,
Inc.
STEP
2:
OPEN PILE TO
BE
PRINTED
Choose
x-
Open
(Ctrl+O PC, Cmd+O
Mac) to display the Open dialog box. Double-
click the \45 folder to open it and then click
iris-
beforetif to select it. Click
Open
to open the file.
To order prints
fiom
Calypso,
the file must be either
a Photoshop
.
psd
file or a
.ti£
file and starting
with
an Adobe
RGB
(1988) profile
is
best
if
you haw
a choice.
As
the iris-beforehf file is already tagged
as
Adobe
RGB
1988 and it is a TIFF file, the file is ready
for the next step.
STEP
3:
CROP
AND SIZE IMAGE
rn
To crop the image to the proportions of an 11
"
x
14
"
print, click the Crop tool (C) in the Toolbox.
Type
11inintheWidthboxand14ininthe
Height box
in
the Options bar.
To move the Crop marquee up to
indude more
space above the
irii,
press the up
arnm
to move
up one pixel at a time or press Shift and the up
arrow
to move the selection marquee up 10 pa
at a time. Once you have selected the part of the
image you want you
can
click the checkmark in
the Options bar or press
Enter
to crop the image.
a
Now select Image
x-
Image
Size
to get the
Image
Size
dialog box shown
in
Figure 45.3. Make
sure that Constrain
Proportions and Resample
Image
is
checked. Resample Image should be
set
to Bicubic Smoother. Type 150 in the Resolution
in the Document
Size
area and then dick OK
to
resize the image slightly.
rn
The image should now be 1,650
x
2100
pixels,
which
is 150 dpi for an 11
"
x 14
"
print. To
view
this information, choose Image
Z-
Image
Size
to get the Image
Si
dialog box Click
Cancel
to
dose the dialog box.
mage
Size
I
While it is posslble to also enter 150 in the
Resolution box to
resize the image
to
the Lightjet
5000's
minimum
recommended DPI setting after the
Crop
command is applied, it is best to first crop the
image. Then up
-
sample
with
the Image
Size
com
-
mand
as
you can then choose the more appropriate
Bicubic Smoother method of interpolation.
Choose
View
*
Fit on
Screen
(Ctrl+O PC,
Cmd+O Mac) and click the maximize icon in the
upper
-
right corner or the image window
if
the
document window
is
not already maximized
if
you are using a PC (press F
if
you are using a Mac
to change to
Full-keen mode). Click just outside
the bottom
-
right corner of the image and drag the
1l-E
ram
Crop marquee up and to the left to include
as
much of the image
as
possible.
45.3
Chapter
8
Making Photographic
Prints
STEP
4:
SHARPEN IMAGE
rn
As
the image is now sized for the intended out
-
put size, you can now sharpen it. Because it is best
to select Unsharp
Mask
settings when viewing an
image at
loo%, choose
View
*
Actual
Pi
(Ctrl+O PC, Opt+Cmd+O Mac). Choose
Filter
>
Sharpen
*
Unsharp
Mask
to get the
Unsharp
Mask
dialog box shown in Figure
45.4.
Try
setting Amount to
2M%,
Radius
to
0.3,
and
Threshold to
0. Click OK to sharpen the image.
To learn more about sharpening images read
Technique
11
and Technique
39.
STEP
5:
CONVERT PROFILE TO CALYPSO
LIGHTJET
5000
COLOR PROFILE
rn
To convert the ~rofile to the Calypso Lightjet
5000
color profile that
was
downloaded
in
Step
1,
choose Image
>
ode
*
Convert to Profile to
get the Convert to Profile
dialog box shown in
Figure
45.5.
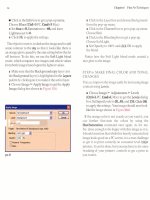
Click in the Profile box to get a pop
-
up menu. You find three profiles named
with
"
Calypso
"
; these are the three Calypso Lightjet
files. Select
Calypso
LJ5
Glossyv2.i~~ to select the
glossy media profile. (Later versions or new color
profiles may have different names.)
Make sure Engine is set to Adobe (ACE) and
that Intent
is
set to Perceptual. Use Black Point.
Compensation and Use
Dither
should both be
switched off.
rn
Click OK to convert the profile.
STEP
6:
SAVE FILE AND SEND
OR
UPLOAD TO CALYPSO
You
can
now save your file by choosing
File
*
Save
As
(Ctrl+Shift+S
PC,
Shift+Cmd+S
Mac) to get the
Fie
Save
dialog box.
After
selecting
an appropriate folder, type a name in the
File
Name
box so that you don't save it over the origi
-
nal file. Make sure that the
ICC
Profile
box
is
checked
in
the
Color
area
-
it should show the
Calypso
LJ5
G1o.ssyvZ.i~~
profile that you selected
earlier. Also make sure you are not saving layers.
Click
OK
to save the file.
Your file
is
now ready to be written
to
a
CD
-
ROM
or
other removable storage media and be sent
to
Calypso
or
be
uploaded to the Calypso FTP Web site. Please
visit the Calypso Web site to learn more about what
storage media
is
acceptable
to
Calypso, about getting an
ITP site
set
up
for
your
image
files,
and additional
ordering
information
Also,
feel
free
to
e-mail Michael
Chambers
at
Calypso
to
ask questions and
to
request
that an
FTF'
account
be
set
up for your
use.
His
e
-
ism~
To get more recommendations and tips on how to
get
Lightjet 5000 prints, visit
this
book's companion
Web page at
www.
reallyusefulpage. com\
50pscs.
This
technique condudes the chapter on
making prints. In the next and final chapter you learn
how to create and
display
our
photographs online
in
a Web
-
based photo gallery.
This
page
left
blank.
I
f
you
want
to share
Internet, you should
niques
in
this
chapter
fun.
The
first
technique.
need to know to create
use
on
a
Web page. The
next
how you
can
use those images
do
Photoshop
CSs
Web Pho
Web photo
gallery.
Next,
image map. If you don't know
or how it
can
be
used
-
this
is
should read.
An
image map
can
viewer
-
friendly navigation between
can
be
used
to
creatively
display
too.
You then
learn
how
to
create
are
wonderful
for
showingUbefor
The
find
technique
covers
the
create
an
animation to spice up
DISPLAY ON
A
WEB
PAGE
I
AEOUTTHE IMAGE
!
.
-
General George
Moon
Tropical Lily Canon EOS 1 Ds
mounted on a tripod, MT-
24EX Macro Twin Lite,
180mm fl3.5, IS0 100,
RAW
image quality setting, fll.O
@
1/25,
2,704
x 4,064 pixel,
9.4MB
RAW
converted to
8-
bits per channel, 800 x 533
pixel
1.2MB .tif
o doubt about it
-
you
can
quickly and easily create an
image
to
be placed on a Web page using commands
such
as
Save
for
Web,
or even
Save
As.
But, there is
much more to creating excellent images that display
well on a Web page
than
merely saving them
as
a
JPEG
image using one of these
commands.
In
this technique, you'll learn
all
the
steps you need to take to make excellent images that have been
optimized
specifically for viewing on a Web page and,
if
you like, the images
can
include information that identifies them
as
yours
as well
as
titles, shooting
information, and so forth.
Chapter9 Creating an
Online
Photo
Gallery
For this technique, we
will
be using a photo of a
brilliantly colored tropical
lily.
Thii
image has been
converted from
a
RAW format file to a TIFF format
and it has been resized so that the longest side
is
600
pixels. No significant editing was done to it. When
the image was converted using Adobe Camera RAW,
care
was taken
not
to sharpen the image as you can
get better results by applying sharpening once the
image has been sized for the Web page. Once you
have been through
this
technique, you will have
learned how the images that you
will
use in the next
technique were prepared.
STEP
1:
OPEN FILE
Select
File
*
Open
(Ctrl+O
PC,
Cmd+O Mac)
to display the
Open
dialog box. After locating
the
\46
folder, double
-
click it to open it Click
ggm-myatif and
then click Open to open the file.
STEP
2:
SIZE IMAGE
rn
The first step is to resize the image to the final
size needed for the Web page, which is an image
that will fit within a
350 x 350 pixel square. Select
Image
*
Image
Size
to get the
Image
Size dialog
box shown in Figure
46.3. Make sure that
Constrain Proportions is selected. Click in the
Height box under
Pi
Dimensions and type
350.
New to Adobe Photoshop
CS
is
a new interpola
-
tion algorithm for downsizing images that helps
maintain image sharpness when the image size
is
reduced. Make sure there is a checkmark next to
Resample Image and click
in
the box to select the
new algorithm:
Bicubic
Sharper. Click OK to
resize the image.
STEP
3:
SHARPEN IMAGE
rn
Now that the image is at its final size, we
can
sharpen it. Select
Filter
*
Sharpen
*
Unsharp
Mask
to get the Unsharp
Mask
dialog box.
As
this
is
a soft image, not much sharpening is needed.
Try setting Amount to
loo%,
Radius
to
0.7,
and
Thre~hold to
0
to bring out the highlights on the
tips of the
Wy.
Click
OK
to apply the settings. To
learn more about sharpening an image, read
Technique
11
and Technique 39.
STEP
4:
ADD FRAME OR OTHER
IMAGE ENHANCING
FEATURES
Depending on how you want your photos to look, the
design of the Web gallery, and the Web page's back
-
ground color, you may want to add a frame or just a
simple line around your image. When you use Adobe
Preparing Images
for
Display
on
a Web Page
Photoshop CS's Web Gallery feature, you
will
find
that there is an option to automatically add a line
around each image. However,
if
you plan on adding
extra canvas as described in the next step, you
will
need to add a lie before you run Web Gallery.
rn
If you want to add a single colored line around
your image, select
Select
+
AU
(Ctrl+A
PC,
Cmd+A
Mac) and then
Edit
*
Stroke
to get the
Stroke
didjag box shown in Figure
46.4.
In
this
dialog box you can choose the
Width
of the stroke
in pixels and the Color of the line. Let's set
Width
to
lpx.
Make sure to set
Location
to
Inside
so the
entire line with
will
show on the image.
In
this
case, the image
will
be placed against a black back
-
ground, so let's choose
White
as the color and
click
OK to add the line around the image.
STEP
5:
ADD CANVAS TO PREVENT
"
IMAGE JUMPING
"
If
you have viewed a Web photo gallery where the
height and width sizes vary between images you may
have noticed text, images, and navigation features
that
"
jump
"
as you move between images. To avoid
this, you simply need to add each of your images to a
background image that has the width of the widest
image, and the height of the widest image.
As
we
will
be using a Web page design for images that fit in a
350
x
350
pixel square, we need to add this image to a
black
350
x
350
pixel canvas.
Select Image
*
Canvas
Si
to get the
Canvas
Size
dialog box shown in Figure
46.5.
Type
350
in
the
Width
and
Height
boxes after setting the
increment to pixels. Leave the Anchor set to the
default center box. Click in the
Canvas
extension
color box and select
Black.
Click
OK
to add
Black
canvas. Your image should now look like the one
Chapter
9
Creatingan
Online
photo
Gallay
shown in Figure
46.6.
If
you have a horizontal
image, it would
lii
the one shown in Figure
46.7.
STEP
6:
ADD COPYRIGHT AND OTHER
INFORMATION TO THE IMAGE PILE
Anyone with even limited experience of sharing pho
-
tos on the Internet
will
be aware that images do get
To improve the way your images are displayed
on
a
Web
page you can add mane
baden
and
even frames that
look like real picture frames.
Check out the framing choices found in the
Frames Action
set.
You will find Drop Shadow
Frame, Strokes Frame, Photo Corners, and even
Wild Frame.
copied and
used
by others without permission. While
it is nearly impossible to stop such action, you
can
at
least add your
copyright and contact information to
each
image you post on a Web site.
Select
File
*
Pie Info (Alt+Ctrl+I PC,
Option+Cnld+I Wac) to get the dialog box
shown
in
pre
4
:.
Here you
can
add
all
kinds
of informauon. Many of these fields contain
information that
can
be used
with
the
Web
Photo
Gallery
feature
making
it
easy to add information
to
an
image once and then have
Web
Photo
Gallery
automatically place it on a Web page. You
can
add any information you'd like at the top, but
each time you post images to a Web site you ought
to set Copyright
Status
to Copyrighted and type
copyright information in the Copyright Notice
box. T
O
insert a
O
symbol, press and hold ALT
while typing
0169
on a
PC;
on a Mac, press
Option+G.
Add a year and your name. It may also
be a good idea
to
add your Web site address if you
Preparinglmages for
Display
on a
Web
Page
have one so that you may be contacted if need
be.
Click
OK
to place
this
information into the
image
file.
When you set the
Copyright
Status to
Copyrighted,
many imaging applications
will
indicate that the image is copyrighted
by
showing
STEP
7:
ADD A VISIBLE WATERMARK OR
COPYRIGHT TEXT TO THE IMAGE
Them are
two
types
of watermarks that you
can
add to
your images: invisible and visible.
An
invisible water
-
mark is embedded into the image, in some
cases
by
the
Digimarc plug
-
in (Fiter
*
Digharc
*
Embed
Watermark). To learn more about the Digimarc sew-
ice, visit
www
.
dig imarc
.
corn. Or, you
can
also
add a visible watermark or text to your image. Adobe
Photoshop
CS's Web Gallery has a feature that auto
-
mates the process of placing text on each image.
However, this automated feature does not let you
change text color or text location. Therefore you may
find that the text either distracts the viewer from
viewing your image or it is not visible because it is a
color that blends in
with
the image color.
rn
To add text to an image use the Horizontal
me tool
(T)
and choose text color and text
placement to suit each image. Should you prefer
vertical type, select the
Vertical
'Ifrpe tool instead
of the Horizontal
-
e tool.
If
you are using an
Action to place text, make sure
to
stop the Action
so that you can choose text color and place the
text when the Action is running. See Technique
6
to learn more about creating and using Action.
STEP
8:
SAVE THE IMAGE AS A JPEG FILE
Before you
can
save an image
as
a JPEG image,
you must first flatten the image
if
you have layers
such as those that you may have created when
adding type. Select
Layer
*
fitten
Image.
Select Pie
*
Save
for Web (Alt+Sbift+Ctrl+S
PC, Option+Shift+Cmd+S
Mac)
to get the Save
forweb dialog box shown in Figure
46.9.
The
Save
forweb feature not only gives you lots of
options for
optimizing your images, but
it
also
provides you
with
"
before
"
and
"
after
"
so that
you
can
get the best balance between image
size
Chapter
9
Creatingan Online
Photo
Gallery
and image quality. Click in the
Preset
box and
choose
JPEG
Medium
to use as a good starting
point Click the 2
-
Up
tab
if
it
is
not already
selected The image on the left
is
the original
image. The image on the right shows how the
image looks with the settings you've chosen.
Below the second image you
can
read
file
size.
This image is now
30.15K-a
good size for quick
downloading.
Click
Save
to save the image and
then
click
Save
again to save the image
in
the
folder you
want.
If
the
file size
is
larger than about
35K
you may want to consider reducing the level
of compression.
If
the image quality decreases too
much, you
can
increase
the
compression level
until
you are happy with
the
image.
Remember that
all
the steps you need to take to cre-
ate Web images
can
be
automated and saved as either
an
Action
or a
Droplet,
which
will
save you tremen
-
dous
time
and increase accuracy. To learn more about
creating
Actions
and Droplets, read Technique
6.
Making
an
Action
is
simple
-
you just record the
steps
you
take
when you edit the first image. Then, run
the
Action
against the rest of the images in
Batch
mode.
By
it out
-Adions
are
wonderful timesavers!
No matter how hard you work or what tech
-
nlques you use to protect images you display on
the lnternet from being used without your per
-
mission or knowledge, you will not be success
-
ful if someone really wants the images. Many
photographers take great effort and expend
lots
oftime trying all kinds of techniques to pre
-
vent the copying and use of their images with
-
out their permission. Such techniques include
adding a
mllover image with text to each image,
placing each image as the background image,
adding expensive digital
copyright"signatures,"
or using one of many Java scripts in an attempt
to prevent use. In
all
these cases, the use of a
free or inexpensive screen capture utility will
give anyone quick access to your images.
If you truly do not want to have your images
downloaded and used by unauthorized users.
there are
reany only two reasonable choices.
Place images on
yourweb site that are
tw
small
to
be
useful for other purposes,or simply do not
upload your work to the Internet. If
yw want to
make
it
possible for visitors to your Web site to
enjoy your
work you should make it as easy as
possible for them to navigate and view your
images. Otherwise, they are likely to leave and
never return and the image thieves will have won!
CREATING AN ONLINE GALLERY
USING WEB PHOTO GALLERY
North
Carolina Dragonfly
Canon
EOS
ID digital cam
-
era, 180mm
f13.5
macro or
300mm fl2.8 with extension
tubes and a
1Ax tele-
extender, various camera
settings. All 20 images have
been converted from RAW to
JPEG,
cropped, resized. and
edited as suggested in
Technique
46.
47.2
ne significant benefit of using digital photos is that they
0
-
can
easily be shared online. As more and more people
have access to the Internet, displaying your photographs
online makes them available to a large worldwide audi
-
ence. Adobe Photoshop
CS
makes it remarkably easy to
create an online photo gallery as most of the repetitive and tedious tasks are
all automated when you use the Web Photo Gallery feature. Although Web
page designs are
limited to
11
preformatted styles, the use of any
HTML
editor makes it possible for you to modify the style sheets or the completed
HTML
pages to suit your own design requirements.
In
this
technique, you use Web Photo Gallery to create an online gallery
for the set of
20
North Carolina dragonfly photos shown in Figure
47.1.
Before you start creating the Web gallery, you may want to take a quick look
at the completed gallery so that you can understand more about the many
options that are available when using the Adobe Photoshop
CS
Web Photo
wtapter
9
Creating an Online
Photo
Gallery
Gallery feature. Assuming that you copied the con
-
tents of the companion CD
-
ROM to your hard drive
as recommended in the Introduction, you
can
find
the Web gallery
in
the \47\gallery folder. On a PC,
use Windows Explorer; on a Mac, use the Finder to
locate the
\47\gallery folder. Double
-
click on the file
indemchtm to
view
the completed Web gallery. The
gallery should now be viewable
in
your default Web
browser,
as
shown
in
Figure 47.2.
STEP
1:
RUN
WEB
PHOTO
GALLERY
Web Photo Gallery can be
run
from either the main
Adobe Photoshop
CS
menu, or from the menu found
in
Fie
Browser.
Using the Fie
Browser
makes it easy
for you to select the images you want, so for this tech
-
nique let's
use
the File
Browser.
rn
Click the File
Browser
icon on the Options bar
(or select Window
9
File
Browser)
to display the
File
Browser
if
it is not already showing. Click in
the Polders window to find and select the
\47
folder to display the
20
dragonfly images.
Click the
first image; then, while pressing Shift,
click the last image to select all
20
images and
highhght them,
as
shown in Figure 47.3.
rn
In
the menu found
in
the File
Browser,
select
Automate
9
Web Photo Gallery to get a dialog
box similar to the one shown in Figure
47.4.Yours
may be slightly different ifthe Options box shows
a setting other than
General.
Click in the Styles box
to
get a pop
-
up menu
listing
11
different Web page styles. If you click
any one of these styles, a small thumbnail image
displays on the right side of the dialog
box.
This
thumbnail shows how the completed Web page
will
look. Let's choose Simple as the Style for this
technique.
Creatingan
Online
Gallery
Using
Web
Photo
Gallery
If you want
to
display a clickable e
-
mail address
on your Web page, click in the
box and type
an e-mail address.
This
address
will
be
displayed
in
the upper left
-
hand
comer
of each Web page.
As
we have already selected the images we want to
use
in the File Browser, set
Use
to
Selected
Images
from
the File Browser
if
it
is
not already shown.
To set the destination folder,
dickDestination to
get the
Bme for Folder dialog box. Select the
folder you want to use. If you need to, you
can
also
create a new folder.
Once
you have selected
a
folder, click Choose.
Click in the Options box if
General
is
not
shown and choose
General.
Make
sure there is a
checkmark in the box next to Preserve
all
meta-
data
so that we
can
keep the metadata in the
image
files.
rn
Click in the Options box and select Banner.
You
can
now type in
any
information you want
displayed on your Web page in the banner
area.
m
Click in the Options box and select Large
Images. These settings allow you the option of
having Web Gallery automatically
resize you
images.
As
we have already sized the dragonfly
images as we want them (read Technique
%),
click
to remove a checkmark
if
there
is
one next
to
Resize Images. The images already have a border
line, so set Border
Size
to
0.
If you want to include Pilename,
Title,
Description or other information that has been
written to the image files, you
can place a check-
mark next to each type of information that you
want Web Gallery to put on the Web pages. To
learn more about how you
can
add this kind of
information to an image, read Technique
13
and
Technique
%.You can also set the Font style and
Font
uize.
8
Click
in
the Options box and select
Thumbnails.
Here you
can
determine the way the
thumbnail images are displayed. Set
Size
to
Medium and use
5
and
3
in the Columns and
Rows
boxes, respectively. Make sure to set Border
Si
to
0
as we don't want a border lime around the
thumbnail images.
rn
Click in the Options box and select Custom
Colors. For a simple black and white Web gallery
set
Background and Banner to
black
and all
other colors to White as shown in Figure
47.5.
Chapter
9
Creatinga
OnlinePhoto
Gdery
0
Click
one
final
time
in
the Options box and
select
Security,
Click
in
the Content box to
choose from the settings: None, Custom
Text,
File
Name,
Copyright, Description,
Credits,
and
Title.
You can choose from these types of infor
-
mation to use as text on your
image
if you
want
to
print directly on the images.
In this
case,
select None.
Click
OK
to begin creatingthe photo gallery.
As
the Web pages
are
being created, you
see
all the
images that
are
loaded, edited, and dosed, show-
ingyouthe incredibly tedious and time
-
consuming
task it has saved you from! Once the Web page has
been completed, the new Web page should be
loaded and displayed in your default Web browser.
It
should look similar to the one shown in
Pigure
47.2.
Once
you click one of the images, you
will
get a Web page
with
an
enlarged image,
as
shown
in
Figure
47.6.
It has navigation buttons that
allow you to move between images or the thumb
-
nail
pages.
STEP
2:
CUSTOMIZE THE
WEB
GALLERY
The Adobe Photoshop
CS
Web Photo
Gallery
fea
-
ture has done a tremendous amount of work for you,
but you
may
not want your gallery
to
look
like
it was
created with a standard Adobe Photoshop
CS
style
template.
Or,
you may not
like
the colors, or the loca
-
tion of the large images, or one of a
vast
number of
other possible
details-and that is okay.
You have
three
ways
to customize Web pages created
by the Web Photo
Gallery
feature. First, you
can
use
an
HTML
editor
to
edit
each
of
the
HTML
pages
so
that they are exactly as pu want. Second, you
can
copy
the Adobe Photoshop
CS
Web Photo
Gallery
style folder you choose
to
use and rename it
-
then
edit
the style templates and
run
Web Photo
~Snery.
This
approach
lets
you use your own customized
template
any
time that you
want
with no additional
HTML
editing
required.
Third, you
can
create your
own
HTML
pages
using
an
HTML
editor and use all
the
thumbnails and images automatidly created
with
Web Photo Gallery. You can 6nd out more
about customizing Web Photo
Gallery
style sheets
by
readmgthe Adobe Pbotoshop
CS
Help
and the Qcu-
mentation that comes
with
Adobe Photoshop
CS.
CREATING AN IMAGE MAP
48
FOR
SITE
NAVIGATION
Photo Gallery Navigation
Page
640
x
480
pixel
.jpg
image created
in
Adobe
Photoshop
CS,
50K
.jpg
file
N
o doubt about it
-
this technique is an exceedingly use
-
ful
technique for anyone interested in creating an online
photo gallery, wen if you don't know what an image
map
is!
If you want a simple navigation page, consider
creating an image map
with
thumbnail
-
size versions of
J
your photos. You wodt need to create buttons or navigation bars, or have
one of
those
text
menu navigation bars like those that are created by so
many Web page creation tools.
The navigation image shown in
Figure
48.1
was created
by
dragging and
dropping thumbnail images onto a
black background
-
it
was
then saved
as
an optimized
JPEG
file that is
small
in size and can quickly download
even when using a slow Internet connection. In this technique, you
dis
-
cover how to create a
link
to a Web
page
for each of the thumbnail photos
that ought
to
be linked to another Web page. Adobe ImageReady
CS,
which
comes with Adobe Photoshop
CS
is
all
you need to complete the work.
-,taper
9
Creatingan OnlinePhoto
GaUPry
STEP
1:
OPEN
PILE
Launch Adobe ImageReady CS.
Choose
Pile
*
Open
(Cul+O
PC,
Cmd+O
Mac) to display the
Open
dialog box Double-
click the
\48
folder to open it and then select the
link-graphic.jpgfile.
Click
Open
to open the
file.
To reset
all
of the Adobe ImageReady CS
palettes, choose
Wmdow
*
Workspace
*
Default
Palette
Locations.
The Adobe ImageReady
CS workspace should now look similar to the one
shown
in
Figure
48.3.
STEP
2:
CREATE SLICES
Click the
Slice
tool (K)
in
the
Toolbox,
which is
shown
in
Figure
48.4.
If the image is not zoomed to
100%,
choose
View
Actual
Size
(Ctrl+Alt+O
PC,
Cmd+
Option+O
Mac).
Viewing the full
-
size image
makes it easier to use the
Slice
tool.
D
Using the
Slice
tool (K),
click
the upper
-
left
corner of the black and white thumbnail image of
a
farm
house and clouds and drag the selection
marquee box down and to the right until you sur
-
round the entire image,
as
shown in
Figure
48.5.
If
Creating an Image Mapfor Site Navigation
your selection marquee
is
not perfect, you
can
dick one of the selection handles and drag the
marquee to where it ought to be to make it per
-
fect. You have now created your first image slice!
As
you may have guessed, you now need to do
the same thing to each of the other images that
need to be linked. To make some of your later
work easier, I suggest that you create slices for
all
the images in a sequential clockwise fashion. Do
not be concerned that other slices are
being cre
-
ated (meaning that the numbers for the slices
increase faster than you select thumbnail images)
as these
"
automatic
"
extra slices
are
necessary. You
can
tell the difference
in
what you created and
what Adobe
ImageReady
CS
created; solid lines
indicate user
-
created slices and the automatically
created slices are indicated by dotted lines.
After you create
all
the slices for the thumbnails
that need
links,
your image should look
like
the
one shown in Figure
48.6.
Note that you do not
need to create a slice for the two images that do
not have text near them
-
they are just
filler
images.
If
you need to delete a slice, select the
Slice
Select
tool
(0)
in
the
Toolbox;
dick on the slice
you want to delete and
press
Delete.
STEP
3:
CREATE
LINK
FOR
EACH SLICE
Now that you have created slices for all the thumb
-
nails
that need a
link
to a Web page, you need to
type
in
the
URL
for each thumbnail. You have two easy
ways
to do
this.
You
can
open the
Web
Content
palette
(
.7)
and then sequentially click each
thumbnw
Lu
USI~
a slice. Or, you
can
click the
Slice
tool
(K)
in the
Toolbox
and wait
until
you get a pop
-
up menu, and then dick
Slice Select
tool (0). Using
the
Slice Select
tool
(O),
you
can
then
didc
each
thumbnail
in
the image to select a slice. In either case,
the goal is to sequentially select each image that needs
to be
linked,
and then type in the appropriate
URL
in
the
Slice
palette.
After selecting the
Slice Select
tool (O), click
once in the
b&w
thumbnail image to select it.
If the
Slice
palette
is
not open, choose
Wmdow
*
Slice
to get the
Slice
palette shown in
Figure
48.8.
Type linked-page.htm in the
URL
box For convenience and testing purposes, a Web
page
called linked-page.htm is in the
\48
folder.
This process allows you to test your
links
and see
how easy it is to create image slices.
rn
Select each slice in a clockwise fashion. To easily
enter
linked-pagehtm
in
the
URL
box
in
the
Slice
palette, you
can
click the
down
arrow
at the right
side of the
URL
box and select it from the list of
recently used
URLs-
and if you type the
link
correctly the first time, you won't make an error.
Life
is
good! Continue on until you have linked
all
the slices.
I.
URL:
Target:
Alt:
1
STEP
4:
SAVE IMAGE AND HTML CODE
You're now just about done. Just save the image and
the Adobe
ImageReady CS
-
created HTML code and
you're ready to test
it
in a Web browser.
Click
Pile
*
Save Optimized
As
(Ctrl+
SM+Alt+S
PC,
Option+Shift+Cmd+S
Mac) to
get the
Save Optimized
As
dialog box shown in
Figure
48.9.
Assuming that you followed the recommenda
-
tions
in
the Introduction about copying the con
-
tents of the companion CD
-
ROM, select the
\48
folder.
If
you did not follow these recommenda
-
tions, you need to make sure that you copy the file
Creating an ImageMap
for
SiteNavigatkm
linked-pagehtm from the
\48
folder on the com
-
panion CD
-
ROM to the same folder you
select
to
save the image and HTML files. This file allows
you to
test
each
link
rn
Click in the
Save
as
type
box and select
IITML
and
Images.
The
File
Name box must now show
link-graphiichtml.
rn
Click Save to save the image and create the
HTML page.
STEP
5:
VIEW IMAGE
AND
TEST LINKS
Using
Wmdows Explorer
if
you are using a PC
or the Finder
if
you are using a Mac, open the
\48
folder and double
-
click the link-graphkhtml
to load it in your default Web browser.
If
you
use
Microsoft Internet Explorer, your Web
browser should look similar to the one shown
in Figure
48.2.
As
you move your cursor across any of the
thumbnail images that have been linked, the cur
-
sor changes to a hand cursor indicating a dichble
link
is there. Click a linked thumbnail and you are
taken to
linked-pagehtm where you
can
click to
return to the
link-graphichtmlpage.
If
you cre
-
ated and linked all the slices correctly
-
, you should
be able to
click each image that is associated
with
a
text title and get
linked-page.htm.
While we have done all of
this
work
in
Adobe
ImageReady
CS,
getting the same results by using just
Adobe Photoshop
CS
is
also
possible. Adobe
Photoshop
CS
offers considerably faver features for
creating Web graphics than does Adobe ImageReady
CS
so that is why we
used
Adobe ImageReady CS.
As
you
gain
experience
with
Adobe ImageReady
CS,
it
will
be your choice for Web image creation. Should
you want to
try
completing
this
technique in Adobe
Photoshop CS, you need to enter the
URL
in
the Slice
Options
dialog box shown in Figure
48.10.
To
access
thii
dialog box, click the Slice
Select
tool
(K)
on a slice.
My hope is that you have learned how you
can
use
image maps and how to create them, and that you
will
create one for your own Web photo gallery. If you
do, and you'd
like
to share your work
with
other read
-
ers of
this
book and visitors to the companion Web
page,pleasesend an e
-
with
alinkto ggeorgesO
reallyusefulpage. corn and tellmeabout your
Web gallery.
This
page
left
blank.

