adobe photoshop revealed apr 2005
Bạn đang xem bản rút gọn của tài liệu. Xem và tải ngay bản đầy đủ của tài liệu tại đây (28.41 MB, 489 trang )
ADOBE
®
PHOTOSHOP
®
CS2
REVEALED
This page intentionally left blank
By Elizabeth Eisner Reding
ADOBE
®
PHOTOSHOP
®
CS2
REVEALED
Managing Editor:
Marjorie Hunt
Product Manager:
MT Cozzola
Associate Product Manager:
Emilie Perreault
Editorial Assistant:
Shana Rosenthal
Production Editor:
Catherine G. DiMassa
Development Editor:
Rachel Biheller Bunin
Composition House:
Integra-India
QA Manuscript Reviewers:
Danielle Shaw, Ashlee Welz
Text Designer:
Ann Small
Illustrator:
Philip Brooker
Cover Design:
Steve Deschene
Proofreader:
Wendy Benedetto
Indexer:
Joan Green
Adobe Photoshop CS2—Revealed
by Elizabeth Eisner Reding
COPYRIGHT © 2006 Course Technology,
a division of Thomson Learning, Inc.
Thomson Learning™ is a trademark used
herein under license.
Printed in Canada.
1 2 3 4 5 6 7 8 9 WC 09 08 07 06 05
For more information, contact Course
Technology, 25 Thomson Place, Boston,
Massachusetts, 02210.
Or find us on the World Wide Web
at: www.course.com
ALL RIGHTS RESERVED. No part
of this work covered by the copyright hereon
may be reproduced or used in any form or
by any means—graphic, electronic, or
mechanical, including photocopying, record-
ing, taping, Web distribution, or information
storage and retrieval systems—without the
written permission of the publisher.
For permission to use material from this
text or product, submit a request online at
www.thomsonrights.com.
Any additional questions about permis-
sions can be submitted by e-mail to
Trademarks
Some of the product names and company
names used in this book have been used
for identification purposes only and may be
trademarks or registered trademarks of
their respective manufacturers and sellers.
Adobe
®
Photoshop
®
, the Partnering with
Adobe logo, Adobe
®
InDesign
®
, and
Adobe
®
Illustrator
®
are trademarks or reg-
istered trademarks of Adobe Systems, Inc.
in the United States and/or other countries.
Third party products, services, company
names, logos, design, titles, words, or
phrases within these materials may be
trademarks of their respective owners.
The Adobe Approved Certification
Courseware logo is a proprietary trademark
of Adobe. All rights reserved.
Credits
Some of the images used in this book are
royalty-free and the property of Getty
Images, Inc. and Morguefile.com.The Getty
images include artwork from the following
royalty-free CD-ROM collections: Education
Elements, Just Flowers, Portraits of Diversity,
Sports and Recreation, Texture and Light,
Tools of the Trade, Travel Souvenirs, Travel &
Vacation Icons, and Working Bodies. The
Morguefile images include artwork from the
following categories: Objects, Scenes,
Animals, and People.
Figure 16 in Chapter 6 is used with permis-
sion from Wacom Technology Corporation.
Figure 20 in Chapter 14 is used with permis-
sion from www. digitalartmuseum.com.
Figure 19 in the online appendix, “Portfolio
Projects and Effects,” is used with permission
from Big Brothers/Big Sisters of America.
Disclaimer
Course Technology reserves the right to
revise this publication and make changes
from time to time in its content without notice.
ISBN 1-59200-832-1
Library of Congress Catalog Card Number:
2005923048
Thomson Course Technology and Adobe Photoshop CS2—Revealed are independent from ProCert Labs, LLC and Adobe Systems Incorporated, and are not
affiliated with ProCert Labs and Adobe in any manner. This publication may assist students to prepare for an Adobe Certified Expert exam, however, neither
ProCert Labs nor Adobe warrant that use of this material will ensure success in connection with any exam.
SERIES & AUTHOR VISION
Revealed Series Vision
The Revealed Series is your guide
to today’s hottest multimedia
applications. These comprehensive
books teach the skills behind the
application, showing you how to apply
smart design principles to multimedia
products, such as dynamic graphics,
animation, Web sites, and video.
A team of design professionals
including multimedia instructors,
students, authors, and editors worked
together to create this series. We
recognized the unique needs of the
multimedia market and created a
series that gives you comprehensive
step-by-step instructions and offers
an in-depth explanation of the “why”
behind a skill, all in a clear, visually-
based layout.
It was our goal to create books that
speak directly to the multimedia and
design community—one of the most
rapidly growing computer fields today.
We feel that the Revealed Series does
just that—with sophisticated content
and an instructive book design.
—The Revealed Series
Author’s Vision
The target audience for this book is a
savvy user who wants important infor-
mation and needs little hand-holding.
If you have a sense of adventure, an
interest in design, and a healthy dose
of creativity, this is the Photoshop
book for you. The focus is hands-on,
and the style is informal and to the
point. My goal is to not only instruct
but inspire you to explore the richness
of this program and your own design
vision.
Special thanks to the fol-
lowing team members:
■
MT Cozzola, who took on the formidable
task of managing the entire project and
made it seem easy. What problems?
■
Rachel Bunin, the development editor
who knows better than to work with me,
but does so anyway. She knows how to
make me laugh when I feel like crying.
■
Cathie DiMassa, who managed the
production end of things, and made
everything turn out all right.
■
Danielle Shaw and Ashlee Welz Smith,
who were able to make short order of a
lengthy book by doing a super job of
getting the bugs out of these chapters.
■
Nicole Pinard, who helped make this
vision a reality and who makes assem-
bling the perfect team possible.
■
Marjorie Hunt, whom we are delighted to
have back at the helm as Managing
Editor on this project.
■
Christina Kling Garrett, who can answer
any question and solve any problem.
I would like to add a special thanks to
my husband, Michael, for his emo-
tional and professional support, and to
my mother, Mary Eisner, for her sup-
port and enthusiasm. Their contribu-
tions make this book possible.
Elizabeth Eisner Reding
v
PREFACE
vi
What You’ll Do
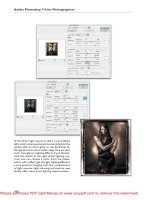
A What You’ll Do figure begins every lesson. This figure gives
you an at-a-glance look at the skills covered in the chapter
and shows you the completed Data File for the lesson. Before
you start the lesson, you will know—both on a technical and
artistic level—what you will be creating.
Comprehensive Conceptual Lessons
Before jumping into instructions, in-depth conceptual infor-
mation tells you “why” skills are applied. This book provides
the “how” and “why” through the use of professional exam-
ples. Also included in the text are helpful tips and sidebars to
help you work more efficiently and creatively, or to teach you
a bit about the history behind the skill you are using.
Introduction to Adobe Photoshop CS2
Welcome to Adobe Photoshop CS2—Revealed. This book
offers creative projects, concise instructions, and complete
coverage of basic to advanced Photoshop skills, helping you
create dynamic Photoshop art! Use this book as you learn
Photoshop, and then use it later as your own reference guide.
This text is organized into 16 chapters plus additional
online bonus content. In these chapters, you will learn many
skills including how to work with layers, make selections,
adjust color techniques, use paint tools, work with filters, trans-
form type, liquify an image, annotate and automate a
Photoshop document, and create Photoshop images for the
Web! The online appendices provide additional coverage on
Adobe Bridge and offer extra practice in creating eye-catching
projects and effects. The online content is available for
downloading from www.course.com/Revealed /photoshopcs2.
vii
Step-by-Step Instructions
This book combines in-depth conceptual information with
concise steps to help you learn Photoshop. Each set of steps
guides you through a lesson where you will apply Photoshop
tasks to a dynamic and professional project file. References to
large colorful images and quick step summaries round out
the lessons. You can download the Data Files for the steps at
the following URL: www.course.com/Revealed/photoshopcs2.
The figures in this book are provided to help you follow the
steps, and the callouts should help you locate icons, buttons,
and commands on the screen. When a figure points out a color
or color change, you should use it to guide your eye to the
relevant location on your monitor screen.
Chapter Summaries
This book contains chapter summaries that highlight the
key tasks and terms you learn in each chapter. You can use
these summaries as a quick refresher should you find you
need to review information you learned earlier in the book.
PREFACE
BRIEF CONTENTS
viii
Series and Author Vision v
Preface vi
Read This Before You Begin xxiii
Chapter 1 Getting Started With Adobe
Photoshop CS2
Lesson 1 Start Adobe Photoshop CS2 1-4
2 Learn How to Open and Save an
Image 1-8
3 Use Organizational and
Management Features 1-14
4 Examine the Photoshop
Window 1-16
5 Use the Layers and History
Palettes 1-24
6 Learn About Photoshop By Using
Help 1-28
7 View and Print an Image 1-32
8 Close a File and Exit
Photoshop 1-36
Chapter 2 Working With Layers
Lesson 1 Examine and Convert Layers 2-4
2 Add and Delete Layers 2-8
3 Add a Selection from One Image to
Another 2-12
4 Organize Layers with Layer Groups
and Colors 2-16
Chapter 3 Making Selections
Lesson 1 Make a Selection Using
Shapes 3-4
2 Modify a Marquee 3-12
3 Select Using Color and Modify a
Selection 3-16
4 Add a Vignette Effect to a
Selection 3-22
Chapter 4 Incorporating Color
Techniques
Lesson 1 Work with Color to Transform an
Image 4-4
2 Use the Color Picker and the
Swatches Palette 4-10
3 Place a Border Around an
Image 4-14
4 Blend Colors Using the Gradient
Tool 4-16
5 Add Color to a Grayscale
Image 4-20
6 Use Filters, Opacity, and Blending
Modes 4-24
7 Match Colors 4-30
Chapter 5 Placing Type in an Image
Lesson 1 Learn About Type and How It Is
Created 5-4
2 Change Spacing and Adjust
Baseline Shift 5-8
3 Use the Drop Shadow Style 5-12
4 Apply Anti-Aliasing to Type 5-16
5 Modify Type with the Bevel and
Emboss Style 5-20
6 Apply Special Effects to Type Using
Filters 5-24
7 Create Text on a Path 5-28
Chapter 6 Using Painting Tools
Lesson 1 Paint and Patch an Image 6-4
2 Create and Modify a Brush Tip 6-10
3 Use the Smudge Tool 6-14
4 Use a Library and an Airbrush
Effect 6-18
Chapter 7 Working with Special Layer
Functions
Lesson 1 Use a Layer Mask with a
Selection 7-4
2 Work with Layer Masks and Layer
Content 7-10
3 Control Pixels to Blend Colors 7-14
4 Eliminate a Layer Mask 7-18
5 Use an Adjustment Layer 7-22
6 Create a Clipping Mask 7-26
Chapter 8 Creating Special Effects with
Filters
Lesson 1 Learn About Filters and How to
Apply Them 8-4
2 Create an Effect with an Artistic
Filter 8-10
3 Add Unique Effects with Stylize
Filters 8-14
4 Alter Images with Distort and Noise
Filters 8-20
5 Alter Lighting with a Render
Filter 8-24
Chapter 9 Enhancing Specific Selections
Lesson 1 Create an Alpha Channel 9-4
2 Use Extract to Isolate an Object 9-8
3 Erase Areas in an Image to Enhance
Appearance 9-12
4 Use the Clone Stamp Tool To Make
Repairs 9-16
5 Use the Magic Wand Tool to Select
Objects 9-20
6 Learn How to Create Snapshots 9-24
7 Create Multiple-Image Layouts 9-28
Chapter 10 Adjusting Colors
Lesson 1 Correct and Adjust Color 10-4
2 Enhance Colors by Altering
Saturation 10-8
3 Modify Color Channels Using
Levels 10-12
4 Create Color Samplers with the Info
Palette 10-14
Chapter 11 Using Clipping Masks, Paths,
& Shapes
Lesson 1 Use a Clipping Group as a
Mask 11-4
2 Use Pen Tools to Create and Modify
a Path 11-8
3 Work with Shapes 11-12
4 Convert Paths and Selections 11-16
BRIEF CONTENTS
ix
Chapter 12 Transforming Type
Lesson 1 Modify Type Using a Bounding
Box 12-4
2 Create Warped Type with a Unique
Shape 12-8
3 Screen Back Type with
Imagery 12-12
4 Create a Faded Type
Effect 12-16
Chapter 13 Liquifying an Image
Lesson 1 Use the Liquify Tools to Distort an
Image 13-4
2 Learn How to Freeze and Thaw
Areas 13-8
3 Use the Mesh Feature as You
Distort an Image 13-12
Chapter 14 Performing Image Surgery
Lesson 1 Delete Unnecessary Imagery 14-4
2 Correct Colors in an Image 14-10
3 Tweak an Image 14-12
Chapter 15 Annotating and Automating an
Image
Lesson 1 Add Annotations to an Image 15-4
2 Create an Action 15-8
3 Modify an Action 15-12
4 Use a Default Action and Create a
Droplet 15-16
Chapter 16 Creating Images for the Web
Lesson 1 Learn About ImageReady 16-4
2 Optimize Images for Web Use 16-8
3 Create a Button for a Web
Page 16-14
4 Create Slices in an Image 16-18
5 Create a Rollover Effect 16-26
6 Create and Play Basic
Animation 16-30
7 Add Tweening and Frame
Delay 16-36
Glossary 1
Index 12
CONTENTS
x
INTRODUCTION
Using Photoshop 1-2
Understanding Platform Interfaces 1-2
Understanding Sources 1-2
LESSON 1
Start Adobe Photoshop CS2 1-4
Defining Image-Editing Software 1-4
Understanding Images 1-4
Using Photoshop Features 1-4
Starting Photoshop and Creating a File 1-5
Tasks Start Photoshop (Windows) 1-6
Start Photoshop (Macintosh) 1-7
LESSON 2
Learn How to Open and Save an Image 1-8
Opening and Saving Files 1-8
Customizing How You Open Files 1-8
Browsing Through Files 1-9
Understanding the Power of Bridge 1-10
Creating a PDF Presentation 1-10
Using Save As Versus Save 1-10
Tasks Open a file using the File menu 1-11
Open a file using the Folders palette in
Adobe Bridge 1-11
Use the Save As command 1-12
Rate and fiter with Bridge 1-13
LESSON 3
Use Organizational and Management
Features 1-14
Learning about Version Cue 1-14
Understanding Version Cue Workspaces 1-14
Using Version Cue’s Administrative
Functions 1-15
Understanding Bridge Center 1-15
LESSON 4
Examine the Photoshop Window 1-16
Learning About the Workspace 1-16
Finding Tools Everywhere 1-16
Using Tool Shortcut Keys 1-18
Customizing Your Environment 1-18
Tasks Select a tool 1-19
Select a tool from the Tool Preset picker 1-20
Add a tool to the Tool Preset picker 1-21
Show and hide palettes 1-22
Create a customized workspace 1-23
LESSON 5
Use the Layers and History Palettes 1-24
Learning About Layers 1-24
Understanding the Layers Palette 1-25
Displaying and Hiding Layers 1-25
Using the History Palette 1-25
Tasks Hide and display a layer 1-26
Move a layer on the Layers palette and
delete a state on the History palette 1-27
LESSON 6
Learn About Photoshop By Using Help 1-28
Understanding the Power of Help 1-28
Using Help Topics 1-28
Tasks Find information in Contents 1-29
Find information in the Index 1-30
Create a Bookmark 1-30
Find information using Search 1-31
LESSON 7
View and Print an Image 1-32
Getting a Closer Look 1-32
Printing Your Image 1-32
Understanding Color Handling
in Printing 1-33
Viewing an Image in Multiple Views 1-33
Tasks Use the Zoom Tool 1-34
Modify print settings 1-35
LESSON 8
Close a File and Exit Photoshop 1-36
Concluding Your Work Session 1-36
Closing Versus Exiting 1-36
Task Close a file and exit
Photoshop 1-37
PART 1
GETTING STARTED WITH ADOBE PHOTOSHOP
CHAPTER 1
GETTING STARTED WITH ADOBE
PHOTOSHOP CS2
CONTENTS
xi
CHAPTER 2
WORKING WITH LAYERS
INTRODUCTION
Layers Are Everything 2-2
Understanding the Importance of
Layers 2-2
Using Layers to Modify an Image 2-2
LESSON 1
Examine and Convert Layers 2-4
Learning About the Layers Palette 2-4
Recognizing Layer Types 2-4
Organizing Layers 2-5
Converting Layers 2-6
Task Convert an image layer into a
Background layer 2-7
LESSON 2
Add and Delete Layers 2-8
Adding Layers to an Image 2-8
Naming a Layer 2-9
Deleting Layers From an Image 2-9
Tasks Add a layer using the Layer menu 2-10
Delete a layer 2-11
Add a layer using the Layers palette 2-11
LESSON 3
Add a Selection from One Image
to Another 2-12
Understanding Selections 2-12
Understanding the Extract and Color Range
Commands 2-12
Making a Selection and Moving
a Selection 2-13
Defringing Layer Contents 2-13
Tasks Make a color range selection 2-14
Move a selection to another image 2-15
Defringe the selection 2-15
LESSON 4
Organize Layers with Layer Groups and
Colors 2-16
Understanding Layer Groups 2-16
Organizing Layers into Groups 2-16
Adding Color to a Layer 2-17
Flattening an Image 2-17
Understanding Layer Comps 2-18
Using Layer Comps 2-18
Tasks Create a layer group 2-19
Move layers to the layer group 2-19
Rename a layer and adjust opacity 2-20
Create layer comps 2-20
Flatten an image 2-21
CONTENTS
xii
INTRODUCTION
Combining Images 3-2
Understanding Selection Tools 3-2
Understanding Which Selection Tool
to Use 3-2
Combining Imagery 3-2
LESSON 1
Make a Selection Using Shapes 3-4
Selecting by Shape 3-4
Creating a Selection 3-4
Using Fastening Points 3-4
Selecting, Deselecting, and Reselecting 3-5
Placing a Selection 3-6
Using Guides 3-6
Tasks Create a selection with the Rectangular
Marquee Tool 3-7
Position a selection with the Move Tool 3-8
Deselect a selection 3-9
Create a selection with the Magnetic
Lasso Tool 3-10
Move a complex selection to an existing
image 3-11
LESSON 2
Modify a Marquee 3-12
Changing the Size of a Marquee 3-12
Modifying a Marquee 3-12
Moving a Marquee 3-13
Tasks Move a marquee 3-14
Enlarge a marquee 3-15
LESSON 3
Select Using Color and Modify a
Selection 3-16
Selecting with Color 3-16
Using the Magic Wand Tool 3-16
Using the Color Range Command 3-17
Transforming a Selection 3-17
Understanding the Healing Brush Tool 3-17
Using the Healing Brush Tool 3-17
Tasks Select using color range 3-18
Select using the Magic Wand Tool 3-19
Flip a selection 3-20
Fix imperfections with the Healing Brush
Tool 3-21
LESSON 4
Add a Vignette Effect to a Selection 3-22
Understanding Vignettes 3-22
Creating a Vignette 3-22
Task Create a vignette 3-23
CHAPTER 3
MAKING SELECTIONS
CONTENTS
xiii
INTRODUCTION
Using Color 4-2
Understanding Color Modes and Color
Models 4-2
Displaying and Printing Images 4-2
LESSON 1
Work with Color to Transform an Image 4-4
Learning About Color Models 4-4
L*a*b Model 4-5
HSB Model 4-5
RGB Mode 4-5
CMYK Mode 4-6
Understanding the Bitmap and Grayscale
Modes 4-6
Changing Foreground and Background
Colors 4-6
Tasks Set the default foreground and background
colors 4-7
Change the background color using the
Color palette 4-8
Change the background color using the
Eyedropper Tool 4-9
LESSON 2
Use the Color Picker and the Swatches
Palette 4-10
Making Selections from the Color Picker 4-10
Using the Swatches Palette 4-11
Tasks Select a color using the Color Picker
dialog box 4-12
Select a color using the Swatches palette
4-12
Add a new color to the Swatches palette
4-13
LESSON 3
Place a Border Around an Image 4-14
Emphasizing an Image 4-14
Locking Transparent Pixels 4-14
Task Create a border 4-15
LESSON 4
Blend Colors Using the Gradient Tool 4-16
Understanding Gradients 4-16
Using the Gradient Tool 4-17
Customizing Gradients 4-17
Tasks Create a gradient from a sample color 4-18
Apply a gradient fill 4-19
LESSON 5
Add Color to a Grayscale Image 4-20
Colorizing Options 4-20
Converting Grayscale and Color Modes 4-20
Colorizing a Grayscale Image 4-21
Tweaking adjustments 4-21
Tasks Change the color mode 4-22
Colorize a grayscale image 4-23
LESSON 6
Use Filters, Opacity, and Blending
Modes 4-24
Manipulating an Image 4-24
Understanding Filters 4-24
Choosing Blending Modes 4-25
Understanding Blending Mode
Components 4-25
Softening Filter Effects 4-25
Balancing Colors 4-25
Tasks Adjust brightness and contrast 4-27
Work with a filter, blending mode, and an
opacity setting 4-28
Adjust color balance 4-29
LESSON 7
Match Colors 4-30
Finding the Right Color 4-30
Using Selections to Match Colors 4-30
Task Match a color 4-31
CHAPTER 4
INCORPORATING COLOR TECHNIQUES
CONTENTS
xiv
INTRODUCTION
Learning About Type 5-2
Understanding the Purpose of Type 5-2
Getting the Most Out of Type 5-2
LESSON 1
Learn About Type and How It Is Created 5-4
Introducing Type Types 5-4
Getting to Know Font Families 5-4
Measuring Type Size 5-5
Acquiring Fonts 5-5
Tasks Create and modify type 5-6
Change type color using an existing
image color 5-7
LESSON 2
Change Spacing and Adjust Baseline Shift 5-8
Adjusting Spacing 5-8
Understanding Character and Line
Spacing 5-8
Using the Character Palette 5-9
Adjusting the Baseline Shift 5-9
Tasks Kern characters 5-10
Shift the baseline 5-11
LESSON 3
Use the Drop Shadow Style 5-12
Adding Effects to Type 5-12
Using the Drop Shadow 5-12
Applying a Style 5-12
Controlling a Drop Shadow 5-13
Tasks Add a drop shadow 5-14
Modify drop shadow settings 5-15
LESSON 4
Apply Anti-Aliasing to Type 5-16
Eliminating the “Jaggies” 5-16
Knowing When to Apply Anti-Aliasing 5-16
Understanding Anti-Aliasing 5-17
Tasks Apply anti-aliasing 5-18
Undo anti-aliasing 5-19
LESSON 5
Modify Type with the Bevel and Emboss
Style 5-20
Using the Bevel and Emboss Style 5-20
Understanding Bevel and Emboss Settings 5-20
Tasks Add the Bevel and Emboss style with the
Layer menu 5-22
Modify Bevel and Emboss settings 5-23
LESSON 6
Apply Special Effects to Type Using
Filters 5-24
Understanding Filters 5-24
Creating Special Effects 5-24
Producing Distortions 5-24
Using Textures and Relief 5-25
Blurring Imagery 5-25
Tasks Rasterize a type layer 5-26
Modify filter settings 5-27
LESSON 7
Create Text on a Path 5-28
Understanding Text on a Path 5-28
Creating Text on a Path 5-28
Task Create a path and add type 5-29
CHAPTER 5
PLACING TYPE IN AN IMAGE
CONTENTS
xv
CHAPTER 6
USING PAINTING TOOLS
INTRODUCTION
Painting Pixels 6-2
Understanding Painting Tools 6-2
Learning About Brush Libraries 6-2
LESSON 1
Paint and Patch an Image 6-4
Using Painting Tools 6-4
Understanding Fade Options 6-4
Learning About the Patch Tool 6-4
Using the Patch Tool 6-5
Tasks Use the Sharpen Tool 6-6
Burn an area 6-7
Set fade options and paint an area 6-8
Patch an area 6-9
LESSON 2
Create and Modify a Brush Tip 6-10
Understanding Brush Tips 6-10
Learning About Brush Tip Modifications 6-10
Creating a Brush Tip 6-11
Tasks Create a brush tip 6-12
Paint a border 6-13
LESSON 3
Use the Smudge Tool 6-14
Blurring Colors 6-14
Smudging Options 6-14
Using Finger Painting 6-15
Tasks Modify smudge settings 6-16
Smudge an image 6-17
LESSON 4
Use a Library and an Airbrush Effect 6-18
Learning About the Airbrush Effect 6-18
Using Brush Tip Libraries 6-19
Managing the Preset Manager 6-19
Tasks Load a brush library 6-20
Create an airbrush effect 6-21
INTRODUCTION
Designing with Layers 7-2
Modifying Specific Areas Within a Layer 7-2
LESSON 1
Use a Layer Mask with a Selection 7-4
About Layer Masks 7-4
Creating a Layer Mask 7-4
Painting a Layer Mask 7-5
Correcting and Updating a Mask 7-5
Tasks Create a layer mask using the Layer
menu 7-6
Create a layer mask using the Layers
palette 7-7
Paint a layer mask 7-8
Modify the layer mask 7-9
LESSON 2
Work with Layer Masks and Layer
Content 7-10
Understanding Layers and Their Masks 7-10
Understanding the Link Icon 7-10
Selecting Multiple Layers 7-10
Working with Layers 7-11
Aligning Selected Layers 7-11
Distributing Selected Layers 7-11
Transforming Objects 7-11
Tasks Select and align layers 7-12
Transform a layer using scale 7-13
Transform a layer using rotate 7-13
LESSON 3
Control Pixels to Blend Colors 7-14
Blending Pixels 7-14
Using Color Sliders 7-15
Tasks Blend pixels with a color range 7-16
Split sliders to select a color range 7-17
LESSON 4
Eliminate a Layer Mask 7-18
Disposing of Layer Masks 7-18
Disabling a Layer Mask 7-18
Removing Layer Masks 7-19
Tasks Disable and enable a layer mask 7-20
Remove a layer mask 7-21
LESSON 5
Use an Adjustment Layer 7-22
Understanding Adjustment Layers 7-22
Creating an Adjustment Layer 7-22
Modifying an Adjustment Layer 7-22
Using Multiple Adjustment Layers 7-22
Merging Adjustment Layers 7-23
Tasks Create and set an adjustment layer 7-24
Set the blending mode 7-25
LESSON 6
Create a Clipping Mask 7-26
Understanding Clipping Masks 7-26
Creating a Clipping Mask 7-26
Removing a Clipping Mask 7-27
Tasks Create a clipping mask 7-28
Remove a clipping mask 7-29
CHAPTER 7
WORKING WITH SPECIAL LAYER
FUNCTIONS
CONTENTS
xvi
INTRODUCTION
Understanding Filters 8-2
Applying Filters 8-2
LESSON 1
Learn About Filters and How to Apply
Them 8-4
Understanding the Filter Menu 8-4
Learning About Filters 8-4
Applying a Filter 8-4
Understanding the Filter Gallery 8-6
Tasks Open a Blur filter 8-7
Apply a Blur filter 8-8
Display layers 8-9
LESSON 2
Create an Effect with an Artistic Filter 8-10
Learning About Artistic Filters 8-10
Using Artistic Filters 8-10
Adjusting Filter Effects 8-11
Tasks Apply an Artistic filter with the Filter
Gallery 8-12
Adjust the filter effect 8-13
LESSON 3
Add Unique Effects with Stylize Filters 8-14
Learning About Stylize Filters 8-14
Applying a Filter to a Selection 8-14
Tasks Apply a Stylize filter 8-16
Apply a filter to a selection 8-17
Apply a previously used filter 8-18
Repeat a filter application 8-19
LESSON 4
Alter Images with Distort and Noise
Filters 8-20
Understanding Distort and Noise Filters 8-20
Optimizing Memory in Photoshop 8-20
Understanding Memory Usage 8-20
Controlling Memory Usage 8-21
Tasks Apply a Twirl filter 8-22
Apply a Noise filter 8-23
LESSON 5
Alter Lighting with a Render Filter 8-24
Understanding Lighting Effects 8-24
Adjusting Light by Setting the Style and Light
Type 8-24
Adjusting Surrounding Light
Conditions 8-24
Adding Texture to Light 8-25
Tasks Select lighting settings 8-26
Apply a lighting effect 8-27
CHAPTER 8
CREATING SPECIAL EFFECTS WITH FILTERS
CONTENTS
xvii
CHAPTER 9
ENHANCING SPECIFIC SELECTIONS
INTRODUCTION
Modifying Objects 9-2
Using Channels 9-2
Fixing Imperfections 9-2
Creating Snapshots 9-2
Using Automation Features 9-3
LESSON 1
Create an Alpha Channel 9-4
Defining Channels 9-4
Understanding Alpha Channels 9-4
Understanding the Channels Palette 9-5
Tasks View the Channels palette 9-6
Create an alpha channel from a
selection 9-7
LESSON 2
Use Extract to Isolate an Object 9-8
Isolating Objects 9-8
Using the Extract Feature 9-9
Tasks Isolate an object 9-10
Extract an object 9-11
Enhance an extracted object 9-11
LESSON 3
Erase Areas in an Image to Enhance
Appearance 9-12
Learning How to Erase Areas 9-12
Understanding Eraser Tools 9-12
Tasks Use the Background Eraser Tool 9-14
Equalize brightness and contrast 9-15
LESSON 4
Use The Clone Stamp Tool To Make
Repairs 9-16
Touching Up a Damaged Area 9-16
Using the Clone Stamp Tool 9-16
Tasks Sample an area to clone 9-18
Use the Clone Stamp Tool to fix an
imperfection 9-19
LESSON 5
Use the Magic Wand Tool to Select
Objects 9-20
Understanding the Magic Wand Tool 9-20
Learning About Tolerance 9-20
Using the Eyedropper Tool and the Magic
Wand Tool 9-20
Understanding Sample Size 9-21
Tasks Select an object using the Magic Wand
Tool 9-22
Compare objects selected using different
sample sizes 9-23
LESSON 6
Learn How to Create Snapshots 9-24
Understanding Snapshots 9-24
Creating a Snapshot 9-24
Changing Snapshot Options 9-25
Tasks Create a snapshot 9-26
Use a snapshot 9-27
LESSON 7
Create Multiple-Image Layouts 9-28
Understanding a Picture Package 9-28
Assembling a Contact Sheet 9-29
Tasks Create a picture package 9-30
Create a contact sheet 9-31
CONTENTS
xviii
INTRODUCTION
Enhancing Color 10-2
Using Tools to Adjust Colors 10-2
Reproducing Colors 10-2
LESSON 1
Correct and Adjust Color 10-4
Making Color Corrections 10-4
Using a Color Management System 10-4
Balancing Colors 10-4
Modifying Curves 10-5
Analyzing Colors 10-5
Tasks Modify color balance settings 10-6
Modify curves 10-7
LESSON 2
Enhance Colors by Altering Saturation 10-8
Understanding Saturation 10-8
Using the Sponge Tool 10-8
Using the Hue/Saturation Dialog Box 10-8
Using Saturation to Convert a Color Layer to
Grayscale 10-9
Tasks Saturate a color range 10-10
Saturate using the Sponge Tool 10-11
LESSON 3
Modify Color Channels Using Levels 10-12
Making Color or Tonal Adjustments 10-12
Correcting Shadows and Highlights 10-12
Task Adjust color using the Levels feature 10-13
LESSON 4
Create Color Samplers with the Info
Palette 10-14
Sampling Colors 10-14
Using Color Samplers 10-14
Using the Info Palette 10-14
Manipulating Color Samplers 10-15
Tasks Create color samplers 10-16
Apply a color sampler and filter and add a
lighting effect 10-17
INTRODUCTION
Working with Shapes 11-2
Defining Clipping Masks and Paths 11-2
Creating Paths 11-2
LESSON 1
Use a Clipping Group as a Mask 11-4
Understanding the Clipping Mask Effect 11-4
Rasterizing Text and Shape Layers 11-5
Using Transform Commands 11-5
Tasks Transform a type layer for use in a clipping
mask 11-6
Create a clipping mask 11-7
LESSON 2
Use Pen Tools to Create and Modify
a Path 11-8
Using Pen and Shape Tools 11-8
Creating a Path 11-8
Modifying a Path 11-8
Tasks Create a path 11-10
Modify a path 11-11
LESSON 3
Work with Shapes 11-12
Using Shape Tools 11-12
Creating Rasterized Shapes 11-12
Creating Shapes 11-12
Embellishing Shapes 11-13
Tasks Create a shape 11-14
Create and modify a custom shape 11-15
LESSON 4
Convert Paths and Selections 11-16
Converting a Selection into a Path 11-16
Converting a Path into a Selection 11-17
Choosing the Right Method 11-17
Tasks Convert a selection into a path 11-18
Stroke a path 11-19
CHAPTER 10
ADJUSTING COLORS
CHAPTER 11
USING CLIPPING MASKS, PATHS, &
SHAPES
CONTENTS
xix
INTRODUCTION
Working with Type 12-2
Transforming and Warping Type 12-2
Using Type to Create Special Effects 12-3
LESSON 1
Modify Type Using a Bounding Box 12-4
Selecting the Bounding Box 12-4
Changing the Bounding Box 12-5
Tasks Display a bounding box 12-6
Modify type using a bounding box 12-7
LESSON 2
Create Warped Type with a Unique Shape 12-8
Warping Type 12-8
Adding Panache to Warped Text 12-9
Combining Your Skills 12-9
Tasks Create warped text 12-10
Enhance warped text with effects 12-11
LESSON 3
Screen Back Type with Imagery 12-12
Screening Type 12-12
Creating the Screened Back Effect 12-13
Adding Finishing Touches 12-13
Tasks Convert a type layer to a shape layer 12-14
Adjust layer content 12-15
LESSON 4
Create a Faded Type Effect 12-16
Creating a Fade Effect 12-16
Using the Gradient Tool 12-17
Tasks Create a fade effect 12-18
Add a lighting effect 12-19
INTRODUCTION
Distorting Images 13-2
Using the Liquify Feature 13-2
Using Common Sense 13-2
LESSON 1
Use the Liquify Tools To Distort an
Image 13-4
Using the Liquify Dialog Box 13-4
Exploring the Possibilities 13-4
Going Wild with Distortions 13-5
Tasks Open the Liquify dialog box and modify the
brush size 13-6
Use the Forward Warp Tool 13-7
LESSON 2
Learn How to Freeze and Thaw Areas 13-8
Controlling Distortion Areas 13-8
Freezing Image Areas 13-8
Reconstructing Distortions 13-8
Undergoing Reconstruction 13-9
Tasks Freeze areas in an image 13-10
Distort unprotected areas of an
image 13-11
LESSON 3
Use the Mesh Feature as You Distort an
Image 13-12
Using the Mesh Feature 13-12
Changing the Mesh Display 13-12
Visualizing the Distortions 13-12
Getting a Better View of Distortions 13-13
Tasks Turn on the mesh 13-14
Distort an image with the mesh feature
activated 13-15
CHAPTER 12
TRANSFORMING TYPE
CHAPTER 13
LIQUIFYING AN IMAGE
INTRODUCTION
Understanding the Realities 14-2
Assessing the Situation 14-2
Applying Knowledge and Making
Decisions 14-2
LESSON 1
Delete Unnecessary Imagery 14-4
Evaluating the Possibilities 14-4
Performing Surgery 14-4
Understanding the Alternatives 14-5
Preparing for Surgery 14-5
Tasks Prepare the image for surgery 14-6
Select imagery with the Rectangular
Marquee Tool 14-7
Duplicate imagery 14-8
Create a layer from a selection 14-9
LESSON 2
Correct Colors in an Image 14-10
Revitalizing an Image 14-10
Making Color Adjustments 14-10
Assessing the Mood 14-10
Task Correct colors 14-11
LESSON 3
Tweak an Image 14-12
Evaluating What’s Next 14-12
Cropping an Image 14-12
Adding Layer Styles 14-12
Task Crop the image 14-13
INTRODUCTION
Creating Annotations 15-2
Communicating Directly to Your
Audience 15-2
Using Automation 15-2
LESSON 1
Add Annotations to an Image 15-4
Creating a Written Annotation 15-4
Reading Notes 15-4
Personalizing a Note 15-4
Creating an Audio Annotation 15-5
Tasks Create a text annotation 15-6
Create an audio annotation 15-7
LESSON 2
Create an Action 15-8
Simplifying Common Tasks 15-8
Understanding Actions 15-8
Knowing Your Options 15-8
Recording an Action 15-9
Playing Back Actions 15-9
Tasks Create an action 15-10
Record an action 15-11
LESSON 3
Modify an Action 15-12
Getting It Right 15-12
Revising an Action 15-12
Changing the Actions Palette View 15-12
Working in Button Mode 15-12
Tasks Add steps to an action 15-14
Modify steps in an action 15-15
LESSON 4
Use a Default Action and Create a
Droplet 15-16
Taking Advantage of Actions 15-16
Identifying Default Actions 15-16
Understanding a Droplet 15-17
Creating a Droplet 15-17
Using Default Actions 15-17
Loading Sets 15-17
Tasks Include a default action within an
action 15-18
Play an existing action in a new
action 15-19
Create a droplet 15-20
Run a droplet 15-21
CHAPTER 14
PERFORMING IMAGE SURGERY
CHAPTER 15
ANNOTATING AND AUTOMATING AN IMAGE
CONTENTS
xx
xxi
INTRODUCTION
Using Photoshop for the Web 16-2
Understanding Web Graphics 16-2
Jumping Between Programs 16-2
LESSON 1
Learn About ImageReady 16-4
Using Photoshop and ImageReady 16-4
Previewing Files for the Web 16-4
Updating Files 16-4
Creating Navigational and Interactive
Functionality 16-5
Switching Between ImageReady and Other
Programs 16-5
Tasks Switch to ImageReady 16-6
View an image in ImageReady 16-7
LESSON 2
Optimize Images for Web Use 16-8
Understanding Optimization 16-8
Optimizing a File 16-8
Understanding Compression 16-9
Comparing Image Types 16-10
Tasks Optimize an image in Photoshop 16-11
Optimize an image in ImageReady 16-12
Place an optimized image 16-13
LESSON 3
Create a Button for a Web Page 16-14
Learning About Buttons 16-14
Creating a Button 16-14
Applying a Button Style 16-15
Tasks Create a button 16-16
Add type to a button 16-17
LESSON 4
Create Slices in an Image 16-18
Understanding Slices 16-18
Using Slices 16-18
Learning About Slice Components 16-19
Adjusting Slice Attributes 16-19
Using a Layer-Based Slice 16-20
Creating a Layer-Based Slice 16-20
Using the Slice Palette 16-21
Assigning a Web Address to a Slice 16-21
Tasks Create a slice using the Slice Tool 16-22
Create a layer-based slice 16-23
Resize a slice 16-24
Assign a Web address to a slice 16-25
LESSON 5
Create a Rollover Effect 16-26
Learning About Rollovers 16-26
Making Rollovers Happen 16-26
Learning About Rollover States 16-26
Previewing Rollover Effects 16-27
Tasks Create a rollover state 16-28
Preview a rollover 16-29
LESSON 6
Create and Play Basic Animation 16-30
Understanding Animation 16-30
Creating Animation on the Animation
Palette 16-30
Animating Images 16-30
Moving and Deleting Frames 16-30
Looping the Animation 16-31
Previewing the Animation 16-31
Tasks Create a rollover state 16-32
Create and duplicate animation
frames 16-33
Adjust animation frames 16-34
Play animation in the image and
browser 16-35
LESSON 7
Add Tweening and Frame Delay 16-36
Understanding Tweening 16-36
Using Tweening on the Animation
Palette 16-36
Understanding Frame Delays 16-37
Setting Frame Delays 16-37
Correcting Pixel Aspect Ratio in Video 16-37
Tasks Tween animation frames 16-38
Set frame delay 16-39
Glossary 1
Index 12
CHAPTER 16
CREATING IMAGES FOR THE WEB
CONTENTS
This page intentionally left blank
READ THIS BEFORE YOU BEGIN
xxiii
Intended Audience
This text is designed for the beginner or
intermediate computer user who wants
to learn how to use Adobe Photoshop
CS2. The book is designed to provide
basic and in-depth material that not only
educates but encourages you to explore
the nuances of this exciting program.
File Identification
Instead of printing a file, the owner of a
Photoshop image can be identified by
reading the File Info dialog box.
Use the following instructions to add
your name to an image:
1.
Click File on the menu bar, then click
File Info.
2.
Click the Description, if necessary.
3.
Click the Author text box.
4.
Type your name, course number, or
other identifying information.
5.
Click OK.
There are no instructions with this text
to use the File Info feature other than
when it is introduced in Chapter 1. It is
up to each user to use this feature so
that his or her work can be identified.
Measurements
When measurements are shown,
needed, or discussed, they are given in
pixels. Use the following instructions
to change the units of measurement
to pixels:
1.
Click Edit on the menu bar, point to
Preferences, then click Units &
Rulers.
2.
Click the Rulers list arrow, then
click pixels.
3.
Click OK.
You can display rulers by clicking
View on the menu bar, then clicking
Rulers, or by pressing [Ctrl][R] (Win)
or [R] (Mac). A check mark to the
left of the Rulers command indicates
that the Rulers are displayed. You can
hide visible rulers by clicking View
on the menu bar, then clicking
Rulers, or by pressing [Ctrl][R] (Win)
or [R] (Mac).
Icons, Buttons, and
Pointers
Symbols for icons, buttons, and
pointers are shown each time they
are used.
Fonts
Data and Solution Files contain a vari-
ety of fonts, and there is no guarantee
that all of these fonts will be available on
your computer. The fonts are identified
in cases where less common fonts are
used in the files. Every effort has been
made to use commonly available fonts
in the lessons. If any of the fonts in use
are not available on your computer,
please make a substitution.
Menu Commands in Tables
In tables, menu commands are abbre-
viated using the following format:
Edit Preferences Units & Rulers.
This command translates as follows:
Click Edit on the menu bar, point to
Preferences, then click Units &
Rulers.
Power User Shortcuts
As a bonus, a Power User Shortcuts
table is included at the end of every
chapter. This table contains the quick-
est method of completing tasks covered
in the chapter. It is meant for the more
experienced user, or for the user who
wants to become more experienced.
Tools are shown, not named.
Certification
If you are interested in becoming an
Adobe Certified Expert, you can refer
to the ACE grid, available for down-
load, at www.course.com/revealed/
photoshopcs2.