Photoshop CS6 - Unlocked ppt
Bạn đang xem bản rút gọn của tài liệu. Xem và tải ngay bản đầy đủ của tài liệu tại đây (12.64 MB, 61 trang )
Thanks for your interest!
Sure, you can make your UI simple, easy to use, efficient
and responsive, but great interface designs make you
want to use them. Use Photoshop to create beautiful,
engaging interface elements.
Build beautiful buttons
100% Satisfaction Guarantee
We want you to feel as condent as we do that this book will deliver the goods, so
you have a full 30 days to play with it. If in that time you feel the book falls short,
simply send it back and we’ll give you a prompt refund of the full purchase price,
minus shipping and handling.
Click here to order and download the Digital
Bundle to suit all your devices - from Kindles
to iPads and more!
Thanks again for your interest in “Photoshop CS6
Unlocked”. It’s great that you’ve decided to
download this sample PDF, as it’ll give you a
taste of the full 400+ page version of the book.
Just to recap, this book covers:
0 Designing backgrounds: Produce seamless tiling and backgrounds.
0 Creating buttons: Design a range of great-looking icons.
0 Working with text: Manipulate and make your text stand out.
0 Optimizing images: Enhance, combine, and adjust images for the Web.
0 Designing a website: Construct a full website layout in Photoshop.
0 Work smarter: Save time with shortcuts, batch commands, and more.
Reach out to us on Twitter or Facebook (with your comments)
Contact us at support (with any questions)
Photoshop CS6 Unlocked: 101 Tips, Tricks
& Techniques
What’s in This Excerpt
This excerpt comprises large extracts from three chapters of Photoshop CS6 Unlocked: 101 Tips,
Tricks & Techniques:
Getting Started with Photoshop
If you’re brand new to Photoshop, come here to learn about how to get around. If you’re not
brand new, you may still enjoy the time-saving tips included in these pages.
Adjusting Images
Fix, salvage, and adjust photographs that are over-exposed, under-exposed, or just dull-looking.
Or, take a good photograph and make it look even better!
Designing a Website
Bringing all the skills from previous chapters together, this chapter shows you how to create
web design mockups in Photoshop, then generate web-optimized images.
What’s in the Rest of the Book
Basic Skills
Build a good foundation for your use of Photoshop with these basic skills, including resizing,
rotating, and hiding parts of your picture.
Creating Buttons
Make buttons of every shape and style by following the solutions in this chapter.
Creating Backgrounds
Create tiling backgrounds that you can use in design elements such as headings and menu bars,
or even the page background itself!
Working with Text
Learn to adjust type settings and make cool text effects for your next logo or web graphic.
Manipulating Images
Start with a photograph or image and add your own effects such as a bokeh effect, reflections,
and more!
Advanced Photoshop Techniques
Automate and animate! This chapter shows you how to save time when performing similar
tasks on many different files, then shows you how to use Photoshop to create animations and
edit videos.
Interested in finding out more?
This sample gives you a taste of what’s in the book, but remember: you’re only seeing a small
piece of the action.
The full version of Photoshop CS6 Unlocked: 101 Tips, Tricks & Techniques is available now.
There’s a page at the end of these sample chapters with a link to the download page.
And once you’ve worked your way through the book, find out how much of a Photoshop master
you are with the online SitePoint Photoshop quiz!
Photoshop CS6 Unlocked (www.sitepoint.com)
viii
Chapter
1
Getting Started with Photoshop
You’ve heard of Photoshop, right? Of course you have—you wouldn’t be reading this book otherwise!
Photoshop is one of the most commonly used tools in the web designer’s arsenal. From the prepar-
ation of initial design comps to generating optimized graphics for a web page, most web designers
rely heavily on this powerful program.
In this introductory chapter, I’ll cover some of the basic tools and tasks that we’ll draw on in later
chapters. I’ll also share some of the shortcuts and time-savers that I frequently use. This chapter
will stop short of providing an exhaustive review of the many effects that Photoshop can achieve
(where would it end?), but it will provide the bare bones that will help beginners get started. If
you’re already familiar with the interface and can perform tasks like making selections, applying
gradients, and working with layers, you might want to skip ahead to the next chapter.
So, what are you waiting for? Open up Photoshop and let’s go!
What’s new in Photoshop CS6?
If you’re a seasoned user of previous versions of Photoshop, you might just be interested in what’s
new in CS6 for web designers. Here’s a quick list:
■
The Photoshop interface is darker, allowing your images and documents to better stand out.
■
Background saving and auto-recover gives you peace of mind.
■
The Crop Tool has many more options, including image-straightening and helpful aspect ratio
grids. A new Perspective Crop Tool allows you to straighten images taken at an angle.
■
The Shape Tool allows you to immediately apply fill and stroke effects to the shape (instead of
using styles).
■
Blurring tools are much more powerful.
■
The Patch Tool uses better Content-Aware technology.
■
The Content-Aware Move Tool allows you to quickly move objects in photos with minimal
editing.
■
Basic video editing is now possible in Photoshop.
■
You can now define character and paragraph styles for type.
■
You can quickly add lorem ipsum filler text from the Type menu.
■
Layer styles are no longer just for layers; they can now be applied to Groups.
■
The Layer panel allows for filtering and searching layers.
The Photoshop Workspace
Photoshop’s “out of the box” workspace consists of the following components, shown in Figure 1.1:
Options bar
The options bar holds contextualized options for different tools.
Toolbox
By default, the toolbox sits to the left of your Photoshop window, and contains shortcuts to
Photoshop tools.
Panels
Individual “panes” that hold information or options for working with your file, known as
panels, float on the right-hand side. Each panel is labeled with a tab, and can be minimized,
closed, grouped with other panels, or dragged to the panel docking areas on the right and bottom,
and in the icon column. In Figure 1.1, the Color panel allows you to change the foreground and
background colors by changing the Red/Green/Blue values directly, or by picking from the
color spectrum.
Document windows
Each open document has its own document window with a status bar along the bottom. The
status bar displays information that’s specific to the document. Document windows can be full-
Photoshop CS6 Unlocked (www.sitepoint.com)
Photoshop CS6 Unlocked2
screen as shown in Figure 1.1, with multiple document tabs across the top, or dragged out to
become independent, floating windows.
Menu bar (not shown)
You will probably already be familiar with the menu bar from other programs. This runs across
the top of your display (Mac) or Photoshop window (Windows), and contains various menu
options for Photoshop’s tools.
Figure 1.1. The Photoshop workspace
Comps and Turtlenecks: Designer Lingo
Now that you’re going to be working in Photoshop, you might want to start talking like a designer.
Designers, like professionals in most specialist fields, have their own terminology for their tools of
the trade. A comp (short for “composite”) refers to a mockup of the final solution that a designer
has in mind. Traditionally, a comp is used in the print world to refer to page layouts, but for web
designers it usually refers to a static interface prepared entirely in Photoshop for the client to look
over before they decide to proceed. You might even hear it being used as a verb, where comping is
the process of creating that mockup site.
Order the print version of this book to get all 400+ pages!
3Getting Started with Photoshop
Customizing Your Workspace
You can customize your Photoshop workspace to suit you or your project; almost everything within
your workspace can be repositioned and reconfigured. You might choose to customize your work-
space by:
Changing the look of the menu bar
You can change which menu items are visible in your menu bar, or even add color to your
menu items. If you wanted, you could also assign new or alternative keyboard shortcuts to menu
commands (I recommend against it, though, until you feel very comfortable with Photoshop or
have a compelling reason to do so). Go to Edit > Menus… and use the dialog box to modify the
menu bar and panel menus.
Moving the options bar
If you want to move the options bar, you can do so by clicking the handle on its left side and
moving it around. The options bar will “dock” to the top or bottom of the screen automatically
if moved near those areas.
Moving the toolbox
The toolbox is extremely portable, and can be moved to any location on your screen. Move the
toolbox by clicking on the dark gray area at the top of it and dragging it around. You may also
click the double arrows in this gray area to change the toolbox from one to two columns.
Rearranging panels
There are many ways to rearrange your panels. You might want to separate a panel from its
panel group and move it into another group. You can do this by dragging the panel tab out of
its original group and into the new group. You might also decide to drag some of your panel
tabs into the icon column. The panel icon column can be resized as well to display the name
of the panel instead of just the icon. Panels also can be docked in the right side or bottom of
the workspace of the workspace. Finally, to display a panel that has been closed, go to Window
and select the panel you want to show.
Displaying different information in the document window status bar
The status bar displays the document file size by default. The file size is shown as two numbers
separated by a forward slash: the first number is an approximation of the image file size with
all layers merged (known as “flattening” the image), while the second number is an approxim-
ation of the total file size of the image with layers intact. If all this sounds new to you, don’t
worry—we’ll be discussing layers shortly. You can set the status bar to display different inform-
ation, such as the document dimension in pixels (shown in Figure 1.2) or the version number
of the file. To do this, click on the arrow icon next to the status bar and choose the information
you’d like to see.
Photoshop CS6 Unlocked (www.sitepoint.com)
Photoshop CS6 Unlocked4
Figure 1.2. Changing the status bar
Saving Your Customized Workspace
As you become more proficient with Photoshop, you may discover that you use certain sets of
panels for different types of projects, while other panels are left unused. Photoshop allows you to
save and load various workspaces—different arrangements of panels, menus, even keyboard
shortcuts—to help you work more efficiently.
After you’ve customized your workspace to your satisfaction, select Window > Workspace > New
Workspace… from the menu bar and enter a name for your workspace, such as Creating Thumbnails
or My Default Workspace. You can then load your different workspaces by opening Window >
Workspace and selecting your custom workspace from the menu list.
Web Designers Use Pixels
One of the first tasks I do once I’ve installed Photoshop is change my Photoshop preferences to use
pixel units instead of inches or centimeters. Go to Photoshop > Preferences > Units & Rulers (Windows:
Order the print version of this book to get all 400+ pages!
5Getting Started with Photoshop
Edit > Preferences > Units & Rulers) and change the Ruler units to pixels. You may also want to change
the Type units to pixels.
Working in Photoshop
Now that you’ve been introduced to the Photoshop workspace and have a basic idea of where
everything is, let’s start getting our hands dirty.
Creating New Documents
You can create a new document by selecting File > New… from the menu bar, or pressing the keyboard
shortcut Command-N (Ctrl-N on Windows). The New dialog box will appear, as shown in Figure 1.3,
where you can specify the document size and other settings.
Figure 1.3. The New dialog box
Snappy Presets
If you’re designing for a website, be sure to set the resolution at 72 Pixels/Inch to reflect the actual
screen resolution. If you’re designing for a minimum screen size, such as 1024×768, be sure to take
into account scrollbars and menus, and set your initial document size at a smaller dimension for
your actual working area. 1000×650, for example, will give you a better estimate of your actual
screen size.
If you want easy access to these dimensions for other new documents, it’s probably a good idea to
click Save Preset… and give the settings a name like “Web Page.” The next time you create a new
document, you’ll be able to load your “Web Page” settings from the Preset list.
Photoshop CS6 Unlocked (www.sitepoint.com)
Photoshop CS6 Unlocked6
Opening Files
Open files by selecting File > Open… from the menu bar, or pressing Command–O (Ctrl–O on Win-
dows). You can select and open multiple files by holding down Command (Ctrl) and clicking on
all the files you require in the Open dialog box.
Saving Files
Save a file by selecting File > Save or pressing Command–S (Ctrl–S on Windows). For a newly created
document, this will save your work in Photoshop Document (PSD) format. If you’d prefer to save
an additional copy of the document, you can use File > Save As… or press Command-Shift-S
(Ctrl-Shift-S) instead. To the great delight of Photoshop users everywhere, Photoshop CS6 introduces
a backup save, where a recovery file is saved every ten minutes. You can change the time in between
saves by going to Photoshop’s preferences (Mac: Photoshop > Preferences > File Handling…, PC: Edit
> Preferences > File Handling…), and choosing from 5, 10, 15, or 30 minutes, or 1 hour. If Photoshop
crashes on you, the recovery file will open automatically the next time you start up Photoshop.
Double-clicking Power
As if keyboard shortcuts weren’t quick enough, Windows users have even more ways to open and
save files, such as:
■
holding down Ctrl and double-clicking the work area to create new documents
■
double-clicking the work area to pull up the Open dialog box to open files
■
holding down Alt and double-clicking the work area to open existing files as new documents
■
holding down Ctrl-Shift and double-clicking the work area to save documents
■
holding down Shift and double-clicking the work area to access Adobe Bridge: Adobe’s “control
center” and file browser
The work area is the dark gray area behind the document windows. If your shortcuts fail, check
that you’re clicking on an empty spot on the work area, and not in one of the document windows
or Photoshop tools.
Alas, on a Mac, Photoshop only allows for double-clicking the work area to open a document. Even
then, you must have Window > Application Frame ticked in order for it to function.
Saving Files for the Web
Photoshop files themselves are unable to be embedded into a web page. You’ll need to export your
file and save it in a web-friendly format. There are three formats for web graphics: GIFs, JPEGs, and
PNGs.
Order the print version of this book to get all 400+ pages!
7Getting Started with Photoshop
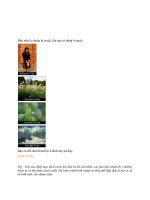
GIF The GIF format (pronounced “giff”) can have a maximum of 256 colors. GIF files support
transparency and animation, and work best with graphics that have large areas of the same
color, as shown in the logo in Figure 1.4.
Figure 1.4. An image that should be saved as GIF
JPEG The JPEG format (pronounced “jay-peg”) works best with photographic images, or images
that have more than 256 colors and gradients, such as the flower in Figure 1.5. Images saved
in JPEG format are compressed, which means that image information is lost, causing the
image to degrade in quality.
Figure 1.5. An image that should be saved as JPEG
PNG The PNG format (sometimes pronounced “ping”) is similar to the GIF format in that it sup-
ports transparency and works best with solid-color images like the logo shown previously;
however, it’s superior to the GIF format as it has the ability to support true levels of trans-
parency for colored areas. PNGs can produce a better quality image at a smaller file size
than can GIFs. Photoshop allows you to save an image as a PNG–8 file (which works the
same way as a GIF would with 256 colors) or a PNG–24 file (allowing for millions of colors
as well as variable transparency).
To save for the Web in Photoshop, select File > Save for Web… or press Command-Option-Shift-S
(Ctrl-Alt-Shift-S on Windows). This will bring up the Save for Web dialog box shown in Figure 1.6,
which will show you a preview of the image to be exported, with its optimized size in the bottom
left-hand corner. You can adjust the settings for the image using the options in the pane on the
right. Choose whether you want to save the file as a GIF, JPEG, PNG-8, or PNG-24, and have a play
with the other settings, keeping an eye on the optimized file size. Try to strike a balance between
the quality and file size of the image. When you’re happy with the result, click Save… and give your
image a filename.
Photoshop CS6 Unlocked (www.sitepoint.com)
Photoshop CS6 Unlocked8
Figure 1.6. Save for Web dialog box
If you tried this exercise, you’re probably quite pleased with yourself for saving an image of reason-
able quality at a file size significantly smaller than the original. You managed this by altering the
settings in the right-hand pane, but what do these settings actually do?
GIF/PNG-8
Colors
Adjusting this setting reduces the number of colors used in the image. This will usually have
the biggest effect on the final image.
Dither amount and type (such as No Dither, Diffusion, Pattern, Noise)
This setting has nothing to do with being nervous or agitated. Dither refers to a compression
technique in which the pattern of dots is varied to give the illusion of a color gradient. Changing
the dither will result in a more noticeable degradation for images that involve a large number
of colors blended together.
Transparency
If you want transparent areas in your graphic, check this box.
Matte color
For transparent images, the matte color is used to blend the edges of your image into the back-
ground of the web page. For opaque images, the matte color defines the background color of
the image.
Order the print version of this book to get all 400+ pages!
9Getting Started with Photoshop
JPEG
Quality Changing the value in the compression quality drop-down box or Quality input field alters
the level of compression for the image. Reducing the quality may result in blurring or
pixelation, but too high a setting will produce a large file that will take users too long
to download. A good approach is to decrease the quality value gradually until you notice
the degradation of your image becoming unacceptable. A reasonable compromise will
be somewhere around this point.
Photoshop Layers
Layers are a powerful feature of Photoshop that enable you to work on one part of an image without
disturbing the rest of it. While the concept of layers may seem intimidating at first, you’ll wonder
how you ever survived without them once you get the hang of using layers. Figure 1.7 shows a
Photoshop document made up of layers.
Figure 1.7. Layered Photoshop document
Figure 1.8 reveals how the layers stack together.
Photoshop CS6 Unlocked (www.sitepoint.com)
Photoshop CS6 Unlocked10
Figure 1.8. The layers in a layered Photoshop document
The transparent parts of any layer, shown by a checkered grid, allow the layers beneath that layer
to show through. You can show and hide each layer in an image by clicking on its corresponding
eye icon in the Layers panel, as shown in Figure 1.9.
Figure 1.9. Hiding a layer
To organize your layers, you can arrange them into layer groups by going to Layer > New > Group….
Each layer group displays in the same way as any ungrouped layers on the Layers panel. A layer
Order the print version of this book to get all 400+ pages!
11Getting Started with Photoshop
group is signified by a folder icon. You can collapse or expand layer groups by clicking on the triangle
to the left of the folder icon, and nest layer groups within each other by dragging one folder icon
into another.
Layer Shortcuts and Tasks
■
Rename layers by double-clicking on the layer name.
■
Change the transparency of a layer by changing its opacity with the Opacity slider, or typing a
value into the Opacity box.
■
Duplicate a selected layer by pressing Command-J (Ctrl-J on Windows). You can also duplicate
a layer by dragging it while pressing the Option (Alt) key. Or you could type Shift-Option
(Shift-Alt) and then hit an arrow key to duplicate the layer and nudge it ten pixels in your desired
direction (note that this only works when you have the Move Tool invoked).
■
Select multiple layers by holding down Command (Ctrl) and clicking the layer names. This
forms a temporary link between the selected layers that allows you to move them as one unit,
delete them all, and so on.
■
You can also link layers together. Select layers by clicking on them while holding down Shift
or Command (Shift or Ctrl on Windows). Once you’ve selected all the layers you wish to link,
click the Link layers button at the bottom-left of the Layers panel (signified by the chain). Linking
layers allows the link relationship to remain even after you select a different layer (unlike the
process of simply selecting multiple layers).
To unlink all the layers, select one of the linked layers and go to Layer > Select Linked Layers to
select all of them automatically; then go to Layer > Unlink Layers. To unlink a single layer, select
the layer you wish to remove from the link and click the Link layers button at the bottom-left of
the Layers panel; the other layers will stay linked. To temporarily unlink a layer, hold down
Shift and click on its corresponding link icon (a red “X” will appear over the link icon). React-
ivate the link by holding down Shift and clicking the link icon again.
■
Rearrange layers by dragging the layer above or below other layers. Use the “move down”
shortcut Command-[ (Ctrl-[) and the “move up” shortcut Command-] (Ctrl-]) to move selected
layers up and down. Command-Shift-[ and Command-Shift-] (Ctrl-Shift-[ and CtrlShift ] on
Windows) will bring layers to the very top or very bottom of the stack.
■
Select a layer by using the keyboard shortcuts Option-[ and Option-] (Alt-[ and Alt-] on Windows).
These keystrokes let you move up and down through layers in the Layers panel.
■
Create a new layer by pressing Shift-Command-N (Shift-Ctrl-N on Windows). This will bring
up the New Layer dialog box. Want to create new layers quickly without having to deal with the
dialog box? Simply press Command-Option-Shift-N (Ctrl-Alt-Shift-N).
Photoshop CS6 Unlocked (www.sitepoint.com)
Photoshop CS6 Unlocked12
■
Merge a layer into the one beneath it by pressing Command-E (Ctrl-E). If you’ve selected layers,
this shortcut will merge those selected layers together.
Finding Layers
Some Photoshop documents grow to have dozens of layers. Even if you’ve diligently named your
layers so that they’re easily identifiable, it might be challenging to find the specific layer you want
to work on. This is where the top section of the Layers panel comes in and saves the day.
My sunset document only has a few layers, but it has enough to make my point. In Figure 1.10, the
top row of the Layers panel in the image on the left shows the search and filtering tools. By default,
the filter type is set to Kind, which allows you to filter the different types of layers: image layers,
adjustment layers, text layers, shape layers, or smart object layers. In the middle diagram, I’ve selected
the Filter for type layers option, and instantaneously, only the text layers of the document are shown!
You can imagine how this would simplify finding a layer in a document with a hundred layers.
Figure 1.10. Filtering and searching layers
The right-hand side image of Figure 1.10 reveals that I’ve changed the filter type to Name, enabling
me to search for a string of letters across layers. As you explore the other filter types, you’ll find
them to be invaluable when navigating documents containing many layers.
Photoshop Toolbox
In this section, I’ll introduce some of the most frequently used tools found in the toolbox. I’ll discuss
more tools in later chapters as we apply them to solutions.
Order the print version of this book to get all 400+ pages!
13Getting Started with Photoshop
You’ll notice that some of the tool icons have small triangles in their bottom right-hand corners.
These icons contain hidden treasures! The triangle indicates that there are more related tools
available. If you right-click on the tool icon (or click and hold it down), a fly-out menu will appear
as displaying the additional tools.
Quick Keyboard Shortcuts
Figure 1.11. Tooltip for a keyboard shortcut
Naturally, most of the tools in the toolbox have a keyboard
shortcut. You can learn each tool’s shortcut by hovering your
cursor over a tool for a few seconds; a tooltip box will appear ,
displaying the name of the tool and its shortcut as in Fig-
ure 1.11. If additional tools are available in the fly-out menu,
you can cycle through them by pressing Shift-[keyboard
shortcut]. Keyboard shortcuts can save you valuable
time—pressing V to bring up the Move Tool, for instance, is
certainly a lot quicker than moving the cursor over the tool-
box to select it. It may seem insignificant right now, but the
time you take to access tools will add up over the course of
a project. For your convenience, whenever I mention a tool,
I’ll list its shortcut in parentheses; for example, the Move
Tool (V).
Selection Tools
You can use the selection tools to select certain areas of your document for editing. If you use this
type of tool, only the area that’s selected will be affected by any changes you make. You can
“feather” selections (that is, specify a fuzzy radius for them) using the Feather field in the options
bar.
Figure 1.12 shows two rectangles: one created by filling in a selection with a feather of zero pixels,
and one that’s created by filling in the same selection with a feather of five pixels.
Figure 1.12. Fuzzy edges with feathered selections
Photoshop CS6 Unlocked (www.sitepoint.com)
Photoshop CS6 Unlocked14
Secret Selections
Selections can have varying levels of transparency, known as the degree of opacity. It’s actually
possible to make a selection with an opacity of 100% in one area, but only 20% in another area. If
a selection has an opacity that’s more than 50%, it will be displayed with a border of dotted lines.
Photoshop won’t visibly outline areas with less than 50% opacity (though they will still be selected).
Selection tools automatically select at 100% opacity. We’ll learn about creating transparent selections
using quick masks and alpha channels later in the section called “Other Useful Tasks and Shortcuts”.
Marquee tools (M), as shown in Figure 1.13, are used to create rectangular or elliptical selections,
including selections that are “single row” (one pixel tall, stretching across the entire width of the
document) and “single column” (one pixel wide, stretching through the entire height of the docu-
ment). To make single-row or single-column selections, click with the appropriate tool on the image
area where you want to select a row or column.
Figure 1.13. Marquee tools
You can use the lasso tools (L), shown in Figure 1.14, to create freeform selections.
Figure 1.14. Lasso tools
There are three forms:
Order the print version of this book to get all 400+ pages!
15Getting Started with Photoshop
Lasso Tool (L) Click and drag the Lasso Tool to draw a selection area. Releasing
the mouse button will close the selection by joining the start and
end points with a straight line.
Polygonal Lasso Tool (L) Click at different points to create vertices of a polygonal shape
using the Polygonal Lasso Tool. Close the selection by moving
your cursor to the beginning of your selection and clicking once,
or pressing the Enter key.
Magnetic Lasso Tool (L) If you think you need help with making your selection, try the
Magnetic Lasso Tool. Photoshop will attempt to make a “smart”
selection by following the edges of contrast and color difference.
Click once near the “edge” of an object and follow around it;
Photoshop will automatically lay down a path with fastening
points. You can also click as you direct the line to create your
own points along on the path. Close the selection by pressing the
Enter key or clicking at a point near the beginning of the selection.
No Selection Sometimes Equals All Selected
If you’ve made a selection, only the pixels within the selection are active and can be worked on.
Some tools can be used without making a selection at all. Be aware, however, that if no specific
selection has been made, Photoshop will assume that you’re working on the entire layer with any
changes that you make affecting all pixels in the layer.
Quick Selection Tool
The Quick Selection Tool (W) allows you to “paint” a selection, grabbing the nearby areas with
similar colors and excluding areas of contrasting colors. Using your brush cursor, more areas are
included in your selection as you paint over them; for example, Figure 1.15.
You can use the options bar to change your brush size, or type [ or ] to increase or decrease the
brush size. If you select a bit more than you intended to, hold the Option (Alt) key and you’ll see
the cursor change from a plus to a minus sign. Now the areas that you paint with the Quick Selection
Tool will be excluded from your selection.
Photoshop CS6 Unlocked (www.sitepoint.com)
Photoshop CS6 Unlocked16
Figure 1.15. Using the Quick Selection Tool to create a selection
Magic Wand Tool
The Magic Wand Tool (W), shown in Figure 1.16, selects areas of similar color. You can change the
tolerance of a Magic Wand selection—that is, how close the color values should be to the sampled
color in order to be selected—and choose whether you want the selection to be contiguous, meaning
pixels that are touching, or not. In the case of the latter, matching colors across the entire document
will be selected.
Figure 1.16. Using the Magic Wand to create a selection
Selection Shortcuts and Tasks
■
Hold the Shift key to add another selection to the first selection.
■
Hold the Option key (Alt key on Windows) to subtract your new selection from the first.
■
Hold Option-Shift (Alt-Shift) to select the intersection of your first and second selections.
Order the print version of this book to get all 400+ pages!
17Getting Started with Photoshop
■
Use the arrow keys to move the selection pixel by pixel. If this is too slow, hold down Shift and
use the arrow keys to move the selection ten pixels at a time.
■
Press Command-J (Ctrl-J) to copy the selection into its own layer. If this seems familiar to you,
it’s because I mentioned earlier how to copy a layer using the same keyboard shortcut. Now that
you know that not selecting anything sometimes means that everything is selected, it makes
sense that by simply selecting a layer in the Layers panel, you can copy the entire layer by
pressing Command-J (Ctrl-J).
■
To cut the selection into its own layer, press Command-Shift-J (Ctrl-Shift-J).
■
To deselect a selected area, click outside of it with one of the Marquee tools or press Command-D
(Ctrl-D).
■
To reactivate your last selection, press Command-Shift-D (Ctrl-Shift-D).
■
Clicking the Refine Edge… button in the options bar brings up a dialog box (seen in Figure 1.17)
that allows you to make adjustments to the edges of the selection that you’ve made; for example,
you can feather your selection or smooth it out. The real-time preview shows how your changes
affect what’s selected.
Figure 1.17. The Refine Edge dialog box
Photoshop CS6 Unlocked (www.sitepoint.com)
Photoshop CS6 Unlocked18
The Move Tool
The Move Tool (V) moves a selected area, as in Figure 1.18, or an entire layer. You can invoke the
Move Tool temporarily when using most other tools by holding down the Command key (Ctrl key
on Windows).
Figure 1.18. The Move Tool in action
You can also duplicate a layer by holding down the Option (Alt) key while using the Move Tool,
as shown in Figure 1.19.
Figure 1.19. Copying a layer with the Move Tool
Move and Copy Shortcut
For most tools, holding Command-Option (Ctrl-Alt) and dragging a selected area will temporarily
invoke the Move Tool, allowing you to move and duplicate the selected layer quickly.
Order the print version of this book to get all 400+ pages!
19Getting Started with Photoshop
Auto-Select
With Auto-Select on (circled in Figure 1.20), the object that your cursor is on will be moved. Without
checking the Auto-Select option, you’ll move whatever layer/s are selected in the Layers panel.
Figure 1.20. Auto-Select option
If you prefer to work with Auto-Select off, you can still utilize some of the functionality of Auto-Select
by holding down Command (Ctrl) and clicking on an object in your document. This will temporarily
allow the Move Tool to select the clicked layer (or group, depending on what setting you have in
your options bar), just as Auto-Select does.
The Crop Tool
The Crop Tool (C) is used to trim images. When you first select the Crop Tool, you’ll see a boundary
box around the entire image. You can drag on the edges of that box to select your crop area, as
shown in Figure 1.21, or draw your own boundary edge by clicking and dragging using the Crop
Tool; then double-click the center of the selection or press Enter to crop the image to the size of the
selection.
To cancel without cropping, select another tool or press the Esc key.
Figure 1.21. Creating a selection using the Crop Tool
Photoshop CS6 Unlocked (www.sitepoint.com)
Photoshop CS6 Unlocked20