Oracle® Database Backup and Recovery Advanced User''''s Guide pdf
Bạn đang xem bản rút gọn của tài liệu. Xem và tải ngay bản đầy đủ của tài liệu tại đây (6.29 MB, 456 trang )
Oracle® Database
Backup and Recovery Advanced User's Guide
10g Release 2 (10.2)
B14191-03
August 2008
A guide to advanced backup and recovery of Oracle
databases and advanced uses of Recovery Manager (RMAN),
including advanced RMAN database backup and recovery
concepts and scenarios, using RMAN for data migration,
transport and duplication, and user-managed backup and
recovery without RMAN.
Oracle Database Backup and Recovery Advanced User's Guide, 10g Release 2 (10.2)
B14191-03
Copyright © 2003, 2008, Oracle. All rights reserved.
Primary Author: Antonio Romero
Contributing Author: Lance Ashdown
Contributors: Kat Weill, Tammy Bednar, Anand Beldalker, Timothy Chien, Raymond Guzman, Alex Hwang,
Ashok Joshi, J. William Lee, Valarie Moore, Muthu Olagappan, Samitha Samaranayake, Francisco Sanchez,
Steven Wertheimer, Wanli Yang
The Programs (which include both the software and documentation) contain proprietary information; they
are provided under a license agreement containing restrictions on use and disclosure and are also protected
by copyright, patent, and other intellectual and industrial property laws. Reverse engineering, disassembly,
or decompilation of the Programs, except to the extent required to obtain interoperability with other
independently created software or as specified by law, is prohibited.
The information contained in this document is subject to change without notice. If you find any problems in
the documentation, please report them to us in writing. This document is not warranted to be error-free.
Except as may be expressly permitted in your license agreement for these Programs, no part of these
Programs may be reproduced or transmitted in any form or by any means, electronic or mechanical, for any
purpose.
If the Programs are delivered to the United States Government or anyone licensing or using the Programs on
behalf of the United States Government, the following notice is applicable:
U.S. GOVERNMENT RIGHTS Programs, software, databases, and related documentation and technical data
delivered to U.S. Government customers are "commercial computer software" or "commercial technical data"
pursuant to the applicable Federal Acquisition Regulation and agency-specific supplemental regulations. As
such, use, duplication, disclosure, modification, and adaptation of the Programs, including documentation
and technical data, shall be subject to the licensing restrictions set forth in the applicable Oracle license
agreement, and, to the extent applicable, the additional rights set forth in FAR 52.227-19, Commercial
Computer Software Restricted Rights (June 1987). Oracle USA, Inc., 500 Oracle Parkway, Redwood City, CA
94065.
The Programs are not intended for use in any nuclear, aviation, mass transit, medical, or other inherently
dangerous applications. It shall be the licensee's responsibility to take all appropriate fail-safe, backup,
redundancy and other measures to ensure the safe use of such applications if the Programs are used for such
purposes, and we disclaim liability for any damages caused by such use of the Programs.
Oracle, JD Edwards, PeopleSoft, and Siebel are registered trademarks of Oracle Corporation and/or its
affiliates. Other names may be trademarks of their respective owners.
The Programs may provide links to Web sites and access to content, products, and services from third
parties. Oracle is not responsible for the availability of, or any content provided on, third-party Web sites.
You bear all risks associated with the use of such content. If you choose to purchase any products or services
from a third party, the relationship is directly between you and the third party. Oracle is not responsible for:
(a) the quality of third-party products or services; or (b) fulfilling any of the terms of the agreement with the
third party, including delivery of products or services and warranty obligations related to purchased
products or services. Oracle is not responsible for any loss or damage of any sort that you may incur from
dealing with any third party.
v
Contents
Preface xxiii
Audience xxiii
Documentation Accessibility xxiii
Related Documentation xxiv
Conventions xxiv
What's New in Backup and Recovery? xxv
Oracle Database 10g Release 2 New Features in Backup and Recovery xxv
Part I Recovery Manager Advanced Architecture and Concepts
1 Recovery Manager Architecture
About the RMAN Environment 1-1
RMAN Session Architecture 1-2
RMAN Command Line Client 1-2
How RMAN Compiles and Executes Commands 1-2
Compilation Phase 1-2
Execution Phase 1-3
Issuing RMAN Commands 1-3
Entering Commands at the RMAN Prompt 1-3
Using RMAN with Command Files 1-3
Stored Scripts 1-3
Commands Valid Only in RUN Blocks 1-4
Commands Not Valid in RUN Blocks 1-4
Directing RMAN Output to a Log File 1-4
RMAN Repository 1-4
Storage of the RMAN Repository in the Control File 1-5
Types of Records in the Control File 1-5
Recovery Without a Recovery catalog 1-6
Storage of the RMAN Repository in the Recovery Catalog 1-6
Registration of Databases in the Recovery Catalog 1-6
Contents of the Recovery Catalog 1-6
Resynchronization of the Recovery Catalog 1-7
Backups of the Recovery Catalog 1-7
Compatibility of the Recovery Catalog 1-7
vi
Media Management 1-7
Performing Backup and Restore with a Media Manager 1-8
Backup Solutions Program 1-8
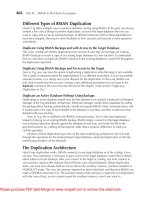
2 RMAN Backups Concepts
About RMAN Channels 2-1
Automatic and Manual Channel Allocation 2-2
Automatic Channel Device Configuration and Parallelism 2-3
Automatic Channel Default Device Types 2-4
Automatic Channel Naming Conventions 2-5
Automatic Channel Generic Configurations 2-5
Automatic Channel-Specific Configurations 2-6
Clearing Automatic Channel Settings 2-6
Determining Channel Parallelism to Match Hardware Devices 2-7
Channel Control Options for Manual and Automatic Channels 2-8
Channel Failover 2-9
About RMAN Backups 2-9
About Image Copies 2-9
Using RMAN-Created Image Copies 2-10
User-Managed Image Copies 2-10
About Proxy Copies 2-10
Storage of Backups on Disk and Tape 2-11
Backups of Archived Logs 2-11
Deletion of Archived Logs After Backups 2-11
Backup Failover for Archived Redo Logs 2-11
Multiplexed Backup Sets 2-12
Algorithm for Multiplexed Backups 2-12
Multiplexing by the Media Manager 2-13
Manual Parallelization of Backups 2-13
Multiple Copies of RMAN Backups 2-14
Duplexed Backup Sets 2-15
Backups of Backup Sets 2-16
Uses for Backups of Backup Sets 2-17
Backup Optimization When Backing Up Backup Sets 2-17
Backup Failover When Backing Up Backup Sets 2-17
Backups of Image Copies 2-18
RMAN Backup Options: Naming, Sizing, and Speed 2-18
Generating Filenames for RMAN Backup Pieces 2-18
Generating Filenames for RMAN Image Copies 2-19
Using FORMAT with RMAN BACKUP AS COPY 2-19
Using DB_FILE_NAME_CONVERT With BACKUP AS COPY 2-19
Using Tags to Identify RMAN Backups 2-19
Default RMAN Backup Tag Format 2-20
How Tags Are Applied
2-20
Uniqueness of Backup Tags 2-20
Size of Backup Pieces 2-21
Number and Size of Backup Sets 2-22
vii
Factors Affecting the Number and Size of Backup Sets 2-22
Overview of the MAXSETSIZE Parameter 2-23
I/O Read Rate of Backups 2-23
RMAN Backup Types 2-23
Incremental Backups 2-24
Incremental Backup Algorithm 2-25
Multilevel Incremental Backups 2-25
Differential Incremental Backups 2-25
Cumulative Incremental Backups 2-26
Planning an Incremental Backup Strategy 2-27
Control File and Server Parameter File Autobackups 2-28
How RMAN Performs Control File Autobackups 2-28
When RMAN Performs Control File Autobackups 2-29
Control File Autobackups After Backup Acivities 2-29
Control File Autobackups After Database Structural Changes 2-29
Backup Retention Policies 2-30
Recovery Window 2-31
Backup Redundancy 2-33
Batch Deletes of Obsolete Backups 2-33
Exempting Backups from the Retention Policy 2-34
Relationship Between Retention Policy and Flash Recovery Area Rules 2-35
Backup Optimization 2-35
Rules for Identifying Identical Files for Backup Optimization 2-35
Backup Optimization Algorithm 2-35
Requirements for Backup Optimization 2-37
Overriding and Disabling Backup Optimization 2-37
Effect of Retention Policies on Backup Optimization for SBT Backups 2-37
Backup Optimization for SBT Backups with Recovery Window Retention Policy 2-38
Backup Optimization for SBT Backups With Redundancy Retention Policy 2-38
Restartable Backups 2-39
Managing Backup Windows and Performance: BACKUP DURATION 2-40
Controlling RMAN Behavior when Backup Window Ends with PARTIAL 2-40
Managing Backup Performance with MINIMIZE TIME and MINIMIZE LOAD 2-41
How RMAN Responds to Backup Errors 2-41
Handling I/O Errors in RMAN Backup: NOT BACKED UP SINCE 2-41
Handling Corrupt Datafile Blocks in RMAN Backup: MAXCORRUPT
2-42
Tests and Integrity Checks for Backups 2-42
Detecting Physical Block Corruption With RMAN BACKUP VALIDATE 2-43
Detection of Logical Block Corruption 2-43
Detection of Fractured Blocks During Open Backups 2-44
Backup Validation with RMAN 2-44
3 RMAN Recovery Concepts
Restoring Files with RMAN 3-1
Mechanics of Datafile Restore Operations 3-1
How RMAN Selects Backups for Use in Restore Operations 3-2
Restore Failover 3-3
viii
Restore Optimization 3-3
Datafile Media Recovery with RMAN 3-4
RMAN Media Recovery: Basic Steps 3-4
Mechanics of Recovery: Incremental Backups and Redo Logs 3-5
How RMAN Searches for Archived Redo Logs During Recovery 3-5
RMAN Behavior When the Repository Is Not Synchronized 3-6
Incomplete or Point-In-Time Recovery 3-7
Tablespace Point-in-Time Recovery 3-7
Block Media Recovery with RMAN 3-7
When to Use Block Media Recovery 3-8
Block Media Recovery When Redo Is Missing 3-9
Database Duplication with RMAN 3-9
Physical Standby Database Creation with RMAN 3-11
4 Connecting to Databases with RMAN
Starting RMAN Without Connecting to a Database 4-1
Connecting to a Target Database and a Recovery Catalog 4-1
Connecting to the Target Database and Recovery Catalog from the Command Line 4-2
Connecting to the Target Database and Recovery Catalog from the RMAN Prompt 4-2
Connecting to an Auxiliary Database 4-2
Connecting to an Auxiliary Database from the Command Line 4-3
Connecting to an Auxiliary Database from the RMAN Prompt 4-3
Diagnosing Connection Problems 4-3
Diagnosing Target and Auxiliary Database Connection Problems 4-4
Diagnosing Recovery Catalog Connection Problems 4-4
Hiding Passwords When Connecting to Databases 4-4
Sending RMAN Output Simultaneously to the Terminal and a Log File 4-5
Using the RMAN Pipe Interface 4-5
Executing Multiple RMAN Commands In Succession Through a Pipe: Example 4-6
Executing RMAN Commands In a Single Job Through a Pipe: Example 4-6
Part II Advanced RMAN Backup and Recovery Topics
5 Configuring the RMAN Environment: Advanced Topics
Configuring the Flash Recovery Area: Advanced Topics 5-1
Configuring Online Redo Log Creation in the Flash Recovery Area 5-1
Configuring Control File Creation in the Flash Recovery Area 5-2
Archived Redo Log Creation in the Flash Recovery Area 5-2
Rules for Initialization Parameters Affecting Redo Log File Destinations 5-2
Filenames for Archived Redo Log Files in the Flash Recovery Area 5-3
RMAN File Creation in the Flash Recovery Area 5-3
Configuring RMAN to Make Backups to a Media Manager 5-4
Prerequisites for Using a Media Manager with RMAN 5-4
Locating the Media Management Library: The SBT_LIBRARY Parameter 5-4
Testing Whether the Media Manager Library Is Integrated Correctly 5-5
Configuring Media Management Software for RMAN Backups 5-5
ix
Configuring Backup Piece Names and Sizes for a Media Manager 5-6
Testing ALLOCATE CHANNEL on the Media Manager 5-6
Testing a Backup to the Media Manager 5-7
Configuring SBT Channels for Use with a Media Manager 5-8
Configuring Channels 5-9
Configuring Channel Parallelism 5-9
Configuring Channel Settings for a Device Type 5-9
Showing the Configured Channel Settings 5-10
Showing the Currently Configured Channel Settings 5-10
Showing the Configured Device Types 5-11
Showing the Default Device Type 5-11
Manually Overriding Configured Channels 5-11
Configuring a Specific Channel for a Device Type 5-12
Configuring Specific Channels: Examples 5-12
Mixing Generic and Specific Channels 5-13
Relationship Between CONFIGURE CHANNEL and Parallelism Setting 5-14
Clearing Channel and Device Settings 5-14
Configuring the Maximum Size of Backup Sets and Pieces 5-15
Showing the Default Maximum Size of Backup Sets: SHOW MAXSETSIZE 5-15
Configuring Backup Optimization 5-16
Displaying Backup Optimization Setting: SHOW BACKUP OPTIMIZATION 5-16
Configuring Backup Duplexing: CONFIGURE BACKUP COPIES 5-17
Showing the Configured Degree of Duplexing: SHOW BACKUP COPIES 5-18
Configuring Tablespaces for Exclusion from Whole Database Backups 5-18
Showing the Tablespaces Excluded from Backups 5-19
Configuring Auxiliary Instance Datafile Names: CONFIGURE AUXNAME 5-19
Showing the Default Filenames Configured for Auxiliary Channels 5-20
Setting the Snapshot Control File Location 5-20
Default Location of the Snapshot Control File 5-20
Viewing the Configured Location of the Snapshot Control File 5-20
Setting the Location of the Snapshot Control File 5-21
Showing the Current Snapshot Control File Name 5-21
Setting Up RMAN for Use with a Shared Server 5-22
6 Making Backups with RMAN: Advanced Topics
Configuring and Allocating Channels for Use in Backups 6-1
Duplexing Backup Sets 6-2
Duplexing Backup Sets with CONFIGURE BACKUP COPIES 6-2
Duplexing Backupsets with BACKUP COPIES 6-3
Making Split Mirror Backups with RMAN 6-3
Backing Up Backup Sets with RMAN 6-5
BACKUP BACKUPSET and Backup Retention Policy 6-5
Backing Up Existing Image Copy Backups with RMAN 6-6
RMAN Encrypted Backups 6-7
RMAN Backup Encryption Modes 6-7
Transparent Encryption of Backups 6-7
Password Encryption of Backups 6-8
x
Dual Mode Encryption of Backups 6-8
Using CONFIGURE and SET to Control RMAN Backup Encryption 6-9
Creating Encrypted Backups 6-9
Restoring Data from Encrypted Backups 6-10
Encryption of Archived Log Backups 6-10
Performance Impact of Encrypting RMAN Backups 6-10
Restarting and Optimizing RMAN Backups 6-10
Backing Up Files Using Backup Optimization 6-11
Restarting a Backup After It Partially Completes 6-11
Backups to CD, DVD and Other Disk Devices with Large Block Sizes 6-11
Validating Backups with RMAN 6-11
RMAN Backup Examples 6-12
Skipping Tablespaces when Backing Up a Database: Example 6-13
Restarting a Backup: Example 6-13
Spreading a Backup Across Multiple Disk Drives: Example 6-14
Specifying the Size of Backup Sets: Example 6-14
Limiting the Size of Backup Pieces: Example 6-15
Backing Up Archived Redo Logs in a Failover Scenario: Example 6-15
Backing Up Archived Logs Needed to Recover an Online Backup: Example 6-16
Backing Up and Deleting Multiple Copies of an Archived Redo Log: Example 6-17
Determining How Channels Distribute a Backup Workload: Example 6-17
Backing Up in NOARCHIVELOG Mode: Example 6-18
Keeping a Long-Term Backup: Example 6-19
Using Backup Optimization: Examples 6-19
Optimizing a Database Backup: Example 6-19
Optimizing a Daily Archived Log Backup to a Single Tape: Example 6-20
Optimizing a Daily Archived Log Backup to Multiple Tapes: Example 6-20
Creating a Weekly Secondary Backup of Archived Logs: Example 6-21
Handling Corruption During Backups: Example 6-21
7 Advanced RMAN Recovery Techniques
Restore and Recovery of NOARCHIVELOG Databases 7-1
Recovering a Database in NOARCHIVELOG Mode Using Incremental Backups 7-1
Restore and Recovery of the Database on a New Host 7-2
Preparing for Restore of a Database to a New Host 7-3
Testing the Restore of a Database to a New Host: Scenario 7-3
Performing Recovery with a Backup Control File 7-7
Performing Recovery with a Backup Control File and No Recovery Catalog: Scenario 7-8
Performing Disaster Recovery 7-10
Performing Block Media Recovery with RMAN 7-12
Block Media Recovery Using All Available Backups 7-12
Block Media Recovery Using Specific Backups 7-13
Block Media Recovery of Blocks Listed in V$DATABASE_BLOCK_CORRUPTION 7-14
RMAN Restore and Recovery Examples 7-14
Restoring Datafile Copies to a New Host: Example 7-14
Restoring Control File When Databases in the Catalog Have the Same Name: Example 7-15
Restoring a Backup Control File By Using the DBID 7-15
xi
Recovering a Lost Datafile Without a Backup: Example 7-16
8 RMAN Tablespace Point-in-Time Recovery (TSPITR)
Understanding RMAN TSPITR 8-1
RMAN TSPITR Concepts 8-1
How TSPITR Works With an RMAN-Managed Auxiliary Instance 8-3
Deciding When to Use TSPITR 8-3
Limitations of TSPITR 8-4
Planning and Preparing for TSPITR 8-5
Choosing the Right Target Time for TSPITR 8-5
Determining the Recovery Set: Analyzing Data Relationships 8-6
Identifying and Resolving Dependencies on the Primary Database 8-6
Identifying and Preserving Objects That Will Be Lost After TSPITR 8-7
Performing Basic RMAN TSPITR 8-8
Fully Automated RMAN TSPITR 8-8
Using an Auxiliary Destination for Automated RMAN TSPITR 8-9
Performing Fully Automated RMAN TSPITR 8-9
Tasks to Perform After Successful TSPITR 8-9
Handling Errors in Automated TSPITR 8-10
Performing Customized RMAN TSPITR with an RMAN-Managed Auxiliary Instance 8-10
Renaming TSPITR Recovery Set Datafiles with SET NEWNAME 8-10
Renaming TSPITR Auxiliary Set Datafiles 8-11
Renaming TSPITR Auxiliary Set Datafiles with SET NEWNAME 8-12
Using DB_FILE_NAME_CONVERT to Name Auxiliary Set Datafiles 8-12
Order of Precedence Among File Renaming Methods in TSPITR 8-13
Specifying Auxiliary Instance Control File Location in TSPITR 8-14
Specifying Auxiliary Instance Online Log Location in TSPITR 8-14
Using Image Copies for Faster RMAN TSPITR Performance 8-15
Using CONFIGURE AUXNAME With Recovery Set Image Copies in TSPITR 8-15
SET NEWNAME and CONFIGURE AUXNAME With Auxiliary Set Image Copies 8-16
Performing TSPITR With CONFIGURE AUXNAME and Image Copies: Scenario 8-16
Customizing Initialization Parameters for the Automatic Auxiliary Instance in TSPITR 8-17
Performing RMAN TSPITR Using Your Own Auxiliary Instance 8-18
Preparing Your Own Auxiliary Instance for RMAN TSPITR 8-18
Step 1: Create an Oracle Password File for the Auxiliary Instance 8-18
Step 2: Create an Initialization Parameter File for the Auxiliary Instance 8-19
Step 3: Check Oracle Net Connectivity to the Auxiliary Instance 8-20
Preparing RMAN Commands for TSPITR with Your Own Auxiliary Instance 8-20
Planning Channels for TSPITR with Your Own Auxiliary Instance 8-21
Planning Datafile Names with Your Own Auxiliary Instance: SET NEWNAME
8-21
Executing TSPITR with Your Own Auxiliary Instance 8-21
Step 1: Start the Auxiliary Instance in NOMOUNT Mode 8-21
Step 2: Connect the RMAN Client to Target and Auxiliary Instances 8-21
Step 3: Execute the RECOVER TABLESPACE Command 8-21
Executing TSPITR With Your Own Auxiliary Instance: Scenario 8-22
Troubleshooting RMAN TSPITR 8-23
Troubleshooting TSPITR: Filename Conflicts 8-24
xii
Troubleshooting TSPITR: Insufficient Sort Space during Export 8-24
Troubleshooting TSPITR: RMAN Cannot Identify Tablespaces with Undo Segments 8-24
Troubleshooting: Restarting Manual Auxiliary Instance After TSPITR Failure 8-24
9 RMAN Backup and Repository Maintenance
RMAN Reporting 9-1
Using the RMAN LIST Command 9-1
RMAN Reports 9-2
Reports of Obsolete Backups 9-2
Crosschecks of RMAN Backups 9-4
Deleting RMAN Backups 9-5
Summary of RMAN Methods for Deleting Backups 9-5
Removal of Backups with the DELETE Command 9-6
Advantage of Using DELETE Instead of Operating System Commands 9-6
Deletion of Obsolete Backups 9-6
Deletion of Expired Backups 9-6
Deletion of Archived Redo Logs That Are Already Backed Up 9-7
Deletion of Files After Backup Using BACKUP DELETE INPUT 9-7
BACKUP DELETE INPUT With Corrupt Archive Logs 9-8
How RMAN Deletes Backup Records from the RMAN Repository 9-8
Behavior of DELETE Command When the Repository and Media Do Not Correspond 9-9
CHANGE AVAILABLE and UNAVAILABLE with RMAN Backups 9-9
Changing Retention Policy Status of RMAN Backups 9-10
Monitoring RMAN Through V$ Views 9-10
Correlating Server Sessions with RMAN Channels 9-11
Matching Server Sessions with Channels When One RMAN Session Is Active 9-11
Matching Server Sessions with Channels in Multiple RMAN Sessions 9-11
Monitoring RMAN Job Progress 9-13
Monitoring RMAN Interaction with the Media Manager 9-15
Monitoring RMAN Job Performance 9-16
10 Managing the Recovery Catalog
Creating a Recovery Catalog 10-1
Configuring the Recovery Catalog Database 10-1
Planning the Size of the Recovery Catalog Schema 10-2
Allocating Disk Space for the Recovery Catalog Database 10-2
Creating the Recovery Catalog Owner 10-3
Creating the Recovery Catalog 10-4
Managing Target Database Records in the Recovery Catalog 10-4
Registering a Database in the Recovery Catalog 10-4
Cataloging Older Files in the Recovery Catalog 10-5
Registering Multiple Databases in a Recovery Catalog 10-6
Unregistering a Target Database from the Recovery Catalog 10-7
Resetting the Database Incarnation in the Recovery Catalog 10-8
Removing DELETED Records From the Recovery Catalog After Upgrade 10-9
Resynchronizing the Recovery Catalog 10-9
Types of Records Updated When Recovery Catalog is Resynchronized 10-10
xiii
Full and Partial Resynchronization 10-10
When to Resynchronize the Recovery Catalog 10-11
Resynchronizing After the Recovery Catalog is Unavailable 10-11
Resynchronizing in ARCHIVELOG Mode When You Back Up Infrequently 10-11
Resynchronizing After Physical Database Changes 10-11
Forcing a Full Resynchronization of the Recovery Catalog 10-12
Resynchronizing the Recovery Catalog and CONTROL_FILE_RECORD_KEEP_TIME 10-12
Managing the Control File When You Use a Recovery Catalog 10-12
Working with RMAN Stored Scripts in the Recovery Catalog 10-13
Creating Stored Scripts: CREATE SCRIPT 10-13
Running Stored Scripts: EXECUTE SCRIPT 10-14
Displaying a Stored Script: PRINT SCRIPT 10-15
Listing Stored Scripts: LIST SCRIPT NAMES 10-15
Updating Stored Scripts: REPLACE SCRIPT 10-16
Deleting Stored Scripts: DELETE SCRIPT 10-16
Starting the RMAN Client and Running a Stored Script 10-16
Restrictions on Stored Script Names 10-17
Backing Up and Recovering the Recovery Catalog 10-17
Backing Up the Recovery Catalog 10-17
Back Up the Recovery Catalog Often 10-17
Choosing the Appropriate Method for Physical Backups 10-18
Safe Storage of the Recovery Catalog 10-19
Exporting the Recovery Catalog Data for Logical Backups 10-19
Restoring and Recovering the Recovery Catalog from Backup 10-19
Re-Creating the Recovery Catalog 10-19
Exporting and Importing the Recovery Catalog 10-20
Considerations When Moving Catalog Data 10-20
Exporting the Recovery Catalog 10-21
Importing the Recovery Catalog 10-21
Increasing Availability of the Recovery Catalog 10-22
Querying Recovery Catalog Views 10-22
Identifying Rows for a Database in the Catalog Views 10-23
Identifying Rows for a Database Object in the Catalog Views 10-23
Querying Catalog Views for the Target DB_KEY or DBID Values 10-23
Using RC_BACKUP_FILES and DBMS_RCVMAN.SETDATABASE 10-24
Determining the Schema Version of the Recovery Catalog 10-25
Upgrading the Recovery Catalog 10-25
Dropping the Recovery Catalog
10-26
11 Tuning Backup and Recovery
Tuning Recovery Manager: Overview 11-1
I/O Buffer Allocation 11-2
Allocation for Disk Buffers 11-2
Allocation of Tape Buffers 11-2
Synchronous and Asynchronous I/O 11-3
Synchronous I/O: Example 11-3
Factors Affecting Backup Speed to Tape 11-4
xiv
Native Transfer Rate 11-4
Tape Compression 11-5
Tape Streaming 11-5
Physical Tape Block Size 11-5
Features and Options Used to Tune RMAN Performance 11-5
Using the RATE Parameter to Control Disk Bandwidth Usage 11-5
Tuning RMAN Backup Performance: Procedure 11-6
Step 1: Remove RATE Parameters from Configured and Allocated Channels 11-6
Step 2: If You Use Synchronous Disk I/O, Set DBWR_IO_SLAVES 11-6
Step 3: If You Fail to Allocate Shared Memory, Set LARGE_POOL_SIZE 11-6
Step 4: Tune RMAN Tape Streaming Performance Bottlenecks 11-7
Using BACKUP VALIDATE To Distinguish Between Tape and Disk Bottlenecks 11-7
Using Multiplexing to Improve Tape Streaming with Disk Bottlenecks 11-7
Using Incremental Backups to Improve Backup Performance With Tape Bottlenecks 11-7
Step 5: Query V$ Views to Identify Bottlenecks 11-8
Identifying Bottlenecks with Synchronous I/O 11-8
Identifying Bottlenecks with Asynchronous I/O 11-8
Instance Recovery Performance Tuning: Fast-Start Fault Recovery 11-9
Understanding Instance Recovery 11-9
Cache Recovery (Rolling Forward) 11-9
Transaction Recovery (Rolling Back) 11-9
Checkpointing and Cache Recovery 11-9
How Checkpoints Affect Performance 11-10
Configuring the Duration of Cache Recovery: FAST_START_MTTR_TARGET 11-10
Practical Values for FAST_START_MTTR_TARGET 11-10
Reducing Checkpoint Frequency to Optimize Runtime Performance 11-11
Monitoring Cache Recovery with V$INSTANCE_RECOVERY 11-11
Tuning FAST_START_MTTR_TARGET and Using MTTR Advisor 11-12
Calibrate the FAST_START_MTTR_TARGET 11-12
Determine the Practical Range for FAST_START_MTTR_TARGET 11-13
Evaluate Different Target Values with MTTR Advisor 11-14
Determine Optimal Size for Redo Logs 11-15
12 Recovery Manager Troubleshooting
Interpreting RMAN Message Output 12-1
Identifying Types of Message Output 12-1
Recognizing RMAN Error Message Stacks 12-2
Identifying Error Codes 12-2
RMAN Error Message Numbers 12-3
ORA-19511: Media Manager Errors 12-3
Interpreting RMAN Error Stacks 12-5
Interpreting RMAN Errors: Example 12-5
Interpreting Server Errors: Example 12-6
Interpreting SBT 2.0 Media Management Errors: Example 12-6
Interpreting SBT 1.1 Media Management Errors: Example 12-6
Identifying RMAN Return Codes 12-7
Testing the Media Management API 12-7
xv
Obtaining the sbttest Utility 12-7
Obtaining Online Documentation for the sbttest Utility 12-8
Using the sbttest Utility 12-8
Terminating an RMAN Command 12-9
Terminating the Session with ALTER SYSTEM KILL SESSION 12-9
Terminating the Session at the Operating System Level 12-10
Terminating an RMAN Session That Is Hung in the Media Manager 12-10
Components of an RMAN Session 12-10
Process Behavior During a Hung Job 12-10
Terminating an RMAN Session: Basic Steps 12-11
RMAN Troubleshooting Scenarios 12-12
After Installation of Media Manager, RMAN Channel Allocation Fails: Scenario 12-12
After Installation of Media Manager, RMAN Channel Allocation Fails: Diagnosis 12-12
After Installation of Media Manager, RMAN Channel Allocation Fails: Solution 12-13
Backup Job Is Hanging: Scenario 12-13
Backup Job Is Hanging: Diagnosis 12-14
Backup Job Is Hanging: Solution 12-14
RMAN Fails to Start RPC Call: Scenario 12-15
RMAN Fails to Start RPC Call: Diagnosis 12-15
Backup Fails with Invalid RECID Error: Scenario 12-15
Backup Fails with Invalid RECID Error: Diagnosis 12-15
Backup Fails with Invalid RECID Error: Solution 1 12-16
Backup Fails with Invalid RECID Error: Solution 2 12-17
Backup Fails Because of Control File Enqueue: Scenario 12-18
Backup Fails Because of Control File Enqueue: Diagnosis 12-18
Backup Fails Because of Control File Enqueue: Solution 12-19
RMAN Fails to Delete All Archived Logs: Scenario 12-19
RMAN Fails to Delete All Archived Logs: Diagnosis 12-20
RMAN Fails to Delete All Archived Logs: Solution 12-20
Backup Fails Because RMAN Cannot Locate an Archived Log: Scenario 12-20
Backup Fails Because RMAN Cannot Locate an Archived Log: Diagnosis 12-20
Backup Fails Because RMAN Cannot Locate an Archived Log: Solution 12-20
RMAN Does Not Recognize Character Set Name: Scenario 12-20
RMAN Does Not Recognize Character Set Name: Diagnosis 12-21
RMAN Does Not Recognize Character Set Name: Solution 12-21
RMAN Denies Logon to Target Database: Scenario 12-21
RMAN Denies Logon to Target Database: Diagnosis 12-21
RMAN Denies Logon to Target Database: Solution 12-22
Database Duplication Fails Because of Missing Log: Scenario 12-22
Database Duplication Fails Because of Missing Log: Diagnosis
12-22
Database Duplication Fails Because of Missing Log: Solution 12-22
Duplication Fails with Multiple RMAN-06023 Errors: Scenario 12-22
Duplication Fails with Multiple RMAN-06023 Errors: Diagnosis 12-23
Duplication Fails with Multiple RMAN-06023 Errors: Solution 12-23
UNKNOWN Database Name Appears in Recovery Catalog: Scenario 12-23
UNKNOWN Database Name Appears in Recovery Catalog: Diagnosis 12-23
UNKNOWN Database Name Appears in Recovery Catalog: Solution 12-23
xvi
Part III Using RMAN for Database Transport, Duplication and Migration
13 Creating and Updating Duplicate Databases with RMAN
Creating a Duplicate Database with RMAN: Overview 13-1
How Recovery Manager Duplicates a Database 13-2
RMAN DUPLICATE DATABASE: Options 13-3
RMAN DUPLICATE DATABASE: Prerequisites and Restrictions 13-4
Renaming Database Files in RMAN Duplicate Database 13-4
Renaming Control Files in RMAN DUPLICATE DATABASE 13-4
Renaming Online Logs in RMAN DUPLICATE DATABASE 13-4
Renaming Datafiles in RMAN DUPLICATE DATABASE 13-5
Preventing Filename Checking when Duplicating a Database 13-6
Renaming Tempfiles in RMAN DUPLICATE DATABASE 13-6
Skipping Tablespaces in RMAN DUPLICATE DATABASE 13-7
Skipping Read-Only Tablespaces When Duplicating a Database 13-7
Skipping OFFLINE NORMAL Tablespaces When Duplicating a Database 13-7
Preparing the RMAN DUPLICATE Auxiliary Instance: Basic Steps 13-8
Task 1: Create an Oracle Password File for the Auxiliary Instance 13-8
Task 2: Establish Oracle Net Connectivity to the Auxiliary Instance 13-8
Task 3: Create an Initialization Parameter File for the Auxiliary Instance 13-8
Task 4: Start the Auxiliary Instance 13-10
Task 5: Mount or Open the Target Database 13-10
Task 6: Make Sure You Have the Necessary Backups and Archived Redo Logs 13-10
Task 7: Allocate Auxiliary Channels if Automatic Channels Are Not Configured 13-11
Creating a Duplicate Database on a Local or Remote Host 13-11
Duplicating a Database on a Remote Host with the Same Directory Structure 13-12
Duplicating a Database on a Remote Host with a Different Directory Structure 13-12
Converting Filenames with Only Initialization Parameters 13-12
Converting Filenames with Only DUPLICATE Parameters 13-13
Using RMAN DUPLICATE With SET NEWNAME: Example 13-14
Using RMAN DUPLICATE With CONFIGURE AUXNAME: Example 13-15
Creating a Duplicate Database on the Local Host 13-16
Using RMAN DUPLICATE with OMF and ASM 13-16
Initialization Parameters for RMAN DUPLICATE to OMF Storage 13-17
Duplicating a Database to ASM Storage 13-18
Using SET NEWNAME with RMAN DUPLICATE to OMF 13-18
Using RMAN DUPLICATE DATABASE: Examples 13-19
Duplicating When the Datafiles Use Inconsistent Paths: Example 13-19
RMAN DUPLICATE DATABASE From File System to ASM: Example 13-20
RMAN DUPLICATE DATABASE From ASM to ASM: Example 13-21
RMAN DUPLICATE DATABASE at a Past Point in Time: Example 13-22
Duplicating with a Client-Side Parameter File: Example 13-22
Running RMAN Client on host_dup 13-22
Running RMAN from host_src 13-22
Using DUPLICATE DATABASE to Resynchronize a Duplicate Database: Example 13-23
Using CONFIGURE AUXNAME to Name Datafiles at the Duplicate 13-23
Syncrhonizing the Duplicate With the Target Using Auxnames 13-24
xvii
Using RMAN Incremental Backups to Refresh a Standby Database 13-24
Using BACKUP INCREMENTAL FROM SCN 13-24
Refreshing a Standby Database With INCREMENTAL FROM SCN Backups: Example 13-25
Step 1: Create the Incremental Backup 13-25
Step 2: Make the Incremental Backup Accessible at the Standby Database 13-25
Step 3: Catalog the Incremental Backup Files at the Standby Database 13-26
Step 4: Apply the Incremental Backup to the Standby Database 13-26
14 Creating Transportable Tablespace Sets from Backup with RMAN
About Creating Transportable Tablespace Sets from Backup with RMAN 14-1
Transportable Tablespace Sets from Backup: Concepts 14-2
When to Use RMAN to Create Transportable Tablespace Sets 14-2
How RMAN Creates Transportable Tablespace Sets from Backup 14-3
Steps RMAN Performs in Transporting Tablespaces from Backup 14-4
Limitations of RMAN TRANSPORT TABLESPACE Command 14-6
Creating a Transportable Tablespace Set with RMAN: Procedure 14-7
Using RMAN TRANSPORT TABLESPACE: Basic Scenario 14-7
RMAN TRANSPORT TABLESPACE with UNTIL Time or SCN 14-8
RMAN TRANSPORT TABLESPACE: Specifying Locations for Data Pump Files 14-9
RMAN TRANSPORT TABLESPACE with Customized Initialization Parameters 14-10
RMAN TRANSPORT TABLESPACE Default Auxiliary Instance Parameters 14-10
Location of the Auxiliary Instance Parameter File 14-11
Using an Auxiliary Instance Parameter File: Example 14-11
Customize Shared Pool Size in RMAN TRANSPORT TABLESPACE 14-12
Customize Auxiliary Control File Location in TRANSPORT TABLESPACE 14-12
Customize Other Auxiliary File Locations in TRANSPORT TABLESPACE 14-12
Transport Tablespace with SET NEWNAME for Auxiliary Datafiles 14-12
Transport Tablespace with CONFIGURE AUXNAME for Auxiliary Datafiles 14-13
Transport Tablespace with AUXILIARY DESTINATION Parameter 14-13
Transport Tablespace and Naming Auxiliary Files with Initialization Parameters 14-14
Troubleshooting RMAN TRANSPORT TABLESPACE 14-14
Troubleshooting RMAN TRANSPORT TABLESPACE: Insufficient Shared Pool 14-14
Troubleshooting RMAN TRANSPORT TABLESPACE: Filename Conflicts 14-15
15 RMAN Cross-Platform Transportable Databases and Tablespaces
Cross-Platform Tranportable Tablespace: CONVERT DATAFILE or TABLESPACE 15-1
Using CONVERT TABLESPACE TO PLATFORM on the Source Platform 15-2
Rules for Renaming Files with CONVERT TABLESPACE 15-3
Converting Tablespaces on the Source Host: Example 15-3
Using CONVERT DATAFILE FROM PLATFORM on the Destination Host 15-4
Converting Datafiles on the Destination Platform: Example 15-5
Restrictions on CONVERT TABLESPACE and CONVERT DATAFILE 15-6
Cross-Platform Transportable Database: RMAN CONVERT DATABASE 15-7
Restrictions on Cross-Platform Transportable Database 15-8
Performing Cross-Platform Database Transport 15-8
Preparing for CONVERT DATABASE: Using the DBMS_TDB Package 15-8
xviii
Using DBMS_TDB.CHECK_DB to Check Database State 15-9
Using DBMS_TDB .CHECK_EXTERNAL to Identify External Objects 15-10
Using the RMAN CONVERT DATABASE Command 15-11
CONVERT DATABASE, Converting Datafiles on the Source Platform 15-11
CONVERT DATABASE. Converting Datafiles on the Destination Host 15-13
Using RMAN CONVERT to Copy Files Between ASM and Non-ASM Storage 15-16
Copying Datafiles To ASM Using CONVERT DATAFILE: Example 15-16
Copying Datafiles From ASM Using CONVERT DATAFILE: Example 15-17
Copying Tablespaces From ASM With CONVERT TABLESPACE: Example 15-17
16 Migrating Databases To and From ASM with Recovery Manager
Migrating a Database into ASM 16-1
Limitation on ASM Migration with Transportable Tablespaces 16-1
Preparing to Migrate a Database to ASM 16-1
Determine Names of Database Files 16-2
Generate RMAN Command File to Undo ASM Migration 16-2
Disk-Based Migration of a Database to ASM 16-2
Migrating the Flash Recovery Area to ASM 16-5
Setting Initialization Parameters for Flash Recovery Area in ASM 16-5
Migrating the Control File to an ASM Flash Recovery Area 16-6
Changing Flashback Log Location to ASM Flash Recovery Area 16-8
Migrating Online Logs to ASM Flash Recovery Area 16-8
Migrating Existing Backups to ASM Flash Recovery Area 16-9
Migrating a Database from ASM to Non-ASM Storage 16-9
PL/SQL Scripts Used in Migrating to ASM Storage 16-10
Generating ASM-to-Non-ASM Storage Migration Script 16-10
Migrating Online Logs of Primary Database to ASM 16-10
Part IV Performing User-Managed Backup and Recovery
17 Making User-Managed Backups
Querying V$ Views to Obtain Backup Information 17-1
Listing Database Files Before a Backup 17-1
Determining Datafile Status for Online Tablespace Backups 17-2
Making User-Managed Backups of the Whole Database 17-3
Making Consistent Whole Database Backups 17-3
Making User-Managed Backups of Offline Tablespaces and Datafiles 17-4
Making User-Managed Backups of Online Tablespaces and Datafiles 17-5
Making User-Managed Backups of Online Read/Write Tablespaces 17-5
Making Multiple User-Managed Backups of Online Read/Write Tablespaces 17-6
Backing Up Online Tablespaces in Parallel 17-6
Backing Up Online Tablespaces Serially 17-7
Ending a Backup After an Instance Failure or SHUTDOWN ABORT 17-7
Ending Backup Mode with the ALTER DATABASE END BACKUP Statement 17-8
Ending Backup Mode with the SQL*Plus RECOVER Command 17-9
Making User-Managed Backups of Read-Only Tablespaces 17-9
xix
Making User-Managed Backups of the Control File 17-10
Backing Up the Control File to a Binary File 17-10
Backing Up the Control File to a Trace File 17-11
Backing Up the Control File to a Trace File: Example 17-11
Making User-Managed Backups of Archived Redo Logs 17-12
Making User-Managed Backups in SUSPEND Mode 17-13
About the Suspend/Resume Feature 17-13
Making Backups in a Suspended Database 17-13
Making User-Managed Backups to Raw Devices 17-15
Backing Up to Raw Devices on UNIX 17-15
Backing Up with the dd utility on UNIX: Examples 17-16
Backing Up to Raw Devices on Windows 17-17
Backing Up with OCOPY: Example 17-17
Specifying the -b and -r Options for OCOPY: Example 17-18
Verifying User-Managed Backups 17-18
Testing the Restore of Backups 17-18
Running the DBVERIFY Utility 17-18
Making Logical Backups with Oracle Export Utilities 17-19
Making User-Managed Backups of Miscellaneous Oracle Files 17-19
Keeping Records of Current and Backup Database Files 17-20
Recording the Locations of Datafiles, Control Files, and Online Redo Logs 17-20
Recording the Locations of Archived Redo Logs 17-20
Recording the Locations and Dates of Backup Files 17-21
18 Performing User-Managed Database Flashback and Recovery
User-Managed Flashback Features of Oracle 18-1
Performing Flashback Database with SQL*Plus 18-2
About User-Managed Restore Operations 18-2
Determining Which Datafiles Require Recovery 18-3
Restoring Datafiles and Archived Redo Logs 18-4
Restoring Datafiles with Operating System Utilities 18-4
Restoring Archived Redo Logs with Operating System Utilities 18-5
Restoring Control Files 18-6
Restore Lost Copy of a Multiplexed Control File 18-6
Copying a Multiplexed Control File to a Default Location 18-6
Copying a Multiplexed Control File to a Nondefault Location 18-6
Restore Control File from Backup After Loss of All Current Control Files 18-7
Restoring a Backup Control File to the Default Location 18-8
Restoring a Backup Control File to a Nondefault Location 18-9
Create New Control File After Losing All Current and Backup Control Files 18-9
About User-Managed Media Recovery 18-11
Preconditions of Performing User-Managed Recovery 18-11
Applying Logs Automatically with the RECOVER Command 18-11
Automating Recovery with SET AUTORECOVERY 18-11
Automating Recovery with the AUTOMATIC Option of the RECOVER Command. 18-12
Recovering When Archived Logs Are in the Default Location 18-13
Recovering When Archived Logs Are in a Nondefault Location 18-13
xx
Resetting the Archived Log Destination 18-14
Overriding the Archived Log Destination 18-14
Responding to Unsuccessful Application of Redo Logs 18-15
Interrupting User-Managed Media Recovery 18-15
Performing Complete User-Managed Media Recovery 18-15
Performing Closed Database Recovery 18-16
Preparing for Closed Database Recovery 18-16
Restoring Backups of the Damaged or Missing Files 18-16
Recovering the Database 18-17
Performing Datafile Recovery in an Open Database 18-18
Preparing for Open Database Recovery 18-19
Restoring Backups of the Inaccessible Datafiles 18-19
Recovering Offline Tablespaces in an Open Database 18-19
Performing User-Managed Database Point-in-Time Recovery 18-20
Preparing for Incomplete Recovery 18-20
Restoring Datafiles Before Performing Incomplete Recovery 18-21
Performing Cancel-Based Incomplete Recovery 18-22
Performing Time-Based or Change-Based Incomplete Recovery 18-23
Opening the Database with the RESETLOGS Option 18-24
About Opening with the RESETLOGS Option 18-24
Executing the ALTER DATABASE OPEN Statements 18-26
Checking the Alert Log After a RESETLOGS Operation 18-27
Recovering a Database in NOARCHIVELOG Mode 18-27
Restoring a NOARCHIVELOG Database to its Default Location 18-27
Restoring a NOARCHIVELOG Database to a New Location 18-28
Controlling Parallel Media Recovery 18-29
19 Advanced User-Managed Recovery Scenarios
Recovering After the Loss of Datafiles: Scenarios 19-1
Losing Datafiles in NOARCHIVELOG Mode 19-1
Losing Datafiles in ARCHIVELOG Mode 19-2
Recovering Through an Added Datafile with a Backup Control File: Scenario 19-2
Re-Creating Datafiles When Backups Are Unavailable: Scenario 19-3
Recovering Through RESETLOGS with Created Control File: Scenario 19-4
Recovering NOLOGGING Tables and Indexes: Scenario 19-4
Recovering Read-Only Tablespaces with a Backup Control File: Scenario 19-5
Recovery of Read-Only or Slow Media with a Backup Control File 19-5
Recovery of Read-Only Files with a Re-Created Control File 19-5
Media Recovery of Transportable Tablespaces: Scenario 19-6
Recovering After the Loss of Online Redo Log Files: Scenarios 19-6
Recovering After Losing a Member of a Multiplexed Online Redo Log Group 19-7
Recovering After the Loss of All Members of an Online Redo Log Group 19-8
Losing an Inactive Online Redo Log Group 19-9
Losing an Active Online Redo Log Group 19-10
Loss of Multiple Redo Log Groups 19-11
Recovering After the Loss of Archived Redo Log Files: Scenario 19-11
Recovering from a Dropped Table: Scenario 19-12
xxi
Performing Media Recovery in a Distributed Environment: Scenario 19-13
Coordinating Time-Based and Change-Based Distributed Database Recovery 19-13
Dropping a Database with SQL*Plus 19-14
20 Performing User-Managed TSPITR
Introduction to User-Managed Tablespace Point-in-Time Recovery 20-1
TSPITR Terminology 20-2
TSPITR Methods 20-2
Preparing for User-Managed Tablespace Point-in-Time Recovery: Basic Steps 20-3
Step 1: Review TSPITR Requirements 20-3
Step 2: Identify All of the Files in the Recovery and Auxiliary Set Tablespaces 20-4
Step 3: Determine Whether Objects Will Be Lost 20-5
Step 4: Choose a Method for Connecting to the Auxiliary Instance 20-5
Step 5: Create an Oracle Password File for the Auxiliary Instance 20-5
Step 6: Create the Initialization Parameter File for the Auxiliary Instance 20-6
Restoring and Recovering the Auxiliary Database in User-Managed TSPITR: Basic Steps 20-7
Restoring and Recovering the Auxiliary Database on the Same Host 20-8
Restoring the Auxiliary Database on a Different Host with the Same Path Names 20-9
Restoring the Auxiliary Database on a Different Host with Different Path Names 20-10
Performing User-Managed TSPITR with Transportable Tablespaces 20-10
Step 1: Unplugging the Tablespaces from the Auxiliary Database 20-11
Step 2: Transporting the Tablespaces into the Primary Database 20-11
Performing Partial TSPITR of Partitioned Tables 20-12
Step 1: Create a Table on the Primary Database for Each Partition Being Recovered 20-13
Step 2: Drop the Indexes on the Partition Being Recovered 20-13
Step 3: Exchange Partitions with Standalone Tables 20-13
Step 4: Drop the Recovery Set Tablespace 20-13
Step 5: Create Tables at Auxiliary Database 20-13
Step 6: Drop Indexes on Partitions Being Recovered 20-13
Step 7: Exchange Partitions with Standalone Tables on the Auxiliary Database 20-14
Step 8: Transport the Recovery Set Tablespaces 20-14
Step 9: Exchange Partitions with Standalone Tables on the Primary Database 20-14
Step 10: Back Up the Recovered Tablespaces in the Primary Database 20-14
Performing User-Managed TSPITR of Partitioned Tables With a Dropped Partition 20-14
Step 1: Find the Low and High Range of the Partition that Was Dropped 20-15
Step 2: Create a Temporary Table 20-15
Step 3: Delete Records From the Partitioned Table 20-15
Step 4: Drop the Recovery Set Tablespace 20-15
Step 5: Create Tables at the Auxiliary Database 20-15
Step 6: Drop Indexes on Partitions Being Recovered 20-15
Step 7: Exchange Partitions with Standalone Tables 20-15
Step 8: Transport the Recovery Set Tablespaces 20-16
Step 9: Insert Standalone Tables into Partitioned Tables 20-16
Step 10: Back Up the Recovered Tablespaces in the Primary Database 20-16
Performing User-Managed TSPITR of Partitioned Tables When a Partition Has Split 20-16
Step 1: Drop the Lower of the Two Partitions at the Primary Database 20-16
Steps 2: Follow Same Procedure as for Partial TSPITR of Partitioned Tablespaces 20-17
xxii
21 Troubleshooting User-Managed Media Recovery
About User-Managed Media Recovery Problems 21-1
Investigating the Media Recovery Problem: Phase 1 21-3
Trying to Fix the Recovery Problem Without Corrupting Blocks: Phase 2 21-4
Deciding Whether to Allow Recovery to Corrupt Blocks: Phase 3 21-5
Allowing Recovery to Corrupt Blocks: Phase 4 21-6
Performing Trial Recovery 21-6
How Trial Recovery Works 21-7
Executing the RECOVER TEST Statement 21-7
Index
xxiii
Preface
This preface contains these topics:
■ Audience
■ Documentation Accessibility
■ Related Documentation
■ Conventions
Audience
Backup and Recovery Advanced User’s Guide is intended for database administrators who
perform the following tasks:
■ Back up, restore, and recover Oracle databases
■ Perform maintenance on backups of database files
To use this document, you need to know the following:
■ Relational database concepts and basic database administration as described in
Oracle Database Concepts and the Oracle Database Administrator's Guide
■ Basic backup and recovery concepts and strategies as described in Oracle Database
Backup and Recovery Basics
■ The operating system environment under which you are running the database
Documentation Accessibility
Our goal is to make Oracle products, services, and supporting documentation
accessible, with good usability, to the disabled community. To that end, our
documentation includes features that make information available to users of assistive
technology. This documentation is available in HTML format, and contains markup to
facilitate access by the disabled community. Accessibility standards will continue to
evolve over time, and Oracle is actively engaged with other market-leading
technology vendors to address technical obstacles so that our documentation can be
accessible to all of our customers. For more information, visit the Oracle Accessibility
Program Web site at
/>Accessibility of Code Examples in Documentation
Screen readers may not always correctly read the code examples in this document. The
conventions for writing code require that closing braces should appear on an
xxiv
otherwise empty line; however, some screen readers may not always read a line of text
that consists solely of a bracket or brace.
Accessibility of Links to External Web Sites in Documentation
This documentation may contain links to Web sites of other companies or
organizations that Oracle does not own or control. Oracle neither evaluates nor makes
any representations regarding the accessibility of these Web sites.
TTY Access to Oracle Support Services
Oracle provides dedicated Text Telephone (TTY) access to Oracle Support Services
within the United States of America 24 hours a day, seven days a week. For TTY
support, call 800.446.2398.
Related Documentation
For more information, see these Oracle resources:
■ Oracle Database Backup and Recovery Basics
■ Oracle Database Backup and Recovery Reference
■ Oracle Database Utilities
You can access information about the Backup Solutions Program at
/>Many books in the documentation set use the sample schemas of the seed database,
which is installed by default when you install Oracle. Refer to Oracle Database Sample
Schemas for information on how these schemas were created and how you can use
them yourself.
Oracle error message documentation is only available in HTML. If you only have
access to the Oracle Documentation CD, you can browse the error messages by range.
Once you find the specific range, use your browser's "find in page" feature to locate the
specific message. When connected to the Internet, you can search for a specific error
message using the error message search feature of the Oracle online documentation.
Conventions
The following text conventions are used in this document:
Convention Meaning
boldface Boldface type indicates graphical user interface elements associated
with an action, or terms defined in text or the glossary.
italic Italic type indicates book titles, emphasis, or placeholder variables for
which you supply particular values.
monospace Monospace type indicates commands within a paragraph, URLs, code
in examples, text that appears on the screen, or text that you enter.
xxv
What's New in Backup and Recovery?
This section describes new features of Recovery Manager in Oracle Database 10g
Release 2, and provides pointers to additional information on each feature. For
information on new features in Oracle Database 10g Release 1 and previous releases,
refer to the documentation for those releases.
Oracle Database 10g Release 2 New Features in Backup and Recovery
The new features for this release greatly increase the manageability of backup and
recovery with RMAN. Backup and recovery contains improvements to security, ease of
use and performance. In addition, transporting data across platforms is more
automated and simplified.
These features include:
■ RMAN Encrypted Backups
RMAN now supports several forms of encryption for backups created as backup
sets, whether on disk or on tape. Encryption can be based upon passwords
provided through RMAN or transparent encryption capabilities based upon the
Oracle Encryption Wallet. Once configured, existing RMAN backup procedures
take advantage of encryption features with no change.
■ Flashback Database Enhancements
Flashback Database can now reverse the effects of OPEN RESETLOGS operations,
returning a database to points in time in ancestor or even sibling incarnations. This
allows its use in many more data recovery scenarios. It also integrates with
guaranteed restore points.
■ Restore Points
Restore Points are aliases for SCNs, which eliminate the need to manually research
and record SCNs or timestamps to use for Flashback Database and Flashback
Table operations.
See Also: "RMAN Encrypted Backups" on page 6-7 for information
on using encrypted backups
See Also: Oracle Database Backup and Recovery Basics for more details on
configuring Flashback Database
See Also: Oracle Database Backup and Recovery Basics for details about
restore points