Tài liệu Flash Builder 4 and Flex 4 Bible- P13 pdf
Bạn đang xem bản rút gọn của tài liệu. Xem và tải ngay bản đầy đủ của tài liệu tại đây (704.96 KB, 50 trang )
571
CHAPTER
Using List Controls
IN THIS CHAPTER
Understanding list controls
Providing data to list controls
Using dynamic data providers
Controlling list item labels
Using list control events and
properties
Handling user data selections
Using custom item renderers
M
ost Flex applications are designed for the purpose of presenting
and managing data in some form. As a result, one of the most pop-
ular families of visual controls in the Flex framework includes
those known as list controls.
A list control is defined as a component that has a
dataProvider property
that enables you to populate the control with dynamic data. The data provided
to a list control can be in the form of either hierarchical or relational data, and
the type of data you want to present frequently determines which control you
use. In addition to being able to display relational or hierarchical data, list con-
trols have a common set of properties, methods, and events that enable the
user to select one or more items with mouse and keyboard gestures.
The Flex 4 SDK includes both the older MX list controls such as
DataGrid,
AdvancedDataGrid, and OlapDataGrid and newer controls based on
the new Spark component architecture:
l
The List component. This component behaves by default like an
HTML
<select> control and displays data items to the user in a
list box. After you learn how to use the
List control, you have
most of the information you need to use other such controls. You
can populate controls with data, listen for events indicating that the
user has selected or started to drag data, set common styles, and so
on. It supports the Spark layout architecture, so you can display a
horizontal or tile layout instead of the default vertical list.
l
The DropDownList and ComboBox components. These compo-
nents also behave like an HTML
<select> control but use a drop-
down list instead of a static list.
l
The ButtonBar component. This component has the same
appearance and behavior as an MX
ToggleButtonBar, presenting
a set of
ToggleButton controls horizontally, but is controlled
programmatically just like other Spark list controls.
26_488959-ch19.indd 57126_488959-ch19.indd 571 3/5/10 2:32 PM3/5/10 2:32 PM
Please purchase PDF Split-Merge on www.verypdf.com to remove this watermark.
Part III: Working with Data
572
On the Web
To use the sample code for this chapter, import the chapter19.fxp project from the Web site files into any
folder on your disk.
n
In this chapter, I describe in general terms how to use all list controls. I include information on
how to populate these controls with data, how to control data presentation with custom generation
of item labels and renderers, and how to handle events indicating that the user wants to select and
manipulate data.
Cross-Reference
The unique capabilities of other list controls, including the MX DataGrid, TileList, and HorizontalList,
and the new Spark components, are described in Chapter 20.
n
Table 19.1 describes the components that have the capability to display dynamic data and support
user interaction using the list control model. In the Architecture column I show which component
architecture the most recent version of the component implements.
TABLE 19.1
The List Controls
Control Architecture Description
Advanced
DataGrid
MX
This component implements all the features of the MX
DataGrid
control but adds the capability to group and aggregate data and can
sort on multiple columns. This component is part of the Flex Data
Visualization components and is available only with a Flash Builder
Premiere license.
ButtonBar
Spark
This new component presents Spark
ToggleButton objects
horizontally. The appearance and behavior are similar to the MX
ToggleButtonBar, but the application programming interface (API)
follows the list model, implementing the
change event and selected
Item
and selectedIndex properties.
ComboBox
Spark This component presents a drop-down list of simple string values. The
presentation of this component is similar to an HTML
<select> con-
trol that has its
size property set to 1, but enables the user to enter an
arbitrary string instead of selecting an item from the list.
DataGrid
MX This component presents a grid with multiple rows and columns. It is
used to present data received from a server-side database or other data
source that uses the spreadsheet-like rows-and-columns structure of
relational database tables.
DropDownList
Spark
Extended from the Spark
List control, this control shows a drop-
down list from which the user can select a value. Its
layout property
enables you to lay the list out with vertical, horizontal, or tile layout.
26_488959-ch19.indd 57226_488959-ch19.indd 572 3/5/10 2:32 PM3/5/10 2:32 PM
Please purchase PDF Split-Merge on www.verypdf.com to remove this watermark.
Chapter 19: Using List Controls
573
Control Architecture Description
Horizontal
List
MX This component presents a horizontal list of data items, typically ren-
dered with a custom item renderer. (For the Spark architecture, use a
List with layout set to HorizontalLayout.)
List
Spark This component presents a list box of data items. By default, the presenta-
tion of this component is similar to an HTML
<select> control that has
its size property set to a value greater than 1. Its
layout property enables
you to lay out the list’s items with a Spark layout object such as
HorizontalLayout or TileLayout.
OlapDataGrid
MX
This component expands on the
AdvancedDataGrid and supports pre-
sentation of results from an Online Analytical Processing (OLAP) query.
TileList
MX This component presents a grid of data items, typically rendered with
a custom item renderer. (For the Spark architecture, use a
List with
layout set to TileLayout.)
Tree
MX This component presents hierarchical data, commonly supplied by the
contents of an XML file.
In addition to the components listed in Table 19.1, the Flex SDK includes a set of MX-based list
controls designed for use in Adobe AIR applications. These controls provide the user with the abil-
ity to inspect and manipulate files and directories in the local file system and cannot be used in
Flex applications that are deployed over the Web. They include the
FileSystemList,
FileSystemComboBox, FileSystemDataGrid, and FileSystemTree components.
Most of the information in this chapter and in Chapter 20 about list and
DataGrid controls
applies equally to these AIR-based controls, but these controls add functionality that enables them
to populate their data from the directory and file contents of the local file system. They also imple-
ment additional properties and methods that are designed to support their unique purpose.
Note
Other MX components extend a class named ComboBase and therefore must be considered members of the
family of list controls as well. The
ColorPicker control is designed to enable selection of a color value from
a grid of “Web-safe” colors, and the
DateField control presents a pop-up calendar control. The components
aren’t often thought of as list controls, but they support the same set of properties, methods, and events as
their cousins. In the Flex 4 SDK, there are no Spark equivalents to these components.
n
Each list control has its own unique visual presentation and behavior. As the developer, you select
the control most suited to your application’s requirements.
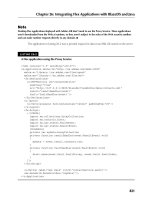
Figure 19.1 shows examples of the
List, DataGrid, and DropDownList controls, each using
the same set of data as its data provider.
On the Web
The application displayed in Figure 19.1 is available in the Web site files as ListControls.mxml in the
chapter19 project.
n
26_488959-ch19.indd 57326_488959-ch19.indd 573 3/5/10 2:32 PM3/5/10 2:32 PM
Please purchase PDF Split-Merge on www.verypdf.com to remove this watermark.
Part III: Working with Data
574
FIGURE 19.1
Commonly used list controls
Using Data Providers
The data you provide to a list control must be in the form of an ActionScript object, but for most
purposes you typically provide a set of data that’s been wrapped in one of the data collection
classes: either the
ArrayList or ArrayCollection classes for data that’s in rows and columns
or the
XMLListCollection class for hierarchical data.
The Spark and MX list controls have the same basic rules for their data providers: the data must be
provided as an ordered data collection. But the Spark controls (
List, DropDownList, and
ComboBox) specify that the data object must implement the IList interface, whereas the MX con-
trols accept any ActionScript
Object. In practical terms, this means that the MX DataGrid and
other related controls can accept a raw
Array as their dataProvider, while the new Spark con-
trols require an
ArrayList, ArrayCollection, or other class that implements the interface.
The
List, DropDownList, and ComboBox controls are distinguished from the DataGrid and
its related controls in that they present only a single column of data. They can present data from a
collection of complex objects, but by default they present only one value in each list item. In con-
trast, the
DataGrid control is designed to present data in multiple columns.
26_488959-ch19.indd 57426_488959-ch19.indd 574 3/5/10 2:32 PM3/5/10 2:32 PM
Please purchase PDF Split-Merge on www.verypdf.com to remove this watermark.
Chapter 19: Using List Controls
575
Using hard-coded data providers
You can embed data in a Flex application for use by either a specific instance of a list control or as
a separate data object that’s then linked to a control through a binding expression. Hard-coding
means that you declare actual data in the code, rather than retrieving it from an external data
source at runtime.
Caution
As described in Chapter 18, when you embed data in a Flex application, the compiled application file expands
accordingly. You should embed data only when it’s a small amount of content and won’t change during the
lifetime of the application.
n
Nesting hard-coded data in a data provider
When using a list control, you can nest hard-coded data in the declaration of a list control’s data-
Provider
by declaring the property with child-element syntax rather than attribute syntax. The
following code presents a
List control populated with a hard-coded data provider containing an
ArrayList of simple String values:
<s:List id=”sizeList”>
<s:dataProvider>
<s:ArrayList>
<fx:String>Small</fx:String>
<fx:String>Medium</fx:String>
<fx:String>Large</fx:String>
</s:ArrayList>
</s:dataProvider>
</s:List>
You also can declare the dataProvider with hard-coded collections of complex objects by nest-
ing multiple
<fx:Object> declarations within the <s:dataProvider> tag set:
<s:List id=”stateList” labelField=”stateName”>
<s:dataProvider>
<s:ArrayList>
<fx:Object>
<fx:stateName>California</fx:stateName>
<fx:capitol>Sacramento</fx:capitol>
</fx:Object>
<fx:Object>
<fx:stateName>Oregon</fx:stateName>
<fx:capitol>Salem</fx:capitol>
</fx:Object>
<fx:Object>
<fx:stateName>Washington</fx:stateName>
<fx:capitol>Olympia</fx:capitol>
</fx:Object>
<s:ArrayList>
</s:dataProvider>
</s:List>
26_488959-ch19.indd 57526_488959-ch19.indd 575 3/5/10 2:32 PM3/5/10 2:32 PM
Please purchase PDF Split-Merge on www.verypdf.com to remove this watermark.
Part III: Working with Data
576
Note
With MX controls, you can leave out the <s:ArrayList> element and nest the data elements directly with
the
<mx:dataProvider>. This isn’t possible with Spark list controls, because the MXML compiler doesn’t
know which implementing class of the
IList interface to use.
n
Modifying data with the ArrayList API
Because data is passed to the dataProvider as an ArrayList or ArrayCollection object,
the class’s API can be used to access and manipulate the data. Even though the original data is
hard-coded, the following ActionScript statement code would add a new item to the
List object’s
dataProvider when it contains simple String values:
sizeList.dataProvider.addItem(‘Extra Large’);
And this code would add a new item when it contains complex objects:
stateList.dataProvider.addItem({state:’New York’,’Albany’});
The application in Listing 19.1 uses a List object with a hard-coded data provider and then
enables the user to add data to the object with the
addItem() method.
LISTING 19.1
A List control with hard-coded data
<?xml version=”1.0” encoding=”utf-8”?>
<s:Application xmlns:fx=”
xmlns:s=”library://ns.adobe.com/flex/spark”
xmlns:mx=”library://ns.adobe.com/flex/mx”>
<s:layout>
<s:VerticalLayout horizontalAlign=”center” paddingTop=”20”/>
</s:layout>
<s:List id=”sizeList”>
<s:dataProvider>
<s:ArrayList>
<fx:String>Small</fx:String>
<fx:String>Medium</fx:String>
<fx:String>Large</fx:String>
</s:ArrayList>
</s:dataProvider>
</s:List>
<s:HGroup>
<s:Label text=”New Item:”/>
<s:TextInput id=”itemInput”/>
<s:Button label=”Add Item”
click=”sizeList.dataProvider.addItem(itemInput.text)”/>
</s:HGroup>
</s:Application>
26_488959-ch19.indd 57626_488959-ch19.indd 576 3/5/10 2:32 PM3/5/10 2:32 PM
Please purchase PDF Split-Merge on www.verypdf.com to remove this watermark.
Chapter 19: Using List Controls
577
On the Web
The code in Listing 19.1 is available in the Web site files as ListWithHardCodedData.mxml in the
chapter19 project.
n
Declaring separate data objects with MXML tags
You also can provide hard-coded data to a Spark list control from an <s:ArrayList> element
declared within an
<fx:Declarations> element or in ActionScript code. The application in
Listing 19.2 declares an
ArrayList and then provides the data to the List object through a
binding expression.
LISTING 19.2
A List control with data provided through a binding expression
<?xml version=”1.0” encoding=”utf-8”?>
<s:Application xmlns:fx=”
xmlns:s=”library://ns.adobe.com/flex/spark”
xmlns:mx=”library://ns.adobe.com/flex/mx”>
<s:layout>
<s:VerticalLayout horizontalAlign=”center” paddingTop=”20”/>
</s:layout>
<fx:Declarations>
<s:ArrayList id=”myData”>
<fx:String>Small</fx:String>
<fx:String>Medium</fx:String>
<fx:String>Large</fx:String>
</s:ArrayList>
</fx:Declarations>
<s:List id=”sizeList” dataProvider=”{myData}”/>
<s:HGroup>
<s:Label text=”New Item:”/>
<s:TextInput id=”itemInput”/>
<s:Button label=”Add Item”
click=”sizeList.dataProvider.addItem(itemInput.text)”/>
</s:HGroup>
</s:Application>
On the Web
The code in Listing 19.2 is available in the Web site files as ListWithBoundData.mxml in the chapter19
project.
n
Using dynamic data providers
Data retrieved from an external source, such as the results of a remote server call through the Remote
Procedure Call (RPC) components, or data retrieved from a local database (for an AIR desktop appli-
cation) is typically stored in a data collection object. As described in Chapter 18, the data collection is
typically declared in ActionScript code with the
[Bindable] metadata tag or in MXML code.
26_488959-ch19.indd 57726_488959-ch19.indd 577 3/5/10 2:32 PM3/5/10 2:32 PM
Please purchase PDF Split-Merge on www.verypdf.com to remove this watermark.
Part III: Working with Data
578
In ActionScript code, the declaration looks like this:
import mx.collections.ArrayList;
[Bindable]
private var myData:ArrayList = new ArrayList();
And in MXML, it looks like this:
<s:ArrayList id=”myData”/>
Note
Data objects that are declared in MXML are immediately instantiated and always bindable.
n
Regardless of how the data collection is declared, by making it bindable, you make it possible to
pass the data to a
List control with a simple binding expression:
<s:List id=”sizeList” dataProvider=”{myData}”/>
Using RPC components
You can choose to retrieve data dynamically from many sources, including the Flex SDK compo-
nents that are grouped together as the RPC classes. These classes are distinguished from each other
by the data format they use to communicate with a remote server:
l
HTTPService. This class sends simple HTTP requests to URLs that return data format-
ted as simple text or XML. For example, a call to an RSS feed from a blog or content-based
Web site would be executed using the
HTTPService class.
l
RemoteObject. This class sends and receives messages formatted in Action Message
Format (AMF). This binary format is defined by Adobe and implemented in many of its
server products, including LiveCycle Data Services, BlazeDS, and ColdFusion.
l
WebService. This class retrieves data from a server with calls formatted in the industry-
standard SOAP format.
These components and their methodologies are described starting in Chapter 23. All, however, are
capable of returning data sets in the form of
ArrayList or ArrayCollection objects that are
suitable for use as
List control data providers.
Note
The AMF data format was published by Adobe Systems in 2007 to support development of independent appli-
cation server products that are compatible with Flex- and Flash-based applications.
n
Retrieving local data in AIR applications
If you’re building an AIR-based desktop application, you can retrieve data from local XML files
using the
File and FileStream classes or from the local SQLite embedded database with
classes such as
SQLConnection and SQLStatement. These classes aren’t designed to return
data in the
ArrayList format directly; you typically need to manually wrap data into your data
collection objects with explicit ActionScript code.
26_488959-ch19.indd 57826_488959-ch19.indd 578 3/5/10 2:32 PM3/5/10 2:32 PM
Please purchase PDF Split-Merge on www.verypdf.com to remove this watermark.
Chapter 19: Using List Controls
579
Controlling List Item Labels
If a List control’s data provider contains simple values (such as String, Number, or Date),
these values are displayed on each item by default. If the data provider contains complex objects
(either instances of the ActionScript
Object class or of your own custom value object classes),
you can determine the text labels that are displayed in a
List control’s items using one of these
strategies:
l
The labelField property enables you to point to a specific named property of each
object whose values should be displayed.
l
The labelFunction property enables you to customize each item’s label with your own
ActionScript code.
Using the labelField property
Most List controls support the labelField property. This property enables you to indicate
which of the named properties of data items in the control’s data provider is displayed at runtime.
The default value of
labelField is label. As a result, if the data provider’s objects have a prop-
erty named
label, that property’s value is displayed. In the following code, the ArrayList con-
tains data objects with a
label property. The List control displays the label property’s value
on each of its items:
<fx:Declarations>
<s:ArrayList id=”stateData”>
<fx:Object>
<fx:label>CA</fx:label>
<fx:capitol>Sacramento</fx:capitol>
</fx:Object>
<fx:Object>
<fx:label>OR</fx:label>
<fx:capitol>Salem</fx:capitol>
</fx:Object>
</s:ArrayList>
</fx:Declarations>
<s:List id=”stateList” dataProvider=”{stateData}”/>
More commonly, the complex objects in the data collection have property names that are deter-
mined by the structure of a database table, XML file, value object, or other existing data source. If
you forget to set the
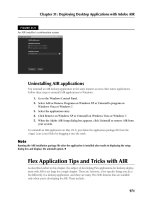
labelField property on a List control that displays complex data objects,
the control displays labels consisting of a set of
[] characters wrapped around the word object and
the object’s data type. If the data item is cast as an ActionScript
Object, the result looks like this:
[object Object]
As shown in Figure 19.2, the results aren’t particularly useful, even when working with a value
object class.
26_488959-ch19.indd 57926_488959-ch19.indd 579 3/5/10 2:32 PM3/5/10 2:32 PM
Please purchase PDF Split-Merge on www.verypdf.com to remove this watermark.
Part III: Working with Data
580
FIGURE 19.2
A List control displaying a complex data object with no labelField setting
To fix this behavior, you explicitly set the List control’s labelField to the name of the prop-
erty you want to display:
<fx:Declarations>
<s:ArrayList id=”stateData”>
<fx:Object>
<fx:state>CA</fx:state>
<fx:capitol>Sacramento</fx:capitol>
</fx:Object>
<fx:Object>
<fx:state>OR</fx:state>
<fx:capitol>Salem</fx:capitol>
</fx:Object>
</s:ArrayList>
</fx:Declarations>
<s:List id=”stateList” dataProvider=”{stateData}”
labelField=”state”/>
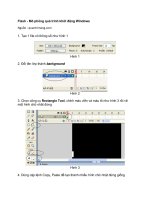
Figure 19.3 shows the same List control, this time displaying the value of the property named in
the control’s
labelField property.
The application in Listing 19.3 uses the
List control’s labelField property to determine which
property value of each data object is displayed at runtime.
LISTING 19.3
Using the labelField property
<?xml version=”1.0” encoding=”utf-8”?>
<s:Application xmlns:fx=”
xmlns:s=”library://ns.adobe.com/flex/spark”
26_488959-ch19.indd 58026_488959-ch19.indd 580 3/5/10 2:32 PM3/5/10 2:32 PM
Please purchase PDF Split-Merge on www.verypdf.com to remove this watermark.
Chapter 19: Using List Controls
581
xmlns:mx=”library://ns.adobe.com/flex/mx”
xmlns:vo=”vo.*”>
<s:layout>
<s:VerticalLayout horizontalAlign=”center” paddingTop=”20”/>
</s:layout>
<fx:Declarations>
<s:ArrayList id=”stateData”>
<vo:StateVO>
<vo:state>CA</vo:state>
<vo:capitol>Sacramento</vo:capitol>
</vo:StateVO>
<vo:StateVO>
<vo:state>OR</vo:state>
<vo:capitol>Salem</vo:capitol>
</vo:StateVO>
<vo:StateVO>
<vo:state>WA</vo:state>
<vo:capitol>Olympia</vo:capitol>
</vo:StateVO>
</s:ArrayList>
</fx:Declarations>
<s:Label text=”A List control with value objects and labelField”
fontSize=”14” fontWeight=”bold” width=”215”
verticalAlign=”middle” textAlign=”center”/>
<s:List id=”stateList” width=”200”
dataProvider=”{stateData}” labelField=”capitol”/>
</s:Application>
FIGURE 19.3
A List control displaying a complex data object with the labelField set to one of the properties of the
data provider’s complex data objects
26_488959-ch19.indd 58126_488959-ch19.indd 581 3/5/10 2:32 PM3/5/10 2:32 PM
Please purchase PDF Split-Merge on www.verypdf.com to remove this watermark.
Part III: Working with Data
582
On the Web
The code in Listing 19.3 is available in the Web site files as UsingLabelField.mxml in the chapter19
project.
n
Using the labelFunction property
Most List controls implement the labelFunction property to enable you to customize the
label that appears on each of the control’s items at runtime. You can control both how the data will
be displayed and enable each label to show multiple properties from your data objects. The
labelFunction property points to the name of a function that follows a specific signature:
[access modifier] function [functionName](item:Object):String
The access modifier for a custom label function can be anything you like, although when you’re
calling the function from within the same application or component in which it’s defined, the
access modifier is typically set to private because it’s most often used only from within. The name
of the function’s only argument (
item in the example syntax) can be anything you like, but it
should be typed as either an
Object or a custom class implementing the Value Object design pat-
tern, depending on what type of data is stored in your
List control’s dataProvider collection.
And the function always returns a
String, because its purpose is to generate a label for each of
the
List control’s visual items.
At runtime, the
List control calls the named function each time it needs to render an item visu-
ally. It passes the current data object to the custom function as its item argument and then displays
the returned
String value. The following is an example of a function that’s compatible with the
labelFunction architecture:
private function getStateLabel(item:StateVO):String
{
return item.capitol + “, “ + item.state;
}
The application in Listing 19.4 displays a List control where each visual item’s label is generated
by the custom
getStateLabel() function.
LISTING 19.4
Using the labelFunction property
<?xml version=”1.0” encoding=”utf-8”?>
<s:Application xmlns:fx=”
xmlns:s=”library://ns.adobe.com/flex/spark”
xmlns:mx=”library://ns.adobe.com/flex/mx”
xmlns:vo=”vo.*”>
<s:layout>
<s:VerticalLayout horizontalAlign=”center” paddingTop=”20”/>
</s:layout>
<fx:Declarations>
26_488959-ch19.indd 58226_488959-ch19.indd 582 3/5/10 2:32 PM3/5/10 2:32 PM
Please purchase PDF Split-Merge on www.verypdf.com to remove this watermark.
Chapter 19: Using List Controls
583
<s:ArrayList id=”stateData”>
<vo:StateVO>
<vo:state>CA</vo:state>
<vo:capitol>Sacramento</vo:capitol>
</vo:StateVO>
<vo:StateVO>
<vo:state>OR</vo:state>
<vo:capitol>Salem</vo:capitol>
</vo:StateVO>
<vo:StateVO>
<vo:state>WA</vo:state>
<vo:capitol>Olympia</vo:capitol>
</vo:StateVO>
</s:ArrayList>
</fx:Declarations>
<fx:Script>
<![CDATA[
import vo.StateVO;
private function getStateLabel(item:StateVO):String
{
return item.capitol + “, “ + item.state;
}
]]>
</fx:Script>
<s:Label text=”A List control with value objects and labelFunction”
fontSize=”14” fontWeight=”bold” width=”215”
textAlign=”center”/>
<s:List id=”stateList” width=”200”
dataProvider=”{stateData}” labelFunction=”getStateLabel”/>
</s:Application>
On the Web
The code in Listing 19.4 is available in the Web site files as UsingLabelFunction.mxml in the chapter19
project.
n
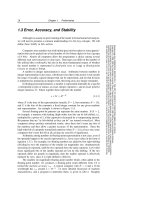
The resulting application is shown in Figure 19.4. Notice that each of the List control’s labels is
generated using both of the data object’s named properties, concatenated with literal strings to sep-
arate the values.
Note
The DataGrid component doesn’t implement the labelField or labelFunction properties directly.
Instead, these properties are implemented in the
DataGridColumn component so you can easily customize the
presentation of individual columns. A label function written for a
DataGridColumn must accept an additional
argument: a reference to the
DataGridColumn that is calling the label function.
n
26_488959-ch19.indd 58326_488959-ch19.indd 583 3/5/10 2:32 PM3/5/10 2:32 PM
Please purchase PDF Split-Merge on www.verypdf.com to remove this watermark.
Part III: Working with Data
584
FIGURE 19.4
A List control displaying String values calculated in a labelFunction
List Control Events and Properties
All List controls support these events to notify you of user actions and other important updates
to a control:
l
change. Notifies you that the user has selected an item using either a mouse or keyboard
gesture.
l
changing. Notifies you that the user has attempted to select an item using either a mouse
or a keyboard gesture. This event is cancelable, thus preventing the selection from occurring.
List controls also support these properties that can be used to detect which data the user cur-
rently has selected:
l
allowMultipleSelections:Boolean. When set to true, this enables the user to
select more than one item at a time by holding down Ctrl while clicking items.
l
doubleClickEnabled:Boolean. When this property is set to true, the List con-
trol detects double-clicks on its items and dispatches a
doubleClick event.
l
selectedIndex:int. This is the numeric index of the currently selected item.
l
selectedIndices:Array. This is an array of indices of the currently selected items,
when the
List control’s allowMultipleSelection property is set to true.
l
selectedItem:Object. This is the data object underlying the List control’s cur-
rently selected row or cell.
l
selectedItems:Array. This is an array of currently selected objects, when the List
control’s
allowMultipleSelection property is set to true.
In addition, each
List control supports unique events and properties designed for that control’s
specific purpose and capabilities.
26_488959-ch19.indd 58426_488959-ch19.indd 584 3/5/10 2:32 PM3/5/10 2:32 PM
Please purchase PDF Split-Merge on www.verypdf.com to remove this watermark.
Chapter 19: Using List Controls
585
Caution
The ComboBox and DropDownList controls do not support the allowMultipleSelection, selected
Indices
, or selectedItems properties.
n
Handling User Data Selections
When a user selects items in a List control, she’s indicating that she wants to use the selected
item’s underlying data. When this occurs, the
List control dispatches a change event. After this
event occurs, you can use the control’s
selectedItem and selectedIndex properties to
detect which item has been selected.
Using the change event
The change event is implemented in all Spark and MX List controls. In Spark controls, it dis-
patches an event object typed as
spark.events.IndexChangeEvent, which has a newIndex
property that indicates by index which data item was selected by the user.
You can detect which data item was selected by the user by referring to the event object’s
new
Index
property and passing it to the getItemAt() method of the ArrayList data provider:
changeMessage = “You clicked on “ +
event.target.dataProvider.getItemAt(event.newIndex);
Caution
This technique notifies you that the user changed their selection, an item, but it doesn’t always indicate that
the expression
event.target.dataProvider.getItemAt(event.newIndex) returns a valid value. In
most
List controls, the user can hold down Ctrl (Cmd on the Mac) and click to deselect an item, in which
case you get a
change event that can’t be distinguished from the event that occurs when selecting an item.
When nothing is selected, the
getItemAt() expression causes a runtime error. The value of newIndex is
-1, and when you pass that value to the ArrayList class’s getItemAt() method, it results in a
RangeError with the message “Index ‘-1’ specified is out of bounds”.
n
Using the selectedItem property
You can also use the List control’s selectedItem property, which always returns a reference
to the data object that drove the creation of the currently selected list item. If the user has dese-
lected all items in a
List control, selectedItem returns null:
if (event.target.selectedItem == null)
{
changeMessage = “None selected”;
}
else
{
changeMessage = “You selected “ + event.target.selectedItem;
}
26_488959-ch19.indd 58526_488959-ch19.indd 585 3/5/10 2:32 PM3/5/10 2:32 PM
Please purchase PDF Split-Merge on www.verypdf.com to remove this watermark.
Part III: Working with Data
586
The application in Listing 19.5 uses a List control and a change event listener. Each time the
change event is dispatched by the List control, an event handler function inspects the control’s
selectedItem and displays a message indicating which item (if any) is currently selected.
LISTING 19.5
Using the change event and selectedItem property
<?xml version=”1.0” encoding=”utf-8”?>
<s:Application xmlns:fx=”
xmlns:s=”library://ns.adobe.com/flex/spark”
xmlns:mx=”library://ns.adobe.com/flex/mx”>
<s:layout>
<s:VerticalLayout horizontalAlign=”center” paddingTop=”20”/>
</s:layout>
<fx:Script>
<![CDATA[
[Bindable]
private var changeMessage:String=”None selected”;
private function changeHandler(event:Event):void
{
if (event.target.selectedItem == null)
changeMessage = “None selected”;
else
changeMessage = “You selected “ + event.target.selectedItem;
}
]]>
</fx:Script>
<fx:Declarations>
<s:ArrayList id=”myData”>
<fx:String>Small</fx:String>
<fx:String>Medium</fx:String>
<fx:String>Large</fx:String>
</s:ArrayList>
</fx:Declarations>
<s:List id=”sizeList” width=”200” dataProvider=”{myData}”
change=”changeHandler(event)”/>
<s:Label text=”{changeMessage}” fontSize=”12”/>
</s:Application>
On the Web
The code in Listing 19.5 is available in the Web site files as ChangeEventDemo.mxml in the chapter19
project.
n
When testing this application, try holding down Ctrl (Windows) or Cmd (Mac) and clicking an
item that’s already selected. You should see the message “None selected” displayed, because the
control’s
selectedItem property now returns null.
26_488959-ch19.indd 58626_488959-ch19.indd 586 3/5/10 2:32 PM3/5/10 2:32 PM
Please purchase PDF Split-Merge on www.verypdf.com to remove this watermark.
Chapter 19: Using List Controls
587
Using the selectedIndex property
All List controls implement the selectedIndex property, which returns the index position of
the control’s currently selected item. Because all indexing in ActionScript starts at 0, if the first item
is selected the
selectedIndex property returns 1, the second returns 2, and so on. When you
use a
List or ComboBox control in a data entry form, you can place a data item as the first item
in a list that indicates that the user is selecting all options:
<s:DropDownList id=”categoryList” change=”changeHandler(event)”>
<s:dataProvider>
<s:ArrayList>
<fx:String>All Categories</fx:String>
<fx:String>Comedy</fx:String>
<fx:String>Drama</fx:String>
<fx:String>Action</fx:String>
<fx:String>Horror</fx:String>
</s:ArrayList>
</s:dataProvider>
</s:DropDownList>
The following code detects whether the user has selected the first item, indicating she wants all cat-
egories or a specific category:
private function changeHandler(event:Event):void
{
if (categoryList.selectedIndex == 0)
{
Alert.show(“You selected all categories”, “Everything!”);
}
else
{
Alert.show(“You selected “ + categoryList.selectedItem,
“One Thing!”);
}
}
If no items are currently selected in a List control, the selectedIndex property returns a
value of
-1. This is particularly useful when you want to detect a state where the user hasn’t yet
selected a value from a
List or DataGrid control:
private function changeHandler(event:Event):void
{
if (categoryList.selectedIndex == -1)
{
Alert.show(“You haven’t selected anything!”, “Nothin!”);
}
else
{
Alert.show(“You selected “ + categoryList.selectedItem,
“One Thing!”);
}
}
26_488959-ch19.indd 58726_488959-ch19.indd 587 3/5/10 2:32 PM3/5/10 2:32 PM
Please purchase PDF Split-Merge on www.verypdf.com to remove this watermark.
Part III: Working with Data
588
Note
When using a MX ComboBox with its editable property set to the default value of false, its selected
Index
property never returns -1, because some item is always selected. When you set editable to true and
the user types a value into the
TextInput portion of the control at runtime, selectedIndex returns -1 to
indicate the user has provided a custom value.
n
Selecting complex data objects
When a List control’s data provider is a collection of complex objects instead of simple values,
you can refer to selected data objects’ named properties using either dot syntax or array-style syn-
tax. Dot syntax is more common, because, especially when working with classes that implement
the Value Object design pattern, they enable Flex Builder and the compiler to validate property
names and provide code completion.
For example, when a user selects an item that represents a complex data object from a
List con-
trol, you should first cast the control’s
selectedItem property as the appropriate ActionScript
class. You can then refer to the object’s named properties and gain the benefit of Flex Builder’s and
the compiler’s syntax checking and code completion tools:
var selectedState:StateVO = stateList.selectedItem as StateVO;
var selectedCapitol = selectedState.capitol;
If you prefer, you can use array-style syntax to refer to a data object’s named properties:
var selectedCapitol = stateList.selectedItem[“capitol”];
This syntax enables you to use variables containing the names of the properties. The following
code would have the same functional result as the other preceding examples:
var fieldName:String = “capitol”;
var selectedCapitol = stateList.selectedItem[fieldName];
Particularly when using data model classes that implement the Value Object design pattern, you
may want to declare a bindable instance of the class to store the most recently selected data item.
This
StateVO value object class contains two properties, both of which are bindable due to the
use of the
[Bindable] metadata tag before the class declaration:
package vo
{
[Bindable]
public class StateVO
{
public var state:String;
public var capitol:String;
public function StateVO()
{
}
}
}
26_488959-ch19.indd 58826_488959-ch19.indd 588 3/5/10 2:32 PM3/5/10 2:32 PM
Please purchase PDF Split-Merge on www.verypdf.com to remove this watermark.
Chapter 19: Using List Controls
589
The application in Listing 19.6 uses a ComboBox with a data provider containing multiple
instances of a value object class. Upon application startup, and then again when the user selects an
item from the control, a reference to the currently selected data item is saved to the
selected-
State
variable.
Notice that this variable is marked as bindable, and its internal
[Bindable] tag also marks its
properties as bindable. Both levels of “bindability” are required in order for the
Label controls to
successfully display the selected object’s properties whenever the user selects new data.
LISTING 19.6
Selecting complex data objects
<?xml version=”1.0” encoding=”utf-8”?>
<s:Application xmlns:fx=”
xmlns:s=”library://ns.adobe.com/flex/spark”
xmlns:mx=”library://ns.adobe.com/flex/mx”
xmlns:vo=”vo.*”>
<s:layout>
<s:VerticalLayout horizontalAlign=”center” paddingTop=”20”/>
</s:layout>
<fx:Script>
<![CDATA[
import vo.StateVO;
[Bindable]
private var selectedState:StateVO;
private function setSelectedState():void
{
selectedState=stateList.selectedItem as StateVO;
}
]]>
</fx:Script>
<fx:Declarations>
<s:ArrayList id=”stateData”>
<vo:StateVO>
<vo:state>CA</vo:state>
<vo:capitol>Sacramento</vo:capitol>
</vo:StateVO>
<vo:StateVO>
<vo:state>OR</vo:state>
<vo:capitol>Salem</vo:capitol>
</vo:StateVO>
<vo:StateVO>
<vo:state>WA</vo:state>
<vo:capitol>Olympia</vo:capitol>
</vo:StateVO>
</s:ArrayList>
</fx:Declarations>
continued
26_488959-ch19.indd 58926_488959-ch19.indd 589 3/5/10 2:32 PM3/5/10 2:32 PM
Please purchase PDF Split-Merge on www.verypdf.com to remove this watermark.
Part III: Working with Data
590
LISTING 19.6
(continued)
<s:DropDownList id=”stateList”
width=”200”
dataProvider=”{stateData}”
labelField=”capitol”
change=”setSelectedState()”/>
<s:Label text=”Selected State Information:”/>
<s:Label text=”State: {selectedState.state}”/>
<s:Label text=”Capitol: {selectedState.capitol}”/>
</s:Application>
On the Web
The code in Listing 19.6 is available in the Web site files as SelectingComplexObjects.mxml in the
chapter19 project.
n
Using Custom Item Renderers
By default, List controls display simple strings in their visual items. As described previously,
you can customize the string that’s displayed with the control’s
labelField and labelFunc-
tion
properties, but if you want to create a more complex display, you need to use a custom
item renderer.
MX
List controls enable you to declare both item renderers and item editors. The differences
between renderers and editors can be described as follows:
l
Item renderers primarily display information, while item editors enable the user to modify
the data that’s stored in the
List control’s data provider.
l
Item renderers display in every item of the List control regardless of the user’s interac-
tions with the control. Item editors are displayed only when the user clicks to start editing
the item.
l
Item renderers also can be marked as editors. In this case, they’re still displayed on every
item of List control like a normal item renderer. But, like an item editor, they enable the
user to modify the data in the
List control’s data provider.
The Spark List controls support only item renderers, and not item editors, but you can write your
own logic to create renderers with an editable interface.
Note
The use of custom item renderers is described in this chapter, because they can be used with all List controls.
Custom item editors are described in Chapter 20 in the section about the
DataGrid control.
n
You declare a List control’s custom item renderer as a visual component that you want the con-
trol to instantiate each time it needs to render an item visually. Each of the
List controls has a
26_488959-ch19.indd 59026_488959-ch19.indd 590 3/5/10 2:32 PM3/5/10 2:32 PM
Please purchase PDF Split-Merge on www.verypdf.com to remove this watermark.
Chapter 19: Using List Controls
591
default item renderer class that it assigns to its itemRenderer property. The default item
Renderer
class for MX List controls is mx.controls.listClasses.ListItemRenderer,
while the default
itemRenderer class for Spark list controls is spark.skins.spark.
DefaultItemRenderer
. Both default itemRenderer classes are designed to display a simple
String value to the user.
When you declare a custom renderer, you override this default selection and have the freedom to
create much more complex presentations.
You can declare custom item renderers in these ways:
l
Drop-in renderers. These are visual components that you assign to an MX List control
without any changes to the renderer component’s default property or style settings. These
are only available with MX list controls.
l
Inline renderers. These are components you define and nest within an MXML declaration
of the
List control.
l
Component renderers. These are separate visual components that you define as MXML
components or ActionScript classes and assign to the
List control’s itemRenderer
property in an MXML declaration. You also can assign a component renderer at runtime
with ActionScript code by using the
mx.core.ClassFactory class.
Using drop-in item renderers
A drop-in renderer is a visual component that you assign to a MX List control’s itemRenderer
or
itemEditor properties using its complete package and class name. A limited number of com-
ponents implement the
IDropInListItemRenderer interface, making them eligible for this
use. They include:
l
Button
l
CheckBox
l
DateField
l
Image
l
Label
l
NumericStepper
l
Text
l
TextArea
l
TextInput
Caution
Spark list controls don’t support drop-in item renderers.
n
At runtime, for each item the List control renders, it creates an instance of the visual component
you name as the renderer and passes data to the default property for that component. For example,
26_488959-ch19.indd 59126_488959-ch19.indd 591 3/5/10 2:32 PM3/5/10 2:32 PM
Please purchase PDF Split-Merge on www.verypdf.com to remove this watermark.
Part III: Working with Data
592
if you use an Image component as your custom renderer, the data is passed to the control’s
source property. The Label, Text, TextArea, and TextInput controls have a default prop-
erty of
text, and each of the other controls has its own unique property.
If a
List control’s data provider contains String values, each containing the location of a
graphic image you want to display instead of a label, you assign the
itemRenderer using the
fully qualified name of the component’s equivalent ActionScript class:
<mx:List id=”answerList” dataProvider=”{answerData}”
itemRenderer=”mx.controls.Image”/>
Caution
When assigning a drop-in or a component item renderer, you must include the entire package and class name
in the
itemRenderer or itemEditor declaration. Including an import statement for the class you’re using
as the renderer does not eliminate this requirement.
n
The application in Listing 19.7 uses an ArrayList of String values, each containing the name
of an image file in the project’s source root. The
List control’s variableRowHeight property
is set to
true, enabling each row of the control to adjust to the image it displays.
LISTING 19.7
Using a drop-in item renderer
<?xml version=”1.0” encoding=”utf-8”?>
<s:Application xmlns:fx=”
xmlns:s=”library://ns.adobe.com/flex/spark”
xmlns:mx=”library://ns.adobe.com/flex/mx”>
<fx:Declarations>
<s:ArrayList id=”answerData”>
<fx:String>assets/yesImage.png</fx:String>
<fx:String>assets/noImage.png</fx:String>
<fx:String>assets/maybeImage.png</fx:String>
</s:ArrayList>
</fx:Declarations>
<mx:List id=”answerList” dataProvider=”{answerData}”
itemRenderer=”mx.controls.Image”
rowCount=”{answerData.length}”
variableRowHeight=”true”
horizontalCenter=”0” top=”20”
width=”80” height=”140”/>
</s:Application>
On the Web
The code in Listing 19.7 is available in the Web site files as DropinRenderer.mxml in the chapter19
project.
n
26_488959-ch19.indd 59226_488959-ch19.indd 592 3/5/10 2:32 PM3/5/10 2:32 PM
Please purchase PDF Split-Merge on www.verypdf.com to remove this watermark.
Chapter 19: Using List Controls
593
Figure 19.5 shows the resulting application. Its MX List control displays the images based on the
values in the control’s data provider.
FIGURE 19.5
An MX List control with a drop-in item renderer
Note
Drop-in item renderers work effectively with both MX single-column controls such as the List and
ComboBox and with DataGridColumn components in the context of a DataGrid. Drop-in item editors
can’t be used very effectively in single-column controls, because with the drop-in architecture you don’t have
the ability to control positioning, set object properties, or override default behaviors.
n
Tip
You can use the labelFunction and labelField properties to affect the string that is passed to the drop-
in renderers. For example, this function designed for use with
labelFunction adds a URL path to an image
reference:
private function doIt(item:Object):String
{
return “ + item as String;
}
n
Using inline renderers and editors
An inline renderer is an MXML component that you nest with the declaration of the List control.
You first nest an
itemRenderer or itemEditor child element with the List control’s MXML
tags, and then within that control, you nest a set of
<fx:Component> tags. Within the
<fx:Component> tags, you can nest the control or container from which you want to extend the
custom component.
With MX list controls, the item renderer can be extended from any MX control or container.
For example, the following code declares a custom component that’s extended from the
VBox
container:
26_488959-ch19.indd 59326_488959-ch19.indd 593 3/5/10 2:32 PM3/5/10 2:32 PM
Please purchase PDF Split-Merge on www.verypdf.com to remove this watermark.
Part III: Working with Data
594
<mx:List id=”myList” dataProvider=”{myData}”>
<mx:itemRenderer>
<fx:Component>
<mx:VBox>
nested components
</mx:VBox>
</fx:Component>
</mx:itemRenderer>
</mx:List>
With Spark list controls, the item renderer should be extended from a new Spark component
named
ItemRenderer:
<s:List id=”myList” dataProvider=”{myData}”>
<s:itemRenderer>
<fx:Component>
<s:ItemRenderer>
nested components
</s:ItemRenderer>
</fx:Component>
</s:itemRenderer>
</s:List>
Note
In object-oriented terms, an inline item renderer is a local anonymous class. Such classes have the benefit of
being declared within the context of their use, in this case within the
List control for which it’s designed. The
drawback of using an anonymous class is that it can’t be reused in a different context.
n
Note
The <fx:Component> declaration is a compiler tag and doesn’t represent a specific ActionScript class. Its
purpose is to create a new component scope within an MXML file. Variables declared within the
<fx:Component> tag set are local to the custom component and, unless declared public, aren’t accessible to
the containing application or component. Also, within the scope of the
<fx:Component> tag set, the expres-
sion
this refers to the current instance of the custom component and not to the application or containing
component.
n
MX visual components and the Spark ItemRenderer class implement a bindable data property
designed for use in the custom item renderer architecture. At runtime, the
List control creates an
instance of the renderer component for each of its data items and passes the data provider’s current
data item to the component instance’s
data property.
Within the component code, you can refer to the current data item in a binding expression to use its
information. In the application in Listing 19.8, the
List control displays the same image as before,
but this time the image file’s location is determined in the custom item renderer by including a literal
string in the Image control declaration. The item renderer is based on the Spark
ItemRenderer
container and includes both the image and a
Label control that displays the raw data.
26_488959-ch19.indd 59426_488959-ch19.indd 594 3/5/10 2:32 PM3/5/10 2:32 PM
Please purchase PDF Split-Merge on www.verypdf.com to remove this watermark.
Chapter 19: Using List Controls
595
LISTING 19.8
Using an inline renderer
<?xml version=”1.0” encoding=”utf-8”?>
<s:Application xmlns:fx=”
xmlns:s=”library://ns.adobe.com/flex/spark”
xmlns:mx=”library://ns.adobe.com/flex/mx”>
<fx:Declarations>
<s:ArrayList id=”answerData”>
<fx:String>yesImage.png</fx:String>
<fx:String>noImage.png</fx:String>
<fx:String>maybeImage.png</fx:String>
</s:ArrayList>
</fx:Declarations>
<s:List id=”myList” dataProvider=”{answerData}” width=”300”
horizontalCenter=”0” top=”20”>
<s:itemRenderer>
<fx:Component>
<s:ItemRenderer width=”100%”>
<s:layout>
<s:VerticalLayout gap=”10” horizontalAlign=”center”
paddingTop=”10” paddingBottom=”10”
paddingLeft=”10” paddingRight=”10”/>
</s:layout>
<mx:Image source=”assets/{data}”/>
<s:Label text=”The value of the data property is {data}”
width=”100%”/>
</s:ItemRenderer>
</fx:Component>
</s:itemRenderer>
</s:List>
</s:Application>
On the Web
The code in Listing 19.8 is available in the Web site files as InlineRenderer.mxml in the chapter19
project.
n
Using an inline or component renderer also makes working with data providers containing com-
plex objects easier. The
List control’s data property is data typed as an ActionScript Object
and is compatible with any sort of data object that might be passed from the
List control’s data
provider. For example, if the data object has an
imageSource property, the custom item ren-
derer can use that property in a binding expression to pass values to its nested visual controls:
<mx:Image source=”imageLocation/{data.imageSource}”/>
In the application in Listing 19.9, the List control’s data provider contains objects with value
and
imageSource properties. The Image component used as the custom item renderer receives
26_488959-ch19.indd 59526_488959-ch19.indd 595 3/5/10 2:32 PM3/5/10 2:32 PM
Please purchase PDF Split-Merge on www.verypdf.com to remove this watermark.